

Difference between revisions of "The Simpsons: Tapped Out Treehouse of Horror 2015 content update"
m (replaced: Bart of Darkness → "Bart of Darkness", Bart's Friend Falls in Love → "Bart's Friend Falls in Love", Blazed and Confused → "Blazed and Confused", Boy-Scoutz 'n the Hood → "Boy-Scoutz 'n the Hood" (2), [[...) |
m (replaced: ==Characters== → == Characters == (323), == → == (262), == → == (5), == == → ==== (256), ====Returning==== → ==== Returning ==== (128), == Premium Gameplay == → == Premium gameplay ==) |
||
| Line 5: | Line 5: | ||
{{quote|Costumes? Check!<br>Party Snacks? Check!<br>Spooky Campfire built with Evil Driftwood? Check and Check!<br><br>An ancient evil stirs in Springfield and the adults have no idea (about this or anything else).<br>It's up to the kids to solve this problem (no matter that they may have caused it)!<br>Play today and fill up your special update treat bag with:<br>*Spooky Campfire Stories (that come to life)<br>*Brand new costumes for your favorite characters<br>*New Daily Challenges<br>*And much much more!|Event description on the App Store}} | {{quote|Costumes? Check!<br>Party Snacks? Check!<br>Spooky Campfire built with Evil Driftwood? Check and Check!<br><br>An ancient evil stirs in Springfield and the adults have no idea (about this or anything else).<br>It's up to the kids to solve this problem (no matter that they may have caused it)!<br>Play today and fill up your special update treat bag with:<br>*Spooky Campfire Stories (that come to life)<br>*Brand new costumes for your favorite characters<br>*New Daily Challenges<br>*And much much more!|Event description on the App Store}} | ||
'''''[[The Simpsons: Tapped Out]]'' Treehouse of Horror 2015 content update''' is a content update and event which was teased by EA on the game's Facebook page October 2, 2015. It was released October 6, 2015, and is the one hundred and fifth content update. It's the game's fourth [[Halloween]] event, after {{TOCU|Treehouse of Horror XXIII}}, {{TOCU|Treehouse of Horror XXIV}} and {{TOCU|Treehouse of Horror XXV}}. It added 5 new characters, 9 new costumes, 5 new buildings, 4 new building skins and 18 new decorations. In the same update, a feature was added but released afterwards: {{TOCU|New User Power Ups}}. | '''''[[The Simpsons: Tapped Out]]'' Treehouse of Horror 2015 content update''' is a content update and event which was teased by EA on the game's Facebook page October 2, 2015. It was released October 6, 2015, and is the one hundred and fifth content update. It's the game's fourth [[Halloween]] event, after {{TOCU|Treehouse of Horror XXIII}}, {{TOCU|Treehouse of Horror XXIV}} and {{TOCU|Treehouse of Horror XXV}}. It added 5 new characters, 9 new costumes, 5 new buildings, 4 new building skins and 18 new decorations. In the same update, a feature was added but released afterwards: {{TOCU|New User Power Ups}}. | ||
| − | ==Characters== | + | == Characters == |
{{Table| | {{Table| | ||
{{THT|Image|width=250px}} | {{THT|Image|width=250px}} | ||
| Line 37: | Line 37: | ||
}} | }} | ||
| − | ===Returning=== | + | === Returning === |
{{Table| | {{Table| | ||
{{THT|Image|width=250px}} | {{THT|Image|width=250px}} | ||
| Line 75: | Line 75: | ||
{{TB|Available from October 20th at 8am GMT to November 27th at 8am GMT.<br>Returns from {{TOCU|Treehouse of Horror XXIII}}, {{TOCU|Treehouse of Horror XXIV}}<br>and {{TOCU|Treehouse of Horror XXV}}.}} | {{TB|Available from October 20th at 8am GMT to November 27th at 8am GMT.<br>Returns from {{TOCU|Treehouse of Horror XXIII}}, {{TOCU|Treehouse of Horror XXIV}}<br>and {{TOCU|Treehouse of Horror XXV}}.}} | ||
}} | }} | ||
| − | ===Costumes=== | + | === Costumes === |
{{Table| | {{Table| | ||
{{THT|Image|width=250px}} | {{THT|Image|width=250px}} | ||
| Line 128: | Line 128: | ||
}} | }} | ||
| − | ====Returning==== | + | ==== Returning ==== |
{{Table| | {{Table| | ||
{{THT|Image|width=250px}} | {{THT|Image|width=250px}} | ||
| Line 188: | Line 188: | ||
{{TB|Unlocked upon starting The Very Young Folk Pt. 5.}} | {{TB|Unlocked upon starting The Very Young Folk Pt. 5.}} | ||
}} | }} | ||
| − | ===Skins=== | + | === Skins === |
{{Table| | {{Table| | ||
{{TH|Image|width=125px}} | {{TH|Image|width=125px}} | ||
| Line 215: | Line 215: | ||
}} | }} | ||
| − | ===Returning=== | + | === Returning === |
{{Table| | {{Table| | ||
{{TH|Image|width=125px}} | {{TH|Image|width=125px}} | ||
| Line 353: | Line 353: | ||
}} | }} | ||
| − | ===Returning=== | + | === Returning === |
{{Table| | {{Table| | ||
{{TH|Image|width=125px}} | {{TH|Image|width=125px}} | ||
| Line 410: | Line 410: | ||
}} | }} | ||
| − | ==Consumables== | + | == Consumables == |
{{Table| | {{Table| | ||
{{TH|Image|width=125px}} | {{TH|Image|width=125px}} | ||
| Line 419: | Line 419: | ||
{{TB|{{Donut|10}}}} | {{TB|{{Donut|10}}}} | ||
}} | }} | ||
| − | ==Items Origins== | + | == Items Origins == |
{{CollapsibleSection|To view the event's and tie-ins' items origins, click "show":| | {{CollapsibleSection|To view the event's and tie-ins' items origins, click "show":| | ||
{{Table| | {{Table| | ||
| Line 588: | Line 588: | ||
}} | }} | ||
| − | ==Act 1 Gameplay== | + | == Act 1 Gameplay == |
{{CollapsibleSection|To view Act 1's questline, click "show":| | {{CollapsibleSection|To view Act 1's questline, click "show":| | ||
| − | ===The Call of the Campfire=== | + | === The Call of the Campfire === |
| − | ====The Call of the Campfire Pt. 1==== | + | ==== The Call of the Campfire Pt. 1 ==== |
{{Table| | {{Table| | ||
{{THT|After the user logs in:|colspan=2}} | {{THT|After the user logs in:|colspan=2}} | ||
| Line 638: | Line 638: | ||
{{THT|Quest reward: {{Cash|100}} and {{XP|10}}|colspan=2}} | {{THT|Quest reward: {{Cash|100}} and {{XP|10}}|colspan=2}} | ||
}} | }} | ||
| − | ====The Call of the Campfire Pt. 2==== | + | ==== The Call of the Campfire Pt. 2 ==== |
{{Table| | {{Table| | ||
{{THT|After tapping on Lisa's exclamation mark:|colspan=2}} | {{THT|After tapping on Lisa's exclamation mark:|colspan=2}} | ||
| Line 678: | Line 678: | ||
{{THT|Quest reward: {{Cash|100}} and {{XP|10}}|colspan=2}} | {{THT|Quest reward: {{Cash|100}} and {{XP|10}}|colspan=2}} | ||
}} | }} | ||
| − | ====The Call of the Campfire Pt. 3==== | + | ==== The Call of the Campfire Pt. 3 ==== |
{{Table| | {{Table| | ||
{{THT|After tapping on Lisa's exclamation mark:|colspan=2}} | {{THT|After tapping on Lisa's exclamation mark:|colspan=2}} | ||
| Line 772: | Line 772: | ||
{{THT|Quest reward: {{Cash|100}} and {{XP|10}}|colspan=2}} | {{THT|Quest reward: {{Cash|100}} and {{XP|10}}|colspan=2}} | ||
}} | }} | ||
| − | ====The Call of the Campfire Pt. 4==== | + | ==== The Call of the Campfire Pt. 4 ==== |
{{Table| | {{Table| | ||
{{THT|After tapping on Bart's exclamation mark:|colspan=2}} | {{THT|After tapping on Bart's exclamation mark:|colspan=2}} | ||
| Line 836: | Line 836: | ||
{{THT|[[File:Zombies Spawning.png|300px]][[File:HW2015 Act 1 Event Guide.png|300px]]<br>Quest reward: {{Cash|100}} and {{SmoreS|100}}|colspan=2}} | {{THT|[[File:Zombies Spawning.png|300px]][[File:HW2015 Act 1 Event Guide.png|300px]]<br>Quest reward: {{Cash|100}} and {{SmoreS|100}}|colspan=2}} | ||
}} | }} | ||
| − | ====The Call of the Campfire Pt. 5==== | + | ==== The Call of the Campfire Pt. 5 ==== |
{{Table| | {{Table| | ||
{{THT|After tapping on Bart's exclamation mark:|colspan=2}} | {{THT|After tapping on Bart's exclamation mark:|colspan=2}} | ||
| Line 865: | Line 865: | ||
{{THT|'''Task''': Send Kids on S'mores Jobs to Spawn Zombies [x2] (4h, Spooky Campfire)<br>'''Task''': Collect Event Currency to Unlock 1st Prize<br>'''Task''': Tap Zombies [x10]<br>Quest reward: {{Cash|100}} and {{SmoreS|100}}|colspan=2}} | {{THT|'''Task''': Send Kids on S'mores Jobs to Spawn Zombies [x2] (4h, Spooky Campfire)<br>'''Task''': Collect Event Currency to Unlock 1st Prize<br>'''Task''': Tap Zombies [x10]<br>Quest reward: {{Cash|100}} and {{SmoreS|100}}|colspan=2}} | ||
}} | }} | ||
| − | ====The Call of the Campfire Pt. 6==== | + | ==== The Call of the Campfire Pt. 6 ==== |
{{Table| | {{Table| | ||
{{THT|After tapping on Lisa's exclamation mark:|colspan=2}} | {{THT|After tapping on Lisa's exclamation mark:|colspan=2}} | ||
| Line 910: | Line 910: | ||
{{THT|Quest reward: {{Cash|100}} and {{SmoreS|100}}|colspan=2}} | {{THT|Quest reward: {{Cash|100}} and {{SmoreS|100}}|colspan=2}} | ||
}} | }} | ||
| − | ====The Call of the Campfire Pt. 7==== | + | ==== The Call of the Campfire Pt. 7 ==== |
{{Table| | {{Table| | ||
{{THT|After tapping on Lisa's exclamation mark:|colspan=2}} | {{THT|After tapping on Lisa's exclamation mark:|colspan=2}} | ||
| Line 942: | Line 942: | ||
}} | }} | ||
| − | ====The Call of the Campfire Pt. 8==== | + | ==== The Call of the Campfire Pt. 8 ==== |
{{Table| | {{Table| | ||
{{THT|After tapping on Bart's exclamation mark:|colspan=2}} | {{THT|After tapping on Bart's exclamation mark:|colspan=2}} | ||
| Line 968: | Line 968: | ||
{{THT|Quest reward: {{Cash|100}} and {{SmoreS|100}}|colspan=2}} | {{THT|Quest reward: {{Cash|100}} and {{SmoreS|100}}|colspan=2}} | ||
}} | }} | ||
| − | ====The Call of the Campfire Pt. 9==== | + | ==== The Call of the Campfire Pt. 9 ==== |
{{Table| | {{Table| | ||
{{THT|After tapping on Milhouse's exclamation mark:|colspan=2}} | {{THT|After tapping on Milhouse's exclamation mark:|colspan=2}} | ||
| Line 999: | Line 999: | ||
{{THT|Quest reward: {{Cash|100}} and {{SmoreS|100}}|colspan=2}} | {{THT|Quest reward: {{Cash|100}} and {{SmoreS|100}}|colspan=2}} | ||
}} | }} | ||
| − | ====The Call of the Campfire Pt. 10==== | + | ==== The Call of the Campfire Pt. 10 ==== |
{{Table| | {{Table| | ||
{{THT|After tapping on Bart's exclamation mark:|colspan=2}} | {{THT|After tapping on Bart's exclamation mark:|colspan=2}} | ||
| Line 1,018: | Line 1,018: | ||
{{THT|'''Task''': Make Milhouse Hide in Shame (4h, Van Houten House)<br>Quest reward: {{Cash|100}} and {{SmoreS|100}}|colspan=2}} | {{THT|'''Task''': Make Milhouse Hide in Shame (4h, Van Houten House)<br>Quest reward: {{Cash|100}} and {{SmoreS|100}}|colspan=2}} | ||
}} | }} | ||
| − | ====The Call of the Campfire Pt. 11==== | + | ==== The Call of the Campfire Pt. 11 ==== |
{{Table| | {{Table| | ||
{{THT|After tapping on Bart's exclamation mark:|colspan=2}} | {{THT|After tapping on Bart's exclamation mark:|colspan=2}} | ||
| Line 1,056: | Line 1,056: | ||
{{THT|Quest reward: {{Cash|100}} and {{SmoreS|100}}|colspan=2}} | {{THT|Quest reward: {{Cash|100}} and {{SmoreS|100}}|colspan=2}} | ||
}} | }} | ||
| − | ====The Call of the Campfire Pt. 12==== | + | ==== The Call of the Campfire Pt. 12 ==== |
{{Table| | {{Table| | ||
{{THT|After tapping on Bart's exclamation mark:|colspan=2}} | {{THT|After tapping on Bart's exclamation mark:|colspan=2}} | ||
| Line 1,092: | Line 1,092: | ||
{{THT|[[File:Skeletons Spawning.png|300px]]<br>Quest reward: {{Cash|100}} and {{SmoreS|100}}|colspan=2}} | {{THT|[[File:Skeletons Spawning.png|300px]]<br>Quest reward: {{Cash|100}} and {{SmoreS|100}}|colspan=2}} | ||
}} | }} | ||
| − | ====The Call of the Campfire Pt. 13==== | + | ==== The Call of the Campfire Pt. 13 ==== |
{{Table| | {{Table| | ||
{{THT|After tapping on Bart's exclamation mark:|colspan=2}} | {{THT|After tapping on Bart's exclamation mark:|colspan=2}} | ||
| Line 1,111: | Line 1,111: | ||
{{THT|'''Task''': Make Bart Plan His Next Prank With M'nthster (4h, Spooky Campfire)<br>Quest reward: {{Cash|100}} and {{SmoreS|100}}|colspan=2}} | {{THT|'''Task''': Make Bart Plan His Next Prank With M'nthster (4h, Spooky Campfire)<br>Quest reward: {{Cash|100}} and {{SmoreS|100}}|colspan=2}} | ||
}} | }} | ||
| − | ====The Unspeakable==== | + | ==== The Unspeakable ==== |
{{Table| | {{Table| | ||
{{THT|After tapping on Homer's exclamation mark:|colspan=2}} | {{THT|After tapping on Homer's exclamation mark:|colspan=2}} | ||
| Line 1,141: | Line 1,141: | ||
}} | }} | ||
| − | ==Act 2 Gameplay== | + | == Act 2 Gameplay == |
{{CollapsibleSection|To view Act 2's questline, click "show":| | {{CollapsibleSection|To view Act 2's questline, click "show":| | ||
| − | ===The Very Young Folk=== | + | === The Very Young Folk === |
| − | ====The Very Young Folk Pt. 1==== | + | ==== The Very Young Folk Pt. 1 ==== |
{{Table| | {{Table| | ||
{{THT|After tapping on Bart's exclamation mark:|colspan=2}} | {{THT|After tapping on Bart's exclamation mark:|colspan=2}} | ||
| Line 1,168: | Line 1,168: | ||
{{THT|Quest reward: {{Cash|100}} and [[File:Tapped Out Gummies.png|25px]]100|colspan=2}} | {{THT|Quest reward: {{Cash|100}} and [[File:Tapped Out Gummies.png|25px]]100|colspan=2}} | ||
}} | }} | ||
| − | ====The Very Young Folk Pt. 2==== | + | ==== The Very Young Folk Pt. 2 ==== |
{{Table| | {{Table| | ||
{{THT|After tapping on Bart's exclamation mark:|colspan=2}} | {{THT|After tapping on Bart's exclamation mark:|colspan=2}} | ||
| Line 1,191: | Line 1,191: | ||
{{THT|'''Task''': Make Bart Search for M'nthster (6h, Spooky Campfire)<br>'''Task''': Make Lisa Search for M'nthster (6h, Spooky Campfire)<br>Quest reward: {{Cash|100}} and [[File:Tapped Out Gummies.png|25px]]100|colspan=2}} | {{THT|'''Task''': Make Bart Search for M'nthster (6h, Spooky Campfire)<br>'''Task''': Make Lisa Search for M'nthster (6h, Spooky Campfire)<br>Quest reward: {{Cash|100}} and [[File:Tapped Out Gummies.png|25px]]100|colspan=2}} | ||
}} | }} | ||
| − | ====The Very Young Folk Pt. 3==== | + | ==== The Very Young Folk Pt. 3 ==== |
{{Table| | {{Table| | ||
{{THT|After completing The Springfield Horror Pt. 1 and tapping on Bart's exclamation mark:|colspan=2}} | {{THT|After completing The Springfield Horror Pt. 1 and tapping on Bart's exclamation mark:|colspan=2}} | ||
| Line 1,229: | Line 1,229: | ||
{{THT|Quest reward: {{Cash|100}} and [[File:Tapped Out Gummies.png|25px]]100|colspan=2}} | {{THT|Quest reward: {{Cash|100}} and [[File:Tapped Out Gummies.png|25px]]100|colspan=2}} | ||
}} | }} | ||
| − | ====The Very Young Folk Pt. 4==== | + | ==== The Very Young Folk Pt. 4 ==== |
{{Table| | {{Table| | ||
{{THT|After completing The Springfield Horror Pt. 2 and tapping on Lisa's exclamation mark:|colspan=2}} | {{THT|After completing The Springfield Horror Pt. 2 and tapping on Lisa's exclamation mark:|colspan=2}} | ||
| Line 1,249: | Line 1,249: | ||
{{THT|Quest reward: {{Cash|100}} and [[File:Tapped Out Gummies.png|25px]]100|colspan=2}} | {{THT|Quest reward: {{Cash|100}} and [[File:Tapped Out Gummies.png|25px]]100|colspan=2}} | ||
}} | }} | ||
| − | ====The Very Young Folk Pt. 5==== | + | ==== The Very Young Folk Pt. 5 ==== |
{{Table| | {{Table| | ||
{{THT|After tapping on Bart's exclamation mark:|colspan=2}} | {{THT|After tapping on Bart's exclamation mark:|colspan=2}} | ||
| Line 1,283: | Line 1,283: | ||
{{THT|[[File:Continue Act 3.png|300px]]<br>Quest reward: {{Cash|100}} and [[File:Tapped Out Gummies.png|25px]]100|colspan=2}} | {{THT|[[File:Continue Act 3.png|300px]]<br>Quest reward: {{Cash|100}} and [[File:Tapped Out Gummies.png|25px]]100|colspan=2}} | ||
}} | }} | ||
| − | ===The Springfield Horror=== | + | === The Springfield Horror === |
| − | ====The Springfield Horror Pt. 1==== | + | ==== The Springfield Horror Pt. 1 ==== |
{{Table| | {{Table| | ||
{{THT|After completing The Very Young Folk Pt. 1 and tapping on Homer's exclamation mark:|colspan=2}} | {{THT|After completing The Very Young Folk Pt. 1 and tapping on Homer's exclamation mark:|colspan=2}} | ||
| Line 1,298: | Line 1,298: | ||
{{THT|[[File:HW2015 Act 2 Event Guide.png|300px]]<br>Quest reward: {{Cash|100}} and [[File:Tapped Out Gummies.png|25px]]100|colspan=2}} | {{THT|[[File:HW2015 Act 2 Event Guide.png|300px]]<br>Quest reward: {{Cash|100}} and [[File:Tapped Out Gummies.png|25px]]100|colspan=2}} | ||
}} | }} | ||
| − | ====The Springfield Horror Pt. 2==== | + | ==== The Springfield Horror Pt. 2 ==== |
{{Table| | {{Table| | ||
{{THT|After tapping on Homer's exclamation mark:|colspan=2}} | {{THT|After tapping on Homer's exclamation mark:|colspan=2}} | ||
| Line 1,318: | Line 1,318: | ||
{{THT|Quest reward: {{Cash|100}} and [[File:Tapped Out Gummies.png|25px]]100|colspan=2}} | {{THT|Quest reward: {{Cash|100}} and [[File:Tapped Out Gummies.png|25px]]100|colspan=2}} | ||
}} | }} | ||
| − | ====The Springfield Horror Pt. 3==== | + | ==== The Springfield Horror Pt. 3 ==== |
{{Table| | {{Table| | ||
{{THT|After tapping on Homer's exclamation mark:|colspan=2}} | {{THT|After tapping on Homer's exclamation mark:|colspan=2}} | ||
| Line 1,333: | Line 1,333: | ||
{{THT|'''Task''': Reach Level 15 and Build Moe's Tavern<br>'''Task''': Craft Moe's Terror<br>'''Task''': Craft Kill-E-Mart<br>'''Task''': Craft Krusty Murder<br>Quest reward: {{Cash|100}} and [[File:Tapped Out Gummies.png|25px]]100|colspan=2}} | {{THT|'''Task''': Reach Level 15 and Build Moe's Tavern<br>'''Task''': Craft Moe's Terror<br>'''Task''': Craft Kill-E-Mart<br>'''Task''': Craft Krusty Murder<br>Quest reward: {{Cash|100}} and [[File:Tapped Out Gummies.png|25px]]100|colspan=2}} | ||
}} | }} | ||
| − | ====The Springfield Horror Pt. 4==== | + | ==== The Springfield Horror Pt. 4 ==== |
{{Table| | {{Table| | ||
{{THT|After tapping on Apu's exclamation mark:|colspan=2}} | {{THT|After tapping on Apu's exclamation mark:|colspan=2}} | ||
| Line 1,360: | Line 1,360: | ||
}} | }} | ||
}} | }} | ||
| − | ==Act 3 Gameplay== | + | == Act 3 Gameplay == |
{{CollapsibleSection|To view Act 3's questline, click "show":| | {{CollapsibleSection|To view Act 3's questline, click "show":| | ||
| − | ===The Sandwich Horror=== | + | === The Sandwich Horror === |
{{Table| | {{Table| | ||
{{THT|After tapping on Homer's exclamation mark:|colspan=2}} | {{THT|After tapping on Homer's exclamation mark:|colspan=2}} | ||
| Line 1,392: | Line 1,392: | ||
{{THT|[[File:HW2015 Act 3 Event Guide.png|300px]]<br>Quest reward: {{Cash|100}} and [[File:Tapped Out Candy Apples.png|25px]]100|colspan=2}} | {{THT|[[File:HW2015 Act 3 Event Guide.png|300px]]<br>Quest reward: {{Cash|100}} and [[File:Tapped Out Candy Apples.png|25px]]100|colspan=2}} | ||
}} | }} | ||
| − | ===The Blameless City=== | + | === The Blameless City === |
{{Table|align=center|width=500px| | {{Table|align=center|width=500px| | ||
{{THT|M'nthster Candy Apples Glitch}} | {{THT|M'nthster Candy Apples Glitch}} | ||
{{THT|A new glitch has been found by EA forum users, where rapidly tapping M'nthster while he's moving and generally anytime he's on screen tappable, you might get lucky and earn Candy Apples faster! Users reported even unlocking all prizes! Tap fast and you may get lucky too!}} | {{THT|A new glitch has been found by EA forum users, where rapidly tapping M'nthster while he's moving and generally anytime he's on screen tappable, you might get lucky and earn Candy Apples faster! Users reported even unlocking all prizes! Tap fast and you may get lucky too!}} | ||
}} | }} | ||
| − | ====The Blameless City Pt. 1==== | + | ==== The Blameless City Pt. 1 ==== |
{{Table| | {{Table| | ||
{{THT|After completing The Sandwich Horror:|colspan=2}} | {{THT|After completing The Sandwich Horror:|colspan=2}} | ||
| Line 1,429: | Line 1,429: | ||
{{THT|Quest reward: {{Cash|100}} and [[File:Tapped Out Candy Apples.png|25px]]100|colspan=2}} | {{THT|Quest reward: {{Cash|100}} and [[File:Tapped Out Candy Apples.png|25px]]100|colspan=2}} | ||
}} | }} | ||
| − | ====The Blameless City Pt. 2==== | + | ==== The Blameless City Pt. 2 ==== |
{{Table| | {{Table| | ||
{{THT|After completing The Blameless City Pt. 1:|colspan=2}} | {{THT|After completing The Blameless City Pt. 1:|colspan=2}} | ||
| Line 1,455: | Line 1,455: | ||
}} | }} | ||
| − | ====The Blameless City Pt. 3==== | + | ==== The Blameless City Pt. 3 ==== |
{{Table| | {{Table| | ||
{{THT|After completing The Blameless City Pt. 2:|colspan=2}} | {{THT|After completing The Blameless City Pt. 2:|colspan=2}} | ||
| Line 1,486: | Line 1,486: | ||
}} | }} | ||
| − | ====The Blameless City Pt. 4==== | + | ==== The Blameless City Pt. 4 ==== |
{{Table| | {{Table| | ||
{{THT|After tapping on Lisa's exclamation mark:|colspan=2}} | {{THT|After tapping on Lisa's exclamation mark:|colspan=2}} | ||
| Line 1,497: | Line 1,497: | ||
{{THT|'''Task''': Tap Star Spawn [x10]<br>[[File:Sunken Temple Menu.png|300px]]<br>Quest reward: {{Cash|100}} and [[File:Tapped Out Candy Apples.png|25px]]100<br>At this point you're qualified for recieving the Takedown on November 18th at 1am GMT.|colspan=2}} | {{THT|'''Task''': Tap Star Spawn [x10]<br>[[File:Sunken Temple Menu.png|300px]]<br>Quest reward: {{Cash|100}} and [[File:Tapped Out Candy Apples.png|25px]]100<br>At this point you're qualified for recieving the Takedown on November 18th at 1am GMT.|colspan=2}} | ||
}} | }} | ||
| − | ====The Blameless City Pt. 5==== | + | ==== The Blameless City Pt. 5 ==== |
{{Table| | {{Table| | ||
{{THT|After the user logs in on November 17th at 1am GMT and tapping on Bart's exclamation mark:|colspan=2}} | {{THT|After the user logs in on November 17th at 1am GMT and tapping on Bart's exclamation mark:|colspan=2}} | ||
| Line 1,517: | Line 1,517: | ||
}} | }} | ||
| − | ===Something Strange in the Neighborhood=== | + | === Something Strange in the Neighborhood === |
{{Table| | {{Table| | ||
{{THT|After completing The Blameless City Pt. 2 and tapping on Bart's exclamation mark:|colspan=2}} | {{THT|After completing The Blameless City Pt. 2 and tapping on Bart's exclamation mark:|colspan=2}} | ||
| Line 1,540: | Line 1,540: | ||
}} | }} | ||
}} | }} | ||
| − | ==Ending Gameplay== | + | == Ending Gameplay == |
{{CollapsibleSection|To view the Ending's questline, click "show":| | {{CollapsibleSection|To view the Ending's questline, click "show":| | ||
| − | ===Prize Track Completed=== | + | === Prize Track Completed === |
{{Table| | {{Table| | ||
{{THT|After completing The Blameless City Pt. 4 and unlocking the Re-Neducation Center:<br>Quest reward: {{Cash|100}} and [[File:Tapped Out Candy Apples.png|25px]]100|colspan=2}} | {{THT|After completing The Blameless City Pt. 4 and unlocking the Re-Neducation Center:<br>Quest reward: {{Cash|100}} and [[File:Tapped Out Candy Apples.png|25px]]100|colspan=2}} | ||
| Line 1,561: | Line 1,561: | ||
{{THT|[[File:Prize Track Over.png|300px]]|colspan=2}} | {{THT|[[File:Prize Track Over.png|300px]]|colspan=2}} | ||
}} | }} | ||
| − | ===Event Ending Reminder=== | + | === Event Ending Reminder === |
{{Table| | {{Table| | ||
{{THT|After completing The Blameless City Pt. 4 and the user logs in on November 14:<br>Quest reward: {{Cash|100}} and [[File:Tapped Out Candy Apples.png|25px]]100|colspan=2}} | {{THT|After completing The Blameless City Pt. 4 and the user logs in on November 14:<br>Quest reward: {{Cash|100}} and [[File:Tapped Out Candy Apples.png|25px]]100|colspan=2}} | ||
| Line 1,577: | Line 1,577: | ||
}} | }} | ||
| − | ===Event Takedown Reminder=== | + | === Event Takedown Reminder === |
{{Table| | {{Table| | ||
{{THT|After completing The Blameless City Pt. 4 and the user logs in on November 18:<br>Quest reward: {{Cash|100}} and [[File:Tapped Out Candy Apples.png|25px]]100|colspan=2}} | {{THT|After completing The Blameless City Pt. 4 and the user logs in on November 18:<br>Quest reward: {{Cash|100}} and [[File:Tapped Out Candy Apples.png|25px]]100|colspan=2}} | ||
| Line 1,610: | Line 1,610: | ||
}} | }} | ||
}} | }} | ||
| − | ==Premium | + | == Premium gameplay == |
| − | ===The Boy who LARP'd=== | + | === The Boy who LARP'd === |
{{CollapsibleSection|To view Wizard Martin's questline, click "show":| | {{CollapsibleSection|To view Wizard Martin's questline, click "show":| | ||
| − | ====The Boy who LARP'd Pt. 1==== | + | ==== The Boy who LARP'd Pt. 1 ==== |
{{Table| | {{Table| | ||
{{THT|After unlocking Wizard Martin:|colspan=2}} | {{THT|After unlocking Wizard Martin:|colspan=2}} | ||
| Line 1,631: | Line 1,631: | ||
{{THT|Quest reward: {{Cash|100}} and {{XP|10}}|colspan=2}} | {{THT|Quest reward: {{Cash|100}} and {{XP|10}}|colspan=2}} | ||
}} | }} | ||
| − | ====The Boy who LARP'd Pt. 2==== | + | ==== The Boy who LARP'd Pt. 2 ==== |
{{Table| | {{Table| | ||
{{THT|After tapping on Martin's exclamation mark:|colspan=2}} | {{THT|After tapping on Martin's exclamation mark:|colspan=2}} | ||
| Line 1,645: | Line 1,645: | ||
{{THT|Quest reward: {{Cash|100}} and {{XP|10}}|colspan=2}} | {{THT|Quest reward: {{Cash|100}} and {{XP|10}}|colspan=2}} | ||
}} | }} | ||
| − | ====The Boy who LARP'd Pt. 3==== | + | ==== The Boy who LARP'd Pt. 3 ==== |
{{Table| | {{Table| | ||
{{THT|After tapping on Martin's exclamation mark:|colspan=2}} | {{THT|After tapping on Martin's exclamation mark:|colspan=2}} | ||
| Line 1,661: | Line 1,661: | ||
{{THT|Quest reward: {{Cash|100}} and {{XP|10}}|colspan=2}} | {{THT|Quest reward: {{Cash|100}} and {{XP|10}}|colspan=2}} | ||
}} | }} | ||
| − | ====The Boy who LARP'd Pt. 4==== | + | ==== The Boy who LARP'd Pt. 4 ==== |
{{Table| | {{Table| | ||
{{THT|After tapping on Martin's exclamation mark:|colspan=2}} | {{THT|After tapping on Martin's exclamation mark:|colspan=2}} | ||
| Line 1,683: | Line 1,683: | ||
{{THT|Quest reward: {{Cash|100}} and {{XP|10}}|colspan=2}} | {{THT|Quest reward: {{Cash|100}} and {{XP|10}}|colspan=2}} | ||
}} | }} | ||
| − | ====The Boy who LARP'd Pt. 5==== | + | ==== The Boy who LARP'd Pt. 5 ==== |
{{Table| | {{Table| | ||
{{THT|After tapping on Martin's exclamation mark:|colspan=2}} | {{THT|After tapping on Martin's exclamation mark:|colspan=2}} | ||
| Line 1,702: | Line 1,702: | ||
}} | }} | ||
}} | }} | ||
| − | ===The Saxamaphone=== | + | === The Saxamaphone === |
{{CollapsibleSection|To view Saxophone Lisa's questline, click "show":| | {{CollapsibleSection|To view Saxophone Lisa's questline, click "show":| | ||
| − | ====The Saxamaphone Pt.1==== | + | ==== The Saxamaphone Pt.1 ==== |
{{Table| | {{Table| | ||
{{THT|After unlocking Saxophone Lisa:|colspan=2}} | {{THT|After unlocking Saxophone Lisa:|colspan=2}} | ||
| Line 1,716: | Line 1,716: | ||
}} | }} | ||
| − | ====The Saxamaphone Pt.2==== | + | ==== The Saxamaphone Pt.2 ==== |
{{Table| | {{Table| | ||
{{THT|After tapping on Lisa's exclamation mark:|colspan=2}} | {{THT|After tapping on Lisa's exclamation mark:|colspan=2}} | ||
| Line 1,738: | Line 1,738: | ||
{{THT|Quest reward: {{Cash|100}} and {{XP|10}}|colspan=2}} | {{THT|Quest reward: {{Cash|100}} and {{XP|10}}|colspan=2}} | ||
}} | }} | ||
| − | ====The Saxamaphone Pt.3==== | + | ==== The Saxamaphone Pt.3 ==== |
{{Table| | {{Table| | ||
{{THT|After tapping on Lisa's exclamation mark:|colspan=2}} | {{THT|After tapping on Lisa's exclamation mark:|colspan=2}} | ||
| Line 1,762: | Line 1,762: | ||
{{THT|Quest reward: {{Cash|100}} and {{XP|10}}|colspan=2}} | {{THT|Quest reward: {{Cash|100}} and {{XP|10}}|colspan=2}} | ||
}} | }} | ||
| − | ====The Saxamaphone Pt.4==== | + | ==== The Saxamaphone Pt.4 ==== |
{{Table| | {{Table| | ||
{{THT|After tapping on Lisa's exclamation mark:|colspan=2}} | {{THT|After tapping on Lisa's exclamation mark:|colspan=2}} | ||
| Line 1,782: | Line 1,782: | ||
{{THT|Quest reward: {{Cash|100}} and {{XP|10}}|colspan=2}} | {{THT|Quest reward: {{Cash|100}} and {{XP|10}}|colspan=2}} | ||
}} | }} | ||
| − | ====The Saxamaphone Pt. 5==== | + | ==== The Saxamaphone Pt. 5 ==== |
{{Table| | {{Table| | ||
{{THT|After tapping on Lisa's exclamation mark:|colspan=2}} | {{THT|After tapping on Lisa's exclamation mark:|colspan=2}} | ||
| Line 1,813: | Line 1,813: | ||
}} | }} | ||
}} | }} | ||
| − | ===Truth, Justice, and the Milhouse Way=== | + | === Truth, Justice, and the Milhouse Way === |
{{CollapsibleSection|To view Radioactive Milhouse's questline, click "show":| | {{CollapsibleSection|To view Radioactive Milhouse's questline, click "show":| | ||
| − | ====Truth, Justice, and the Milhouse Way Pt. 1==== | + | ==== Truth, Justice, and the Milhouse Way Pt. 1 ==== |
{{Table| | {{Table| | ||
{{THT|After tapping on Milhouse's exclamation mark:|colspan=2}} | {{THT|After tapping on Milhouse's exclamation mark:|colspan=2}} | ||
| Line 1,839: | Line 1,839: | ||
{{THT|Quest reward: {{Cash|100}} and {{XP|10}}|colspan=2}} | {{THT|Quest reward: {{Cash|100}} and {{XP|10}}|colspan=2}} | ||
}} | }} | ||
| − | ====Truth, Justice, and the Milhouse Way Pt. 2==== | + | ==== Truth, Justice, and the Milhouse Way Pt. 2 ==== |
{{Table| | {{Table| | ||
{{THT|After tapping on Milhouse's exclamation mark:|colspan=2}} | {{THT|After tapping on Milhouse's exclamation mark:|colspan=2}} | ||
| Line 1,864: | Line 1,864: | ||
}} | }} | ||
| − | ====Truth, Justice, and the Milhouse Way Pt. 3==== | + | ==== Truth, Justice, and the Milhouse Way Pt. 3 ==== |
{{Table| | {{Table| | ||
{{THT|After tapping on Milhouse's exclamation mark:|colspan=2}} | {{THT|After tapping on Milhouse's exclamation mark:|colspan=2}} | ||
| Line 1,882: | Line 1,882: | ||
{{THT|Quest reward: {{Cash|100}} and {{XP|10}}|colspan=2}} | {{THT|Quest reward: {{Cash|100}} and {{XP|10}}|colspan=2}} | ||
}} | }} | ||
| − | ====Truth, Justice, and the Milhouse Way Pt. 4==== | + | ==== Truth, Justice, and the Milhouse Way Pt. 4 ==== |
{{Table| | {{Table| | ||
{{THT|After tapping on Milhouse's exclamation mark:|colspan=2}} | {{THT|After tapping on Milhouse's exclamation mark:|colspan=2}} | ||
| Line 1,902: | Line 1,902: | ||
{{THT|Quest reward: {{Cash|100}} and {{XP|10}}|colspan=2}} | {{THT|Quest reward: {{Cash|100}} and {{XP|10}}|colspan=2}} | ||
}} | }} | ||
| − | ====Truth, Justice, and the Milhouse Way Pt. 5==== | + | ==== Truth, Justice, and the Milhouse Way Pt. 5 ==== |
{{Table| | {{Table| | ||
{{THT|After tapping on Milhouse's exclamation mark:|colspan=2}} | {{THT|After tapping on Milhouse's exclamation mark:|colspan=2}} | ||
| Line 1,926: | Line 1,926: | ||
}} | }} | ||
| − | ===Willie's Labyrinth=== | + | === Willie's Labyrinth === |
{{CollapsibleSection|To view The Shinning Maze's questline, click "show":| | {{CollapsibleSection|To view The Shinning Maze's questline, click "show":| | ||
| − | ====Willie's Labyrinth Pt. 1==== | + | ==== Willie's Labyrinth Pt. 1 ==== |
{{Table| | {{Table| | ||
{{THT|After placing The Shinning Maze:|colspan=2}} | {{THT|After placing The Shinning Maze:|colspan=2}} | ||
| Line 1,950: | Line 1,950: | ||
{{THT|Quest reward: {{Cash|100}} and {{XP|10}}|colspan=2}} | {{THT|Quest reward: {{Cash|100}} and {{XP|10}}|colspan=2}} | ||
}} | }} | ||
| − | ====Willie's Labyrinth Pt. 2==== | + | ==== Willie's Labyrinth Pt. 2 ==== |
{{Table| | {{Table| | ||
{{THT|After tapping on Lisa's exclamation mark:|colspan=2}} | {{THT|After tapping on Lisa's exclamation mark:|colspan=2}} | ||
| Line 1,972: | Line 1,972: | ||
{{THT|Quest reward: {{Cash|100}} and {{XP|10}}|colspan=2}} | {{THT|Quest reward: {{Cash|100}} and {{XP|10}}|colspan=2}} | ||
}} | }} | ||
| − | ====Willie's Labyrinth Pt. 3==== | + | ==== Willie's Labyrinth Pt. 3 ==== |
{{Table| | {{Table| | ||
{{THT|After tapping on Willy's exclamation mark:|colspan=2}} | {{THT|After tapping on Willy's exclamation mark:|colspan=2}} | ||
| Line 2,003: | Line 2,003: | ||
}} | }} | ||
}} | }} | ||
| − | ===Under the Tentacles=== | + | === Under the Tentacles === |
{{CollapsibleSection|To view Fairy Kodos' questline, click "show":| | {{CollapsibleSection|To view Fairy Kodos' questline, click "show":| | ||
| − | ====Under the Tentacles Pt. 1==== | + | ==== Under the Tentacles Pt. 1 ==== |
{{Table| | {{Table| | ||
{{THT|After tapping on Kodos's exclamation mark:|colspan=2}} | {{THT|After tapping on Kodos's exclamation mark:|colspan=2}} | ||
| Line 2,033: | Line 2,033: | ||
{{THT|Quest reward: {{Cash|100}} and {{XP|10}}|colspan=2}} | {{THT|Quest reward: {{Cash|100}} and {{XP|10}}|colspan=2}} | ||
}} | }} | ||
| − | ====Under the Tentacles Pt. 2==== | + | ==== Under the Tentacles Pt. 2 ==== |
{{Table| | {{Table| | ||
{{THT|After tapping on Kodos's exclamation mark:|colspan=2}} | {{THT|After tapping on Kodos's exclamation mark:|colspan=2}} | ||
| Line 2,059: | Line 2,059: | ||
{{THT|Quest reward: {{Cash|100}} and {{XP|10}}|colspan=2}} | {{THT|Quest reward: {{Cash|100}} and {{XP|10}}|colspan=2}} | ||
}} | }} | ||
| − | ====Under the Tentacles Pt. 3==== | + | ==== Under the Tentacles Pt. 3 ==== |
{{Table| | {{Table| | ||
{{THT|After tapping on Kodos's exclamation mark:|colspan=2}} | {{THT|After tapping on Kodos's exclamation mark:|colspan=2}} | ||
| Line 2,079: | Line 2,079: | ||
{{THT|Quest reward: {{Cash|100}} and {{XP|10}}|colspan=2}} | {{THT|Quest reward: {{Cash|100}} and {{XP|10}}|colspan=2}} | ||
}} | }} | ||
| − | ====Under the Tentacles Pt. 4==== | + | ==== Under the Tentacles Pt. 4 ==== |
{{Table| | {{Table| | ||
{{THT|After tapping on Kodos's exclamation mark:|colspan=2}} | {{THT|After tapping on Kodos's exclamation mark:|colspan=2}} | ||
| Line 2,105: | Line 2,105: | ||
}} | }} | ||
| − | ===Early Squirrel Gets the Nut=== | + | === Early Squirrel Gets the Nut === |
{{CollapsibleSection|To view Acorn Kirk's questline, click "show":| | {{CollapsibleSection|To view Acorn Kirk's questline, click "show":| | ||
| − | ====Early Squirrel Gets the Nut Pt. 1==== | + | ==== Early Squirrel Gets the Nut Pt. 1 ==== |
{{Table| | {{Table| | ||
{{THT|After tapping on Kirk's exclamation mark:|colspan=2}} | {{THT|After tapping on Kirk's exclamation mark:|colspan=2}} | ||
| Line 2,143: | Line 2,143: | ||
{{THT|Quest reward: {{Cash|100}} and {{XP|10}}|colspan=2}} | {{THT|Quest reward: {{Cash|100}} and {{XP|10}}|colspan=2}} | ||
}} | }} | ||
| − | ====Early Squirrel Gets the Nut Pt. 2==== | + | ==== Early Squirrel Gets the Nut Pt. 2 ==== |
{{Table| | {{Table| | ||
{{THT|After tapping on Kirk's exclamation mark:|colspan=2}} | {{THT|After tapping on Kirk's exclamation mark:|colspan=2}} | ||
| Line 2,165: | Line 2,165: | ||
{{THT|Quest reward: {{Cash|100}} and {{XP|10}}|colspan=2}} | {{THT|Quest reward: {{Cash|100}} and {{XP|10}}|colspan=2}} | ||
}} | }} | ||
| − | ====Early Squirrel Gets the Nut Pt. 3==== | + | ==== Early Squirrel Gets the Nut Pt. 3 ==== |
{{Table| | {{Table| | ||
{{THT|After tapping on Kirk's exclamation mark:|colspan=2}} | {{THT|After tapping on Kirk's exclamation mark:|colspan=2}} | ||
| Line 2,187: | Line 2,187: | ||
{{THT|Quest reward: {{Cash|100}} and {{XP|10}}|colspan=2}} | {{THT|Quest reward: {{Cash|100}} and {{XP|10}}|colspan=2}} | ||
}} | }} | ||
| − | ====Early Squirrel Gets the Nut Pt. 4==== | + | ==== Early Squirrel Gets the Nut Pt. 4 ==== |
{{Table| | {{Table| | ||
{{THT|After tapping on Kirk's exclamation mark:|colspan=2}} | {{THT|After tapping on Kirk's exclamation mark:|colspan=2}} | ||
| Line 2,217: | Line 2,217: | ||
{{THT|Quest reward: {{Cash|100}} and {{XP|10}}|colspan=2}} | {{THT|Quest reward: {{Cash|100}} and {{XP|10}}|colspan=2}} | ||
}} | }} | ||
| − | ====Early Squirrel Gets the Nut Pt. 5==== | + | ==== Early Squirrel Gets the Nut Pt. 5 ==== |
{{Table| | {{Table| | ||
{{THT|After tapping on Kirk's exclamation mark:|colspan=2}} | {{THT|After tapping on Kirk's exclamation mark:|colspan=2}} | ||
| Line 2,233: | Line 2,233: | ||
}} | }} | ||
| − | ===Cover Squirrel=== | + | === Cover Squirrel === |
{{CollapsibleSection|To view Squirrel Luann's questline, click "show":| | {{CollapsibleSection|To view Squirrel Luann's questline, click "show":| | ||
| − | ====Cover Squirrel Pt. 1==== | + | ==== Cover Squirrel Pt. 1 ==== |
{{Table| | {{Table| | ||
{{THT|After tapping on Luann's exclamation mark:|colspan=2}} | {{THT|After tapping on Luann's exclamation mark:|colspan=2}} | ||
| Line 2,255: | Line 2,255: | ||
{{THT|Quest reward: {{Cash|100}} and {{XP|10}}|colspan=2}} | {{THT|Quest reward: {{Cash|100}} and {{XP|10}}|colspan=2}} | ||
}} | }} | ||
| − | ====Cover Squirrel Pt. 2==== | + | ==== Cover Squirrel Pt. 2 ==== |
{{Table| | {{Table| | ||
{{THT|After tapping on Luann's exclamation mark:|colspan=2}} | {{THT|After tapping on Luann's exclamation mark:|colspan=2}} | ||
| Line 2,273: | Line 2,273: | ||
{{THT|Quest reward: {{Cash|100}} and {{XP|10}}|colspan=2}} | {{THT|Quest reward: {{Cash|100}} and {{XP|10}}|colspan=2}} | ||
}} | }} | ||
| − | ====Cover Squirrel Pt. 3==== | + | ==== Cover Squirrel Pt. 3 ==== |
{{Table| | {{Table| | ||
{{THT|After tapping on Luann's exclamation mark:|colspan=2}} | {{THT|After tapping on Luann's exclamation mark:|colspan=2}} | ||
| Line 2,293: | Line 2,293: | ||
{{THT|Quest reward: {{Cash|100}} and {{XP|10}}|colspan=2}} | {{THT|Quest reward: {{Cash|100}} and {{XP|10}}|colspan=2}} | ||
}} | }} | ||
| − | ====Cover Squirrel Pt. 4==== | + | ==== Cover Squirrel Pt. 4 ==== |
{{Table| | {{Table| | ||
{{THT|After tapping on Luann's exclamation mark:|colspan=2}} | {{THT|After tapping on Luann's exclamation mark:|colspan=2}} | ||
| Line 2,313: | Line 2,313: | ||
{{THT|Quest reward: {{Cash|100}} and {{XP|10}}|colspan=2}} | {{THT|Quest reward: {{Cash|100}} and {{XP|10}}|colspan=2}} | ||
}} | }} | ||
| − | ====Cover Squirrel Pt. 5==== | + | ==== Cover Squirrel Pt. 5 ==== |
{{Table| | {{Table| | ||
{{THT|After tapping on Luann's exclamation mark:|colspan=2}} | {{THT|After tapping on Luann's exclamation mark:|colspan=2}} | ||
| Line 2,330: | Line 2,330: | ||
}} | }} | ||
}} | }} | ||
| − | ===What Is Dead May Never Die=== | + | === What Is Dead May Never Die === |
{{Table| | {{Table| | ||
{{THT|After unlocking Disco Zombie:<br>'''Task''': Tap the Disco Zombie<br>Quest reward: {{Cash|100}} and {{XP|10}}|colspan=2}} | {{THT|After unlocking Disco Zombie:<br>'''Task''': Tap the Disco Zombie<br>Quest reward: {{Cash|100}} and {{XP|10}}|colspan=2}} | ||
}} | }} | ||
| − | ===Spawn of the Elder God=== | + | === Spawn of the Elder God === |
{{Table| | {{Table| | ||
{{THT|After unlocking Star Spawn:<br>'''Task''': Tap the Star Spawn<br>Quest reward: {{Cash|100}} and {{XP|10}}|colspan=2}} | {{THT|After unlocking Star Spawn:<br>'''Task''': Tap the Star Spawn<br>Quest reward: {{Cash|100}} and {{XP|10}}|colspan=2}} | ||
}} | }} | ||
| − | ===Formless Tappers=== | + | === Formless Tappers === |
{{Table| | {{Table| | ||
{{THT|After unlocking Formless Terror:<br>'''Task''': Tap the Formless Terror<br>Quest reward: {{Cash|100}} and {{XP|10}}|colspan=2}} | {{THT|After unlocking Formless Terror:<br>'''Task''': Tap the Formless Terror<br>Quest reward: {{Cash|100}} and {{XP|10}}|colspan=2}} | ||
}} | }} | ||
| − | ===No Bones About It=== | + | === No Bones About It === |
{{Table| | {{Table| | ||
{{THT|After unlocking Helter Skeleter:<br>'''Task''': Tap the Helter Skeleter<br>Quest reward: {{Cash|100}} and {{XP|10}}|colspan=2}} | {{THT|After unlocking Helter Skeleter:<br>'''Task''': Tap the Helter Skeleter<br>Quest reward: {{Cash|100}} and {{XP|10}}|colspan=2}} | ||
}} | }} | ||
| − | ==Kang and Kodos Gameplay== | + | == Kang and Kodos Gameplay == |
| − | ===Midgalaxy Crisis=== | + | === Midgalaxy Crisis === |
{{CollapsibleSection|To view this questline, click "show":| | {{CollapsibleSection|To view this questline, click "show":| | ||
| − | ====Midgalaxy Crisis Pt. 1==== | + | ==== Midgalaxy Crisis Pt. 1 ==== |
{{Table| | {{Table| | ||
{{THT|After completing A Proper Rigellian Thanksgiving Pt. 1 and tapping on Kang's exclamation mark:|colspan=2}} | {{THT|After completing A Proper Rigellian Thanksgiving Pt. 1 and tapping on Kang's exclamation mark:|colspan=2}} | ||
| Line 2,376: | Line 2,376: | ||
{{THT|Quest reward: {{Cash|100}} and {{XP|10}}|colspan=2}} | {{THT|Quest reward: {{Cash|100}} and {{XP|10}}|colspan=2}} | ||
}} | }} | ||
| − | ====Midgalaxy Crisis Pt. 2==== | + | ==== Midgalaxy Crisis Pt. 2 ==== |
{{Table| | {{Table| | ||
{{THT|After tapping on Kang's exclamation mark:|colspan=2}} | {{THT|After tapping on Kang's exclamation mark:|colspan=2}} | ||
| Line 2,385: | Line 2,385: | ||
{{THT|'''Task''': Make Kang Crack the Whip (1h)<br>'''Task''': Make Homer Hide in the Brown House (24h, Brown House)<br>Quest reward: {{Cash|100}} and {{XP|10}}|colspan=2}} | {{THT|'''Task''': Make Kang Crack the Whip (1h)<br>'''Task''': Make Homer Hide in the Brown House (24h, Brown House)<br>Quest reward: {{Cash|100}} and {{XP|10}}|colspan=2}} | ||
}} | }} | ||
| − | ====Midgalaxy Crisis Pt. 3==== | + | ==== Midgalaxy Crisis Pt. 3 ==== |
{{Table| | {{Table| | ||
{{THT|After tapping on Kang's exclamation mark:|colspan=2}} | {{THT|After tapping on Kang's exclamation mark:|colspan=2}} | ||
| Line 2,415: | Line 2,415: | ||
{{THT|Quest reward: {{Cash|100}} and {{XP|10}}|colspan=2}} | {{THT|Quest reward: {{Cash|100}} and {{XP|10}}|colspan=2}} | ||
}} | }} | ||
| − | ====Midgalaxy Crisis Pt. 4==== | + | ==== Midgalaxy Crisis Pt. 4 ==== |
{{Table| | {{Table| | ||
{{THT|After tapping on Kang's exclamation mark:|colspan=2}} | {{THT|After tapping on Kang's exclamation mark:|colspan=2}} | ||
| Line 2,443: | Line 2,443: | ||
}} | }} | ||
| − | ===Where No Probe Has Gone Before=== | + | === Where No Probe Has Gone Before === |
{{CollapsibleSection|To view this questline, click "show":| | {{CollapsibleSection|To view this questline, click "show":| | ||
| − | ====Where No Probe Has Gone Before Pt. 1==== | + | ==== Where No Probe Has Gone Before Pt. 1 ==== |
{{Table| | {{Table| | ||
{{THT|After completing Midgalaxy Crisis Pt. 4 and tapping on Kang's exclamation mark:|colspan=2}} | {{THT|After completing Midgalaxy Crisis Pt. 4 and tapping on Kang's exclamation mark:|colspan=2}} | ||
| Line 2,467: | Line 2,467: | ||
{{THT|Quest reward: {{Cash|100}} and {{XP|10}}|colspan=2}} | {{THT|Quest reward: {{Cash|100}} and {{XP|10}}|colspan=2}} | ||
}} | }} | ||
| − | ====Where No Probe Has Gone Before Pt. 2==== | + | ==== Where No Probe Has Gone Before Pt. 2 ==== |
{{Table| | {{Table| | ||
{{THT|After tapping on Kodos's exclamation mark:|colspan=2}} | {{THT|After tapping on Kodos's exclamation mark:|colspan=2}} | ||
| Line 2,487: | Line 2,487: | ||
{{THT|Quest reward: {{Cash|100}} and {{XP|10}}|colspan=2}} | {{THT|Quest reward: {{Cash|100}} and {{XP|10}}|colspan=2}} | ||
}} | }} | ||
| − | ====Where No Probe Has Gone Before Pt. 3==== | + | ==== Where No Probe Has Gone Before Pt. 3 ==== |
{{Table| | {{Table| | ||
{{THT|After tapping on Kodos's exclamation mark:|colspan=2}} | {{THT|After tapping on Kodos's exclamation mark:|colspan=2}} | ||
| Line 2,511: | Line 2,511: | ||
{{THT|Quest reward: {{Cash|100}} and {{XP|10}}|colspan=2}} | {{THT|Quest reward: {{Cash|100}} and {{XP|10}}|colspan=2}} | ||
}} | }} | ||
| − | ====Where No Probe Has Gone Before Pt. 4==== | + | ==== Where No Probe Has Gone Before Pt. 4 ==== |
{{Table| | {{Table| | ||
{{THT|After tapping on Kodos's exclamation mark:|colspan=2}} | {{THT|After tapping on Kodos's exclamation mark:|colspan=2}} | ||
| Line 2,526: | Line 2,526: | ||
{{THT|'''Task''': Make Kodos Refine Probe Technology (24h, Brown House)<br>Quest reward: {{Cash|100}} and {{XP|10}}|colspan=2}} | {{THT|'''Task''': Make Kodos Refine Probe Technology (24h, Brown House)<br>Quest reward: {{Cash|100}} and {{XP|10}}|colspan=2}} | ||
}} | }} | ||
| − | ====Where No Probe Has Gone Before Pt. 5==== | + | ==== Where No Probe Has Gone Before Pt. 5 ==== |
{{Table| | {{Table| | ||
{{THT|After tapping on Kodos's exclamation mark:|colspan=2}} | {{THT|After tapping on Kodos's exclamation mark:|colspan=2}} | ||
| Line 2,543: | Line 2,543: | ||
}} | }} | ||
}} | }} | ||
| − | ==Dates== | + | == Dates == |
{{Table| | {{Table| | ||
{{TH|Date and Time}} | {{TH|Date and Time}} | ||
| Line 2,651: | Line 2,651: | ||
{{TB|Quests Kill Date, Radioactive Milhouse, Saxophone Lisa, Wizard Martin, Spooky Campfire, Fairy Kodos,<br>Devil Flanders, Heck House, Marge the Witch, Portal to Rigel 7, Rigellian Queen, Acorn Kirk, Squirrel Luann}} | {{TB|Quests Kill Date, Radioactive Milhouse, Saxophone Lisa, Wizard Martin, Spooky Campfire, Fairy Kodos,<br>Devil Flanders, Heck House, Marge the Witch, Portal to Rigel 7, Rigellian Queen, Acorn Kirk, Squirrel Luann}} | ||
}} | }} | ||
| − | ==Nightmare Spawn and Currency Earning Jobs== | + | == Nightmare Spawn and Currency Earning Jobs == |
| − | ===All Acts=== | + | === All Acts === |
| − | ====Items==== | + | ==== Items ==== |
{{Table| | {{Table| | ||
{{TH|Item}} | {{TH|Item}} | ||
| Line 2,680: | Line 2,680: | ||
{{TB|[[File:TSTO Random Nightmare Icon.png|20px]]24 Random Nightmares}} | {{TB|[[File:TSTO Random Nightmare Icon.png|20px]]24 Random Nightmares}} | ||
}} | }} | ||
| − | ====Characters==== | + | ==== Characters ==== |
{{Table| | {{Table| | ||
{{TH|Character}} | {{TH|Character}} | ||
| Line 2,709: | Line 2,709: | ||
}} | }} | ||
| − | ===Act 1 and 2=== | + | === Act 1 and 2 === |
<gallery> | <gallery> | ||
File:Spooky Campfire Act 1 and 2 Menu.png|Spooky Campfire Act 1 and 2 Menu | File:Spooky Campfire Act 1 and 2 Menu.png|Spooky Campfire Act 1 and 2 Menu | ||
| Line 2,718: | Line 2,718: | ||
</gallery> | </gallery> | ||
| − | ====Tell a Scary Story==== | + | ==== Tell a Scary Story ==== |
{{Table| | {{Table| | ||
{{TH|Character}} | {{TH|Character}} | ||
| Line 2,741: | Line 2,741: | ||
}} | }} | ||
| − | ====Send Youngsters to Make S'mores==== | + | ==== Send Youngsters to Make S'mores ==== |
{{Table| | {{Table| | ||
{{TH|Characters}} | {{TH|Characters}} | ||
| Line 2,760: | Line 2,760: | ||
{{TB|[[File:Tapped Out Smores.png|20px]]16}} | {{TB|[[File:Tapped Out Smores.png|20px]]16}} | ||
}} | }} | ||
| − | ===Act 2=== | + | === Act 2 === |
<gallery> | <gallery> | ||
File:THOH2015 Find Building.png|Find Building Screen | File:THOH2015 Find Building.png|Find Building Screen | ||
| Line 2,769: | Line 2,769: | ||
</gallery> | </gallery> | ||
| − | ====Gather at the Simpson's House==== | + | ==== Gather at the Simpson's House ==== |
{{Table| | {{Table| | ||
{{TH|Characters}} | {{TH|Characters}} | ||
| Line 2,784: | Line 2,784: | ||
{{TB|[[File:Tapped Out Gummies.png|20px]]60}} | {{TB|[[File:Tapped Out Gummies.png|20px]]60}} | ||
}} | }} | ||
| − | ====Unwind With Wine==== | + | ==== Unwind With Wine ==== |
{{Table| | {{Table| | ||
{{TH|Characters}} | {{TH|Characters}} | ||
| Line 2,795: | Line 2,795: | ||
{{TB|[[File:Tapped Out Gummies.png|20px]]6}} | {{TB|[[File:Tapped Out Gummies.png|20px]]6}} | ||
}} | }} | ||
| − | ====Have Fun With Cameras==== | + | ==== Have Fun With Cameras ==== |
{{Table| | {{Table| | ||
{{TH|Characters}} | {{TH|Characters}} | ||
| Line 2,808: | Line 2,808: | ||
{{TB|[[File:Tapped Out Gummies.png|20px]]18}} | {{TB|[[File:Tapped Out Gummies.png|20px]]18}} | ||
}} | }} | ||
| − | ====Play With Food==== | + | ==== Play With Food ==== |
{{Table| | {{Table| | ||
{{TH|Characters}} | {{TH|Characters}} | ||
| Line 2,820: | Line 2,820: | ||
}} | }} | ||
| − | ====Characters==== | + | ==== Characters ==== |
{{Table| | {{Table| | ||
{{TH|Character}} | {{TH|Character}} | ||
| Line 2,834: | Line 2,834: | ||
}} | }} | ||
| − | ===Act 3=== | + | === Act 3 === |
<gallery> | <gallery> | ||
File:Spooky Campfire Act 3 Menu.png|Spooky Campfire Act 3 Menu (Active) | File:Spooky Campfire Act 3 Menu.png|Spooky Campfire Act 3 Menu (Active) | ||
| Line 2,848: | Line 2,848: | ||
File:Sunk Temple.png|Sunk Temple | File:Sunk Temple.png|Sunk Temple | ||
</gallery> | </gallery> | ||
| − | ====Fight M'nthster==== | + | ==== Fight M'nthster ==== |
{{Table| | {{Table| | ||
{{TH|Characters}} | {{TH|Characters}} | ||
| Line 2,864: | Line 2,864: | ||
{{TB|[[File:Tapped Out Candy Apples.png|20px]]8}} | {{TB|[[File:Tapped Out Candy Apples.png|20px]]8}} | ||
}} | }} | ||
| − | ====Hunt Nightmares==== | + | ==== Hunt Nightmares ==== |
{{Table| | {{Table| | ||
{{TH|Characters}} | {{TH|Characters}} | ||
| Line 2,889: | Line 2,889: | ||
{{TB|[[File:Tapped Out Snakes.png|20px]]2}} | {{TB|[[File:Tapped Out Snakes.png|20px]]2}} | ||
}} | }} | ||
| − | ====Defeating M'nthster==== | + | ==== Defeating M'nthster ==== |
{{Table| | {{Table| | ||
{{TH|Attack}} | {{TH|Attack}} | ||
| Line 2,903: | Line 2,903: | ||
}} | }} | ||
| − | ====Characters==== | + | ==== Characters ==== |
{{Table| | {{Table| | ||
{{TH|Character}} | {{TH|Character}} | ||
| Line 2,917: | Line 2,917: | ||
}} | }} | ||
| − | ==Prizes== | + | == Prizes == |
{{Table| | {{Table| | ||
{{THT|'''Note: '''While collecting the items, you'll find yourself getting a weird number in the prize track screen. The game is actually showing you how many you need to reach that prize, not the total like other events. The total will show up on the lower left of the screen.}} | {{THT|'''Note: '''While collecting the items, you'll find yourself getting a weird number in the prize track screen. The game is actually showing you how many you need to reach that prize, not the total like other events. The total will show up on the lower left of the screen.}} | ||
| Line 2,976: | Line 2,976: | ||
}} | }} | ||
| − | ===Captain Kang=== | + | === Captain Kang === |
{{CollapsibleSection|To view Pirate Kang's questline, click "show":| | {{CollapsibleSection|To view Pirate Kang's questline, click "show":| | ||
| − | ====Captain Kang Pt. 1==== | + | ==== Captain Kang Pt. 1 ==== |
{{Table| | {{Table| | ||
{{THT|After tapping on Kang's exclamation mark:|colspan=2}} | {{THT|After tapping on Kang's exclamation mark:|colspan=2}} | ||
| Line 2,996: | Line 2,996: | ||
{{THT|Quest reward: {{Cash|100}} and {{XP|10}}|colspan=2}} | {{THT|Quest reward: {{Cash|100}} and {{XP|10}}|colspan=2}} | ||
}} | }} | ||
| − | ====Captain Kang Pt. 2==== | + | ==== Captain Kang Pt. 2 ==== |
{{Table| | {{Table| | ||
{{THT|After tapping on Kang's exclamation mark:|colspan=2}} | {{THT|After tapping on Kang's exclamation mark:|colspan=2}} | ||
| Line 3,014: | Line 3,014: | ||
{{THT|Quest reward: {{Cash|100}} and {{XP|10}}|colspan=2}} | {{THT|Quest reward: {{Cash|100}} and {{XP|10}}|colspan=2}} | ||
}} | }} | ||
| − | ====Captain Kang Pt. 3==== | + | ==== Captain Kang Pt. 3 ==== |
{{Table| | {{Table| | ||
{{THT|After tapping on Kang's exclamation mark:|colspan=2}} | {{THT|After tapping on Kang's exclamation mark:|colspan=2}} | ||
| Line 3,044: | Line 3,044: | ||
{{THT|Quest reward: {{Cash|100}} and {{XP|10}}|colspan=2}} | {{THT|Quest reward: {{Cash|100}} and {{XP|10}}|colspan=2}} | ||
}} | }} | ||
| − | ====Captain Kang Pt. 4==== | + | ==== Captain Kang Pt. 4 ==== |
{{Table| | {{Table| | ||
{{THT|After tapping on Kang's exclamation mark:|colspan=2}} | {{THT|After tapping on Kang's exclamation mark:|colspan=2}} | ||
| Line 3,065: | Line 3,065: | ||
}} | }} | ||
}} | }} | ||
| − | ===The One that Got Away=== | + | === The One that Got Away === |
{{CollapsibleSection|To view Model Donut's questline, click "show":| | {{CollapsibleSection|To view Model Donut's questline, click "show":| | ||
{{Table| | {{Table| | ||
| Line 3,115: | Line 3,115: | ||
}} | }} | ||
| − | ===Gate to Nowhere=== | + | === Gate to Nowhere === |
{{Table| | {{Table| | ||
{{THT|After unlocking Gate to Nowhere:|colspan=2}} | {{THT|After unlocking Gate to Nowhere:|colspan=2}} | ||
{{THT|'''Task''': Place Gate to Nowhere<br>Quest reward: {{Cash|100}} and {{XP|10}}|colspan=2}} | {{THT|'''Task''': Place Gate to Nowhere<br>Quest reward: {{Cash|100}} and {{XP|10}}|colspan=2}} | ||
}} | }} | ||
| − | ===The Ultra-Prankster=== | + | === The Ultra-Prankster === |
{{CollapsibleSection|To view Clockwork Bart's questline, click "show":| | {{CollapsibleSection|To view Clockwork Bart's questline, click "show":| | ||
| − | ====The Ultra-Prankster Pt. 1==== | + | ==== The Ultra-Prankster Pt. 1 ==== |
{{Table| | {{Table| | ||
{{THT|After unlocking Clockwork Bart:|colspan=2}} | {{THT|After unlocking Clockwork Bart:|colspan=2}} | ||
| Line 3,141: | Line 3,141: | ||
{{THT|'''Task''': Make Clockwork Bart Go Ultra-Pranking (4h)<br>Quest reward: {{Cash|100}} and {{XP|10}}|colspan=2}} | {{THT|'''Task''': Make Clockwork Bart Go Ultra-Pranking (4h)<br>Quest reward: {{Cash|100}} and {{XP|10}}|colspan=2}} | ||
}} | }} | ||
| − | ====The Ultra-Prankster Pt. 2==== | + | ==== The Ultra-Prankster Pt. 2 ==== |
{{Table| | {{Table| | ||
{{THT|After tapping on Bart's exclamation mark:|colspan=2}} | {{THT|After tapping on Bart's exclamation mark:|colspan=2}} | ||
| Line 3,157: | Line 3,157: | ||
{{THT|Quest reward: {{Cash|100}} and {{XP|10}}|colspan=2}} | {{THT|Quest reward: {{Cash|100}} and {{XP|10}}|colspan=2}} | ||
}} | }} | ||
| − | ====The Ultra-Prankster Pt. 3==== | + | ==== The Ultra-Prankster Pt. 3 ==== |
{{Table| | {{Table| | ||
{{THT|After tapping on Bart's exclamation mark:|colspan=2}} | {{THT|After tapping on Bart's exclamation mark:|colspan=2}} | ||
| Line 3,173: | Line 3,173: | ||
{{THT|Quest reward: {{Cash|100}} and {{XP|10}}|colspan=2}} | {{THT|Quest reward: {{Cash|100}} and {{XP|10}}|colspan=2}} | ||
}} | }} | ||
| − | ====The Ultra-Prankster Pt. 4==== | + | ==== The Ultra-Prankster Pt. 4 ==== |
{{Table| | {{Table| | ||
{{THT|After tapping on Bart's exclamation mark:|colspan=2}} | {{THT|After tapping on Bart's exclamation mark:|colspan=2}} | ||
| Line 3,201: | Line 3,201: | ||
{{THT|Quest reward: {{Cash|100}} and {{XP|10}}|colspan=2}} | {{THT|Quest reward: {{Cash|100}} and {{XP|10}}|colspan=2}} | ||
}} | }} | ||
| − | ====The Ultra-Prankster Pt. 5==== | + | ==== The Ultra-Prankster Pt. 5 ==== |
{{Table| | {{Table| | ||
{{THT|After tapping on Bart's exclamation mark:|colspan=2}} | {{THT|After tapping on Bart's exclamation mark:|colspan=2}} | ||
| Line 3,217: | Line 3,217: | ||
{{THT|Quest reward: {{Cash|100}} and {{XP|10}}|colspan=2}} | {{THT|Quest reward: {{Cash|100}} and {{XP|10}}|colspan=2}} | ||
}} | }} | ||
| − | ====The Ultra-Prankster Pt. 6==== | + | ==== The Ultra-Prankster Pt. 6 ==== |
{{Table| | {{Table| | ||
{{THT|After tapping on Bart's exclamation mark:|colspan=2}} | {{THT|After tapping on Bart's exclamation mark:|colspan=2}} | ||
| Line 3,240: | Line 3,240: | ||
}} | }} | ||
}} | }} | ||
| − | ===Festiween=== | + | === Festiween === |
{{CollapsibleSection|To view Holiday Homer's questline, click "show":| | {{CollapsibleSection|To view Holiday Homer's questline, click "show":| | ||
| − | ====Festiween Pt. 1==== | + | ==== Festiween Pt. 1 ==== |
{{Table| | {{Table| | ||
{{THT|After tapping on Homer's exclamation mark:|colspan=2}} | {{THT|After tapping on Homer's exclamation mark:|colspan=2}} | ||
| Line 3,258: | Line 3,258: | ||
{{THT|Quest reward: {{Cash|100}} and {{XP|10}}|colspan=2}} | {{THT|Quest reward: {{Cash|100}} and {{XP|10}}|colspan=2}} | ||
}} | }} | ||
| − | ====Festiween Pt. 2==== | + | ==== Festiween Pt. 2 ==== |
{{Table| | {{Table| | ||
{{THT|After tapping on Homer's exclamation mark:|colspan=2}} | {{THT|After tapping on Homer's exclamation mark:|colspan=2}} | ||
| Line 3,276: | Line 3,276: | ||
{{THT|Quest reward: {{Cash|100}} and {{XP|10}}|colspan=2}} | {{THT|Quest reward: {{Cash|100}} and {{XP|10}}|colspan=2}} | ||
}} | }} | ||
| − | ====Festiween Pt. 3==== | + | ==== Festiween Pt. 3 ==== |
{{Table| | {{Table| | ||
{{THT|After tapping on Lisa's exclamation mark:|colspan=2}} | {{THT|After tapping on Lisa's exclamation mark:|colspan=2}} | ||
| Line 3,296: | Line 3,296: | ||
{{THT|Quest reward: {{Cash|100}} and {{XP|10}}|colspan=2}} | {{THT|Quest reward: {{Cash|100}} and {{XP|10}}|colspan=2}} | ||
}} | }} | ||
| − | ====Festiween Pt. 4==== | + | ==== Festiween Pt. 4 ==== |
{{Table| | {{Table| | ||
{{THT|After tapping on Lisa's exclamation mark:|colspan=2}} | {{THT|After tapping on Lisa's exclamation mark:|colspan=2}} | ||
| Line 3,321: | Line 3,321: | ||
}} | }} | ||
}} | }} | ||
| − | ===Lobotomy of Love=== | + | === Lobotomy of Love === |
{{CollapsibleSection|To view Re-Neducation Center's questline, click "show":| | {{CollapsibleSection|To view Re-Neducation Center's questline, click "show":| | ||
| − | ====Lobotomy of Love Pt. 1==== | + | ==== Lobotomy of Love Pt. 1 ==== |
{{Table| | {{Table| | ||
{{THT|After tapping on Wiggum's exclamation mark:|colspan=2}} | {{THT|After tapping on Wiggum's exclamation mark:|colspan=2}} | ||
| Line 3,351: | Line 3,351: | ||
{{THT|Quest reward: {{Cash|100}} and {{XP|10}}|colspan=2}} | {{THT|Quest reward: {{Cash|100}} and {{XP|10}}|colspan=2}} | ||
}} | }} | ||
| − | ====Lobotomy of Love Pt. 2==== | + | ==== Lobotomy of Love Pt. 2 ==== |
{{Table| | {{Table| | ||
{{THT|After tapping on Ned's exclamation mark:|colspan=2}} | {{THT|After tapping on Ned's exclamation mark:|colspan=2}} | ||
| Line 3,373: | Line 3,373: | ||
{{THT|Quest reward: {{Cash|100}} and {{XP|10}}|colspan=2}} | {{THT|Quest reward: {{Cash|100}} and {{XP|10}}|colspan=2}} | ||
}} | }} | ||
| − | ====Lobotomy of Love Pt. 3==== | + | ==== Lobotomy of Love Pt. 3 ==== |
{{Table| | {{Table| | ||
{{THT|After tapping on Ned's exclamation mark:|colspan=2}} | {{THT|After tapping on Ned's exclamation mark:|colspan=2}} | ||
| Line 3,397: | Line 3,397: | ||
}} | }} | ||
| − | ==Crafting== | + | == Crafting == |
{{Table|align=center|width=500px| | {{Table|align=center|width=500px| | ||
{{THT|Excellent Craft Option}} | {{THT|Excellent Craft Option}} | ||
| Line 3,464: | Line 3,464: | ||
}} | }} | ||
| − | ===A Proper Rigellian Thanksgiving=== | + | === A Proper Rigellian Thanksgiving === |
{{CollapsibleSection|To view the Crafting's questline, click "show":| | {{CollapsibleSection|To view the Crafting's questline, click "show":| | ||
| − | ====Act 1, 2 and 3==== | + | ==== Act 1, 2 and 3 ==== |
| − | =====A Proper Rigellian Thanksgiving Pt. 1===== | + | ===== A Proper Rigellian Thanksgiving Pt. 1 ===== |
{{Table| | {{Table| | ||
{{THT|After completing The Call of the Campfire Pt. 4:|colspan=2}} | {{THT|After completing The Call of the Campfire Pt. 4:|colspan=2}} | ||
| Line 3,486: | Line 3,486: | ||
{{THT|'''Task''': Craft the Spooky Grove<br>[[File:THOH2015 Crafting Menu.png|300px]]<br>Quest reward: {{Cash|100}} and {{XP|10}} and<br>[[File:Tapped Out Unlock Kang.png|100px]][[File:Tapped Out Kang New Character.png|300px]]|colspan=2}} | {{THT|'''Task''': Craft the Spooky Grove<br>[[File:THOH2015 Crafting Menu.png|300px]]<br>Quest reward: {{Cash|100}} and {{XP|10}} and<br>[[File:Tapped Out Unlock Kang.png|100px]][[File:Tapped Out Kang New Character.png|300px]]|colspan=2}} | ||
}} | }} | ||
| − | =====A Proper Rigellian Thanksgiving Pt. 2===== | + | ===== A Proper Rigellian Thanksgiving Pt. 2 ===== |
{{Table| | {{Table| | ||
{{THT|After completing A Proper Rigellian Thanksgiving Pt. 1:|colspan=2}} | {{THT|After completing A Proper Rigellian Thanksgiving Pt. 1:|colspan=2}} | ||
{{THT|'''Task''': Craft the Spooky House<br>Quest reward: {{Cash|100}} and {{XP|10}}|colspan=2}} | {{THT|'''Task''': Craft the Spooky House<br>Quest reward: {{Cash|100}} and {{XP|10}}|colspan=2}} | ||
}} | }} | ||
| − | =====A Proper Rigellian Thanksgiving Pt. 3===== | + | ===== A Proper Rigellian Thanksgiving Pt. 3 ===== |
{{Table| | {{Table| | ||
{{THT|After completing A Proper Rigellian Thanksgiving Pt. 2:|colspan=2}} | {{THT|After completing A Proper Rigellian Thanksgiving Pt. 2:|colspan=2}} | ||
{{THT|'''Task''': Craft Hugo<br>Quest reward: {{Cash|100}} and {{XP|10}}|colspan=2}} | {{THT|'''Task''': Craft Hugo<br>Quest reward: {{Cash|100}} and {{XP|10}}|colspan=2}} | ||
}} | }} | ||
| − | ====Act 2 and 3==== | + | ==== Act 2 and 3 ==== |
| − | =====A Proper Rigellian Thanksgiving Pt. 4===== | + | ===== A Proper Rigellian Thanksgiving Pt. 4 ===== |
{{Table| | {{Table| | ||
{{THT|After completing A Proper Rigellian Thanksgiving Pt. 3 and the user logs in on October 20:|colspan=2}} | {{THT|After completing A Proper Rigellian Thanksgiving Pt. 3 and the user logs in on October 20:|colspan=2}} | ||
{{THT|'''Task''': Craft the Wailing Wall<br>Quest reward: {{Cash|100}} and {{XP|10}}|colspan=2}} | {{THT|'''Task''': Craft the Wailing Wall<br>Quest reward: {{Cash|100}} and {{XP|10}}|colspan=2}} | ||
}} | }} | ||
| − | =====A Proper Rigellian Thanksgiving Pt. 5===== | + | ===== A Proper Rigellian Thanksgiving Pt. 5 ===== |
{{Table| | {{Table| | ||
{{THT|After completing A Proper Rigellian Thanksgiving Pt. 4:|colspan=2}} | {{THT|After completing A Proper Rigellian Thanksgiving Pt. 4:|colspan=2}} | ||
{{THT|'''Task''': Craft Halloween Balloons<br>Quest reward: {{Cash|100}} and {{XP|10}}|colspan=2}} | {{THT|'''Task''': Craft Halloween Balloons<br>Quest reward: {{Cash|100}} and {{XP|10}}|colspan=2}} | ||
}} | }} | ||
| − | =====A Proper Rigellian Thanksgiving Pt. 6===== | + | ===== A Proper Rigellian Thanksgiving Pt. 6 ===== |
{{Table| | {{Table| | ||
{{THT|After completing A Proper Rigellian Thanksgiving Pt. 5:|colspan=2}} | {{THT|After completing A Proper Rigellian Thanksgiving Pt. 5:|colspan=2}} | ||
{{THT|'''Task''': Craft the Jack-O-Lantern<br>Quest reward: {{Cash|100}} and {{XP|10}}|colspan=2}} | {{THT|'''Task''': Craft the Jack-O-Lantern<br>Quest reward: {{Cash|100}} and {{XP|10}}|colspan=2}} | ||
}} | }} | ||
| − | =====A Proper Rigellian Thanksgiving Pt. 7===== | + | ===== A Proper Rigellian Thanksgiving Pt. 7 ===== |
{{Table| | {{Table| | ||
{{THT|After completing A Proper Rigellian Thanksgiving Pt. 6:|colspan=2}} | {{THT|After completing A Proper Rigellian Thanksgiving Pt. 6:|colspan=2}} | ||
{{THT|'''Task''': Craft the Spooky Wall<br>Quest reward: {{Cash|100}} and {{XP|10}}|colspan=2}} | {{THT|'''Task''': Craft the Spooky Wall<br>Quest reward: {{Cash|100}} and {{XP|10}}|colspan=2}} | ||
}} | }} | ||
| − | ====Act 3==== | + | ==== Act 3 ==== |
| − | =====A Proper Rigellian Thanksgiving Pt. 8===== | + | ===== A Proper Rigellian Thanksgiving Pt. 8 ===== |
{{Table| | {{Table| | ||
{{THT|After completing A Proper Rigellian Thanksgiving Pt. 7 and the user logs in on November 4:|colspan=2}} | {{THT|After completing A Proper Rigellian Thanksgiving Pt. 7 and the user logs in on November 4:|colspan=2}} | ||
{{THT|'''Task''': Craft the Biohazard Tower<br>Quest reward: {{Cash|100}} and {{XP|10}}|colspan=2}} | {{THT|'''Task''': Craft the Biohazard Tower<br>Quest reward: {{Cash|100}} and {{XP|10}}|colspan=2}} | ||
}} | }} | ||
| − | =====A Proper Rigellian Thanksgiving Pt. 9===== | + | ===== A Proper Rigellian Thanksgiving Pt. 9 ===== |
{{Table| | {{Table| | ||
{{THT|After completing A Proper Rigellian Thanksgiving Pt. 8:|colspan=2}} | {{THT|After completing A Proper Rigellian Thanksgiving Pt. 8:|colspan=2}} | ||
{{THT|'''Task''': Craft the Biohazard Wall<br>Quest reward: {{Cash|100}} and {{XP|10}}|colspan=2}} | {{THT|'''Task''': Craft the Biohazard Wall<br>Quest reward: {{Cash|100}} and {{XP|10}}|colspan=2}} | ||
}} | }} | ||
| − | =====A Proper Rigellian Thanksgiving Pt. 10===== | + | ===== A Proper Rigellian Thanksgiving Pt. 10 ===== |
{{Table| | {{Table| | ||
{{THT|After completing A Proper Rigellian Thanksgiving Pt. 9:|colspan=2}} | {{THT|After completing A Proper Rigellian Thanksgiving Pt. 9:|colspan=2}} | ||
| Line 3,535: | Line 3,535: | ||
}} | }} | ||
| − | ===My Brother's Keeper=== | + | === My Brother's Keeper === |
{{CollapsibleSection|To view Hugo's questline, click "show":| | {{CollapsibleSection|To view Hugo's questline, click "show":| | ||
| − | ====My Brother's Keeper Pt. 1==== | + | ==== My Brother's Keeper Pt. 1 ==== |
{{Table| | {{Table| | ||
{{THT|After tapping on Bart's exclamation mark:|colspan=2}} | {{THT|After tapping on Bart's exclamation mark:|colspan=2}} | ||
| Line 3,560: | Line 3,560: | ||
{{THT|'''Task''': Make Hugo Eat Fish Heads (4h)<br>'''Task''': Make Bart Lose his Lunch (4h, Simpson House)<br>Quest reward: {{Cash|100}} and {{XP|10}}|colspan=2}} | {{THT|'''Task''': Make Hugo Eat Fish Heads (4h)<br>'''Task''': Make Bart Lose his Lunch (4h, Simpson House)<br>Quest reward: {{Cash|100}} and {{XP|10}}|colspan=2}} | ||
}} | }} | ||
| − | ====My Brother's Keeper Pt. 2==== | + | ==== My Brother's Keeper Pt. 2 ==== |
{{Table| | {{Table| | ||
{{THT|After tapping on Bart's exclamation mark:|colspan=2}} | {{THT|After tapping on Bart's exclamation mark:|colspan=2}} | ||
| Line 3,598: | Line 3,598: | ||
{{THT|Quest reward: {{Cash|100}} and {{XP|10}}|colspan=2}} | {{THT|Quest reward: {{Cash|100}} and {{XP|10}}|colspan=2}} | ||
}} | }} | ||
| − | ====My Brother's Keeper Pt. 3==== | + | ==== My Brother's Keeper Pt. 3 ==== |
{{Table| | {{Table| | ||
{{THT|After tapping on Hugo's exclamation mark:|colspan=2}} | {{THT|After tapping on Hugo's exclamation mark:|colspan=2}} | ||
| Line 3,616: | Line 3,616: | ||
{{THT|Quest reward: {{Cash|100}} and {{XP|10}}|colspan=2}} | {{THT|Quest reward: {{Cash|100}} and {{XP|10}}|colspan=2}} | ||
}} | }} | ||
| − | ====My Brother's Keeper Pt. 4==== | + | ==== My Brother's Keeper Pt. 4 ==== |
{{Table| | {{Table| | ||
{{THT|After tapping on Hugo's exclamation mark:|colspan=2}} | {{THT|After tapping on Hugo's exclamation mark:|colspan=2}} | ||
| Line 3,648: | Line 3,648: | ||
{{THT|Quest reward: {{Cash|100}} and {{XP|10}}|colspan=2}} | {{THT|Quest reward: {{Cash|100}} and {{XP|10}}|colspan=2}} | ||
}} | }} | ||
| − | ====My Brother's Keeper Pt. 5==== | + | ==== My Brother's Keeper Pt. 5 ==== |
{{Table| | {{Table| | ||
{{THT|After tapping on Hugo's exclamation mark:|colspan=2}} | {{THT|After tapping on Hugo's exclamation mark:|colspan=2}} | ||
| Line 3,668: | Line 3,668: | ||
{{THT|Quest reward: {{Cash|100}} and {{XP|10}}|colspan=2}} | {{THT|Quest reward: {{Cash|100}} and {{XP|10}}|colspan=2}} | ||
}} | }} | ||
| − | ====My Brother's Keeper Pt. 6==== | + | ==== My Brother's Keeper Pt. 6 ==== |
{{Table| | {{Table| | ||
{{THT|After tapping on Bart's exclamation mark:|colspan=2}} | {{THT|After tapping on Bart's exclamation mark:|colspan=2}} | ||
| Line 3,691: | Line 3,691: | ||
}} | }} | ||
| − | ==Spooky Campfire Level Up== | + | == Spooky Campfire Level Up == |
[[File:Spooky Campfire Level Up Screen.png|300px]] | [[File:Spooky Campfire Level Up Screen.png|300px]] | ||
{{Table| | {{Table| | ||
| Line 3,721: | Line 3,721: | ||
{{TB|Level 5, every 4 level.}} | {{TB|Level 5, every 4 level.}} | ||
}} | }} | ||
| − | ===Getting Wood=== | + | === Getting Wood === |
{{CollapsibleSection|To view the Spooky Campfire Level Up's questline, click "show":| | {{CollapsibleSection|To view the Spooky Campfire Level Up's questline, click "show":| | ||
| − | ====Getting Wood Pt. 1==== | + | ==== Getting Wood Pt. 1 ==== |
{{Table| | {{Table| | ||
{{THT|After completing The Call Of The Campfire Pt. 8:|colspan=2}} | {{THT|After completing The Call Of The Campfire Pt. 8:|colspan=2}} | ||
{{THT|'''Task''': Upgrade the Spooky Campfire to Level 4<br>Quest reward: {{Cash|100}} and [[File:Tapped Out Smores.png|25px]]100/[[File:Tapped Out Gummies.png|25px]]100/[[File:Tapped Out Candy Apples.png|25px]]100|colspan=2}} | {{THT|'''Task''': Upgrade the Spooky Campfire to Level 4<br>Quest reward: {{Cash|100}} and [[File:Tapped Out Smores.png|25px]]100/[[File:Tapped Out Gummies.png|25px]]100/[[File:Tapped Out Candy Apples.png|25px]]100|colspan=2}} | ||
}} | }} | ||
| − | ====Getting Wood Pt. 2==== | + | ==== Getting Wood Pt. 2 ==== |
{{Table| | {{Table| | ||
{{THT|After completing Getting Wood Pt. 1:|colspan=2}} | {{THT|After completing Getting Wood Pt. 1:|colspan=2}} | ||
{{THT|'''Task''': Upgrade the Spooky Campfire to Level 5<br>Quest reward: {{Cash|100}} and [[File:Tapped Out Smores.png|25px]]100/[[File:Tapped Out Gummies.png|25px]]100/[[File:Tapped Out Candy Apples.png|25px]]100|colspan=2}} | {{THT|'''Task''': Upgrade the Spooky Campfire to Level 5<br>Quest reward: {{Cash|100}} and [[File:Tapped Out Smores.png|25px]]100/[[File:Tapped Out Gummies.png|25px]]100/[[File:Tapped Out Candy Apples.png|25px]]100|colspan=2}} | ||
}} | }} | ||
| − | ====Getting Wood Pt. 3==== | + | ==== Getting Wood Pt. 3 ==== |
{{Table| | {{Table| | ||
{{THT|After completing Getting Wood Pt. 2:|colspan=2}} | {{THT|After completing Getting Wood Pt. 2:|colspan=2}} | ||
{{THT|'''Task''': Upgrade the Spooky Campfire to Level 10<br>Quest reward: {{Cash|100}} and [[File:Tapped Out Smores.png|25px]]100/[[File:Tapped Out Gummies.png|25px]]100/[[File:Tapped Out Candy Apples.png|25px]]100|colspan=2}} | {{THT|'''Task''': Upgrade the Spooky Campfire to Level 10<br>Quest reward: {{Cash|100}} and [[File:Tapped Out Smores.png|25px]]100/[[File:Tapped Out Gummies.png|25px]]100/[[File:Tapped Out Candy Apples.png|25px]]100|colspan=2}} | ||
}} | }} | ||
| − | ====Getting Wood Pt. 4==== | + | ==== Getting Wood Pt. 4 ==== |
{{Table| | {{Table| | ||
{{THT|After completing Getting Wood Pt. 3:|colspan=2}} | {{THT|After completing Getting Wood Pt. 3:|colspan=2}} | ||
{{THT|'''Task''': Upgrade the Spooky Campfire to Level 15<br>Quest reward: {{Cash|100}} and [[File:Tapped Out Smores.png|25px]]100/[[File:Tapped Out Gummies.png|25px]]100/[[File:Tapped Out Candy Apples.png|25px]]100|colspan=2}} | {{THT|'''Task''': Upgrade the Spooky Campfire to Level 15<br>Quest reward: {{Cash|100}} and [[File:Tapped Out Smores.png|25px]]100/[[File:Tapped Out Gummies.png|25px]]100/[[File:Tapped Out Candy Apples.png|25px]]100|colspan=2}} | ||
}} | }} | ||
| − | ====Getting Wood Pt. 5==== | + | ==== Getting Wood Pt. 5 ==== |
{{Table| | {{Table| | ||
{{THT|After completing Getting Wood Pt. 4:|colspan=2}} | {{THT|After completing Getting Wood Pt. 4:|colspan=2}} | ||
{{THT|'''Task''': Upgrade the Spooky Campfire to Level 20<br>Quest reward: {{Cash|100}} and [[File:Tapped Out Smores.png|25px]]100/[[File:Tapped Out Gummies.png|25px]]100/[[File:Tapped Out Candy Apples.png|25px]]100|colspan=2}} | {{THT|'''Task''': Upgrade the Spooky Campfire to Level 20<br>Quest reward: {{Cash|100}} and [[File:Tapped Out Smores.png|25px]]100/[[File:Tapped Out Gummies.png|25px]]100/[[File:Tapped Out Candy Apples.png|25px]]100|colspan=2}} | ||
}} | }} | ||
| − | ====Getting Wood Pt. 6==== | + | ==== Getting Wood Pt. 6 ==== |
{{Table| | {{Table| | ||
{{THT|After completing Getting Wood Pt. 5 (the quest loops):|colspan=2}} | {{THT|After completing Getting Wood Pt. 5 (the quest loops):|colspan=2}} | ||
| Line 3,755: | Line 3,755: | ||
}} | }} | ||
| − | ==Shopkeeper's Challenges== | + | == Shopkeeper's Challenges == |
<gallery> | <gallery> | ||
File:HW2015 Daily Challenges Event Guide.png|Shopkeeper's Challenges Guide | File:HW2015 Daily Challenges Event Guide.png|Shopkeeper's Challenges Guide | ||
| Line 3,933: | Line 3,933: | ||
{{TB|{{Donut|20}}}} | {{TB|{{Donut|20}}}} | ||
}} | }} | ||
| − | ===Shopkeeper's Challenges=== | + | === Shopkeeper's Challenges === |
{{CollapsibleSection|To view the House of Evil's questline, click "show":| | {{CollapsibleSection|To view the House of Evil's questline, click "show":| | ||
| − | ====House of Evil owned==== | + | ==== House of Evil owned ==== |
{{Table| | {{Table| | ||
{{THT|After the user logs in on October 12 at 8am GMT and having completed The Call of the Campfire Pt. 5:|colspan=2}} | {{THT|After the user logs in on October 12 at 8am GMT and having completed The Call of the Campfire Pt. 5:|colspan=2}} | ||
| Line 3,943: | Line 3,943: | ||
}} | }} | ||
| − | ====House of Evil not owned==== | + | ==== House of Evil not owned ==== |
{{Table| | {{Table| | ||
{{THT|After the user logs in on October 12 at 8am GMT and having completed The Call of the Campfire Pt. 5:|colspan=2}} | {{THT|After the user logs in on October 12 at 8am GMT and having completed The Call of the Campfire Pt. 5:|colspan=2}} | ||
| Line 3,951: | Line 3,951: | ||
}} | }} | ||
| − | ====Unreleased==== | + | ==== Unreleased ==== |
{{Table| | {{Table| | ||
{{Tapped Out House Of Evil Shopkeeper Icon}} | {{Tapped Out House Of Evil Shopkeeper Icon}} | ||
| Line 3,966: | Line 3,966: | ||
}} | }} | ||
| − | ==Daily Play Combo== | + | == Daily Play Combo == |
<gallery> | <gallery> | ||
File:Daily Play Combo Smores.png|Act 1 | File:Daily Play Combo Smores.png|Act 1 | ||
| Line 3,973: | Line 3,973: | ||
</gallery> | </gallery> | ||
| − | ==Conform-o-meter impact== | + | == Conform-o-meter impact == |
{{Table| | {{Table| | ||
{{TH|Building or Item}} | {{TH|Building or Item}} | ||
| Line 4,122: | Line 4,122: | ||
=== October 7 Update ("4_17_THOH2015_Patch1_PostLaunch")=== | === October 7 Update ("4_17_THOH2015_Patch1_PostLaunch")=== | ||
*Fixed The Call of the Campfire Pt. 3 not completing. | *Fixed The Call of the Campfire Pt. 3 not completing. | ||
| − | === October 8 Update (12.30am GMT Server Update)=== | + | === October 8 Update (12.30am GMT Server Update) === |
{{Main|The Simpsons: Tapped Out IRS and Job Manager content update#October 8 Update .2812.30am GMT Server Update.29|l1=The Simpsons: Tapped Out IRS and Job Manager content update#October 8 Update (12.30am GMT Server Update)}} | {{Main|The Simpsons: Tapped Out IRS and Job Manager content update#October 8 Update .2812.30am GMT Server Update.29|l1=The Simpsons: Tapped Out IRS and Job Manager content update#October 8 Update (12.30am GMT Server Update)}} | ||
===October 15 Update ("4_17_HalloweenOfHorror")=== | ===October 15 Update ("4_17_HalloweenOfHorror")=== | ||
| Line 4,139: | Line 4,139: | ||
*The looping campfire upgrade quests no longer require each other to start and now set a value to check what upgrade quest was active last. | *The looping campfire upgrade quests no longer require each other to start and now set a value to check what upgrade quest was active last. | ||
*The crafting cost for Moe's Terror, Kill-E-Mart and Krusty Murder changed from 250 to 500. | *The crafting cost for Moe's Terror, Kill-E-Mart and Krusty Murder changed from 250 to 500. | ||
| − | ===October 21 Update (4.17.2)=== | + | === October 21 Update (4.17.2) === |
*''IRS and Job Manager related changes: ''[[The Simpsons: Tapped Out IRS and Job Manager content update#October 21 Update .284.17.2.29|The Simpsons: Tapped Out IRS and Job Manager content update#October 21 Update (4.17.2)]] | *''IRS and Job Manager related changes: ''[[The Simpsons: Tapped Out IRS and Job Manager content update#October 21 Update .284.17.2.29|The Simpsons: Tapped Out IRS and Job Manager content update#October 21 Update (4.17.2)]] | ||
===October 22 Update 1 ("v4_17_THOH2015_TieIn")=== | ===October 22 Update 1 ("v4_17_THOH2015_TieIn")=== | ||
| Line 4,150: | Line 4,150: | ||
*Squirrel Luann, Fairy Kodos, Acorn Kirk now shows that they require the respective character in the build menu. | *Squirrel Luann, Fairy Kodos, Acorn Kirk now shows that they require the respective character in the build menu. | ||
*Radioactive Milhouse, Saxophone Lisa and Wizard Martin now shows Improved Halloween jobs! in the build menu and now earn premium payout in Send Youngsters to Make S'mores, spawning 4 nightmares instead of 2 and yielding {{XP|60}}. | *Radioactive Milhouse, Saxophone Lisa and Wizard Martin now shows Improved Halloween jobs! in the build menu and now earn premium payout in Send Youngsters to Make S'mores, spawning 4 nightmares instead of 2 and yielding {{XP|60}}. | ||
| − | ===October 22 Update 2 (6.40pm GMT Server Update)=== | + | === October 22 Update 2 (6.40pm GMT Server Update) === |
*''New User Power Up related changes: ''[[The Simpsons: Tapped Out New User Power Ups content update#October 22 Update 2 .286.40pm GMT Server Update.29|The Simpsons: Tapped Out New User Power Ups content update#October 22 Update 2 (6.40pm GMT Server Update)]] | *''New User Power Up related changes: ''[[The Simpsons: Tapped Out New User Power Ups content update#October 22 Update 2 .286.40pm GMT Server Update.29|The Simpsons: Tapped Out New User Power Ups content update#October 22 Update 2 (6.40pm GMT Server Update)]] | ||
===October 23 Update ("4_17_THOH2015_TieIn_Patch1_PostLaunch")=== | ===October 23 Update ("4_17_THOH2015_TieIn_Patch1_PostLaunch")=== | ||
| Line 4,163: | Line 4,163: | ||
*Hunt Nightmares now requires The Blameless City to be started. | *Hunt Nightmares now requires The Blameless City to be started. | ||
*Fixed a glitch not granting Scream-son House. | *Fixed a glitch not granting Scream-son House. | ||
| − | ===November 5 Update (8pm GMT Server Update)=== | + | === November 5 Update (8pm GMT Server Update) === |
*Hunt Nightmares time was halved from 8 hours to 4 hours. | *Hunt Nightmares time was halved from 8 hours to 4 hours. | ||
===November 6 Update ("4_17_HalloweenPromo_Patch2_PostLaunch")=== | ===November 6 Update ("4_17_HalloweenPromo_Patch2_PostLaunch")=== | ||
Revision as of 13:10, August 3, 2021
- This article is about the Tapped Out's Treehouse of Horror content update from 2015. For other year's Tapped Out Treehouse of Horror content updates, see The Simpsons: Tapped Out Treehouse of Horror content updates.
|
|
|


- "Costumes? Check!
Party Snacks? Check!
Spooky Campfire built with Evil Driftwood? Check and Check!
An ancient evil stirs in Springfield and the adults have no idea (about this or anything else).
It's up to the kids to solve this problem (no matter that they may have caused it)!
Play today and fill up your special update treat bag with:
*Spooky Campfire Stories (that come to life)
*Brand new costumes for your favorite characters
*New Daily Challenges
*And much much more!" - ―Event description on the App Store
The Simpsons: Tapped Out Treehouse of Horror 2015 content update is a content update and event which was teased by EA on the game's Facebook page October 2, 2015. It was released October 6, 2015, and is the one hundred and fifth content update. It's the game's fourth Halloween event, after Treehouse of Horror XXIII, Treehouse of Horror XXIV and Treehouse of Horror XXV. It added 5 new characters, 9 new costumes, 5 new buildings, 4 new building skins and 18 new decorations. In the same update, a feature was added but released afterwards: New User Power Ups.
Contents
- 1 Characters
- 2 Buildings
- 3 Decorations
- 4 Consumables
- 5 Items Origins
- 6 Act 1 Gameplay
- 6.1 The Call of the Campfire
- 6.1.1 The Call of the Campfire Pt. 1
- 6.1.2 The Call of the Campfire Pt. 2
- 6.1.3 The Call of the Campfire Pt. 3
- 6.1.4 The Call of the Campfire Pt. 4
- 6.1.5 The Call of the Campfire Pt. 5
- 6.1.6 The Call of the Campfire Pt. 6
- 6.1.7 The Call of the Campfire Pt. 7
- 6.1.8 The Call of the Campfire Pt. 8
- 6.1.9 The Call of the Campfire Pt. 9
- 6.1.10 The Call of the Campfire Pt. 10
- 6.1.11 The Call of the Campfire Pt. 11
- 6.1.12 The Call of the Campfire Pt. 12
- 6.1.13 The Call of the Campfire Pt. 13
- 6.1.14 The Unspeakable
- 6.1 The Call of the Campfire
- 7 Act 2 Gameplay
- 8 Act 3 Gameplay
- 9 Ending Gameplay
- 10 Premium gameplay
- 11 Kang and Kodos Gameplay
- 12 Dates
- 13 Nightmare Spawn and Currency Earning Jobs
- 14 Prizes
- 15 Crafting
- 16 Spooky Campfire Level Up
- 17 Shopkeeper's Challenges
- 18 Daily Play Combo
- 19 Conform-o-meter impact
- 20 Other changes made
- 20.1 October 6 Update (4.17.0 / 4.17.1;"v4_17_THOH2015","4_17_NewUserPowerUpsTHOH2015")
- 20.2 October 7 Update ("4_17_THOH2015_Patch1_PostLaunch")
- 20.3 October 8 Update (12.30am GMT Server Update)
- 20.4 October 15 Update ("4_17_HalloweenOfHorror")
- 20.5 October 16 Update ("v4_17_THOH2015_Patch3_PostLaunch", Server Update)
- 20.6 October 21 Update (4.17.2)
- 20.7 October 22 Update 1 ("v4_17_THOH2015_TieIn")
- 20.8 October 22 Update 2 (6.40pm GMT Server Update)
- 20.9 October 23 Update ("4_17_THOH2015_TieIn_Patch1_PostLaunch")
- 20.10 October 26 Update ("4_17_THOH2015_TieIn_PostLaunch_Patch2")
- 20.11 October 28 Update ("4_17_HalloweenPromo")
- 20.12 October 29 Update ("4_17_HalloweenPromo_Patch1_PostLaunch")
- 20.13 November 5 Update (8pm GMT Server Update)
- 20.14 November 6 Update ("4_17_HalloweenPromo_Patch2_PostLaunch")
- 20.15 November 10 Update ("4_17_GinaMalloy")
- 20.16 November 11 Update ("4_17_GinaMalloy_PostLaunch_Patch1")
- 20.17 November 17 Update (4.17.6,"v4_17_THOH2015_Takedown")
- 21 Sources
Characters
|


Returning
|


Costumes
|


Returning
|


Buildings
|


Skins
|


Returning
|


Decorations
|

|


Returning
|


Consumables
|

 25
25 Items Origins
| ||||||||||||||||||||||||||||||||||||||||||||||||||||||||||||||||||||||||||||||||||||||||||||||||||||||||||||||||||||||||||||||||||||||||||||||||||||||||||||||||||||||||||||||||||||||||
Act 1 Gameplay
The Call of the CampfireThe Call of the Campfire Pt. 1
The Call of the Campfire Pt. 2
The Call of the Campfire Pt. 3
The Call of the Campfire Pt. 4
The Call of the Campfire Pt. 5
The Call of the Campfire Pt. 6
The Call of the Campfire Pt. 7
The Call of the Campfire Pt. 8
The Call of the Campfire Pt. 9
The Call of the Campfire Pt. 10
The Call of the Campfire Pt. 11
The Call of the Campfire Pt. 12
The Call of the Campfire Pt. 13
The Unspeakable
| |||||||||||||||||||||||||||||||||||||||||||||||||||||||||||||||||||||||||||||||||||||||||||||||||||||||||||||||||||||||||||||||||||||||||||||||||||||||||||||||||||||||||||||||||||||||||||||||||||||||||||||||||||||||||||||||||||||||||||||||||||||||||||||||||||||||||||||||||||||||||||||||||||||||||||||||||||||||||||||||||||||||||||||||||||||||||||||||||||||||||||||||||||||||||||||||||||||||||||||||||||||||||||||||||||||||||||||||||||||||||||||||||||||||||||||||||||||||||||||||||||||||||||||||||||||||||||||||||||||||||||||||||||||||||||||||||||||||||||||||||||||||||


Act 2 Gameplay
The Very Young FolkThe Very Young Folk Pt. 1
The Very Young Folk Pt. 2
The Very Young Folk Pt. 3
The Very Young Folk Pt. 4
The Very Young Folk Pt. 5
The Springfield HorrorThe Springfield Horror Pt. 1
The Springfield Horror Pt. 2
The Springfield Horror Pt. 3
The Springfield Horror Pt. 4
| ||||||||||||||||||||||||||||||||||||||||||||||||||||||||||||||||||||||||||||||||||||||||||||||||||||||||||||||||||||||||||||||||||||||||||||||||||||||||||||||||||||||||||||||||||||||||||||||||||||||||||||||||||||||||||||||||||||||

Act 3 Gameplay
The Sandwich Horror
The Blameless City
The Blameless City Pt. 1
The Blameless City Pt. 2
The Blameless City Pt. 3
The Blameless City Pt. 4
The Blameless City Pt. 5
Something Strange in the Neighborhood
| |||||||||||||||||||||||||||||||||||||||||||||||||||||||||||||||||||||||||||||||||||||||||||||||||||||||||||||||||||||||||||||||||||||||||||||||||||||||||||||||||||||||||||||||||||||||||||


Ending Gameplay
Prize Track Completed
Event Ending Reminder
Event Takedown Reminder
| ||||||||||||||||||||||||||||||||||||||||||||||||||||||||||||||||||||||||||


Premium gameplay
The Boy who LARP'd
The Boy who LARP'd Pt. 1
The Boy who LARP'd Pt. 2
The Boy who LARP'd Pt. 3
The Boy who LARP'd Pt. 4
The Boy who LARP'd Pt. 5
| ||||||||||||||||||||||||||||||||||||||||||||||||||||||||||||||||||||||||||||||||||||||||||||||||||||||
The Saxamaphone
The Saxamaphone Pt.1
The Saxamaphone Pt.2
The Saxamaphone Pt.3
The Saxamaphone Pt.4
The Saxamaphone Pt. 5
| |||||||||||||||||||||||||||||||||||||||||||||||||||||||||||||||||||||||||||||||||||||||||||||||||||||||||||||||||||||||
Truth, Justice, and the Milhouse Way
Truth, Justice, and the Milhouse Way Pt. 1
Truth, Justice, and the Milhouse Way Pt. 2
Truth, Justice, and the Milhouse Way Pt. 3
Truth, Justice, and the Milhouse Way Pt. 4
Truth, Justice, and the Milhouse Way Pt. 5
| ||||||||||||||||||||||||||||||||||||||||||||||||||||||||||||||||||||||||||||||||||||||||||||||||||||||||||||||||||||||
Willie's Labyrinth
Willie's Labyrinth Pt. 1
Willie's Labyrinth Pt. 2
Willie's Labyrinth Pt. 3
| |||||||||||||||||||||||||||||||||||||||||||||||||||||||||||||||||||||||||||||||||||||
Under the Tentacles
Under the Tentacles Pt. 1
Under the Tentacles Pt. 2
Under the Tentacles Pt. 3
Under the Tentacles Pt. 4
| |||||||||||||||||||||||||||||||||||||||||||||||||||||||||||||||||||||||||||||||||||||||||||||||||||||||||||||||
Early Squirrel Gets the Nut
Early Squirrel Gets the Nut Pt. 1
Early Squirrel Gets the Nut Pt. 2
Early Squirrel Gets the Nut Pt. 3
Early Squirrel Gets the Nut Pt. 4
Early Squirrel Gets the Nut Pt. 5
| ||||||||||||||||||||||||||||||||||||||||||||||||||||||||||||||||||||||||||||||||||||||||||||||||||||||||||||||||||||||||||||||||||||||||||
Cover Squirrel
Cover Squirrel Pt. 1
Cover Squirrel Pt. 2
Cover Squirrel Pt. 3
Cover Squirrel Pt. 4
Cover Squirrel Pt. 5
| ||||||||||||||||||||||||||||||||||||||||||||||||||||||||||||||||||||||||||||||||||||||||||||||||||||||||||||
What Is Dead May Never Die
| ||
Spawn of the Elder God
| ||
Formless Tappers
| ||
No Bones About It
| ||
Kang and Kodos Gameplay
Midgalaxy Crisis
Midgalaxy Crisis Pt. 1
Midgalaxy Crisis Pt. 2
Midgalaxy Crisis Pt. 3
Midgalaxy Crisis Pt. 4
| |||||||||||||||||||||||||||||||||||||||||||||||||||||||||||||||||||||||||||||||||||||||||||||||||||||||
Where No Probe Has Gone Before
Where No Probe Has Gone Before Pt. 1
Where No Probe Has Gone Before Pt. 2
Where No Probe Has Gone Before Pt. 3
Where No Probe Has Gone Before Pt. 4
Where No Probe Has Gone Before Pt. 5
| ||||||||||||||||||||||||||||||||||||||||||||||||||||||||||||||||||||||||||||||||||||||||||||||||||||||||||||||
Dates
|
Nightmare Spawn and Currency Earning Jobs
All Acts
Items
|
Characters
|
Act 1 and 2
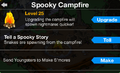
Spooky Campfire Act 1 and 2 Menu
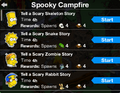
Tell a Scary Story Act 1 Menu
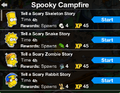
Tell a Scary Story Act 2 Menu
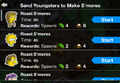
Send Youngsters to Make S'mores Act 1 Menu
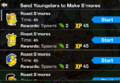
Send Youngsters to Make S'mores Act 2 Menu


Tell a Scary Story
|
Send Youngsters to Make S'mores
|
Act 2

Find Building Screen
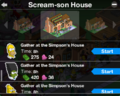
Gather at the Simpson's House Menu
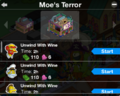
Unwind With Wine Menu
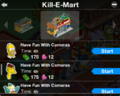
Have Fun With Cameras Menu
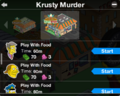
Play With Food Menu


Gather at the Simpson's House
|
Unwind With Wine
|
Have Fun With Cameras
|
Play With Food
|
Characters
|
Act 3
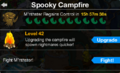
Spooky Campfire Act 3 Menu (Active)

Spooky Campfire Act 3 Menu (Inactive)
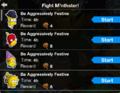
Fight M'nthster Menu
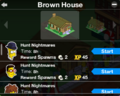
Hunt Nightmares Menu
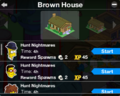
Hunt Nightmares Menu after November 5 Update


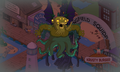
Flying M'nthster

M'nthster at the Spooky Campfire
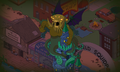
M'nthster at the Sunken Temple

Sunk Temple
Fight M'nthster
|
Hunt Nightmares
|
Defeating M'nthster
|
Characters
|
Prizes
|


| |||||||||||||||||||||||||||||||||||||||||||||||||||||||||

Captain Kang
Captain Kang Pt. 1
Captain Kang Pt. 2
Captain Kang Pt. 3
Captain Kang Pt. 4
| |||||||||||||||||||||||||||||||||||||||||||||||||||||||||||||||||||||||||||||||||||||||||||||||||||
The One that Got Away
| |||||||||||||||||||||||||||||||||||||||||||||||||||||||
Gate to Nowhere
| ||||
The Ultra-Prankster
The Ultra-Prankster Pt. 1
The Ultra-Prankster Pt. 2
The Ultra-Prankster Pt. 3
The Ultra-Prankster Pt. 4
The Ultra-Prankster Pt. 5
The Ultra-Prankster Pt. 6
| |||||||||||||||||||||||||||||||||||||||||||||||||||||||||||||||||||||||||||||||||||||||||||||||||||||||||||||||||||||||||||||||||||
Festiween
Festiween Pt. 1
Festiween Pt. 2
Festiween Pt. 3
Festiween Pt. 4
| |||||||||||||||||||||||||||||||||||||||||||||||||||||||||||||||||||||||||||||||||||||||||||
Lobotomy of Love
Lobotomy of Love Pt. 1
Lobotomy of Love Pt. 2
Lobotomy of Love Pt. 3
| ||||||||||||||||||||||||||||||||||||||||||||||||||||||||||||||||||||||||||||||||||||
Crafting
|

| ||||||||||||||||||||||||||||||||||||||||||||||||||||||||||||||||||
A Proper Rigellian Thanksgiving
Act 1, 2 and 3A Proper Rigellian Thanksgiving Pt. 1
A Proper Rigellian Thanksgiving Pt. 2
A Proper Rigellian Thanksgiving Pt. 3
Act 2 and 3A Proper Rigellian Thanksgiving Pt. 4
A Proper Rigellian Thanksgiving Pt. 5
A Proper Rigellian Thanksgiving Pt. 6
A Proper Rigellian Thanksgiving Pt. 7
Act 3A Proper Rigellian Thanksgiving Pt. 8
A Proper Rigellian Thanksgiving Pt. 9
A Proper Rigellian Thanksgiving Pt. 10
| |||||||||||||||||||||||||||||||||||||||||||||||||||||||||||||||||||||||||
My Brother's Keeper
My Brother's Keeper Pt. 1
My Brother's Keeper Pt. 2
My Brother's Keeper Pt. 3
My Brother's Keeper Pt. 4
My Brother's Keeper Pt. 5
My Brother's Keeper Pt. 6
| |||||||||||||||||||||||||||||||||||||||||||||||||||||||||||||||||||||||||||||||||||||||||||||||||||||||||||||||||||||||||||||||||||||||||||||||||||||||||||||||||||
Spooky Campfire Level Up

|
Every level upgrade, you'll receive a 5% increase to the Nightmares (Act 1 and 2)/Star Spawns (Act 3) spawn rate and a new decoration. After level 41 the rate doesn't increase anymore.
Decorations
|
Getting Wood
Getting Wood Pt. 1
Getting Wood Pt. 2
Getting Wood Pt. 3
Getting Wood Pt. 4
Getting Wood Pt. 5
Getting Wood Pt. 6
| |||||||||||||||||||||||||||||||||||||||
Shopkeeper's Challenges

Shopkeeper's Challenges Guide
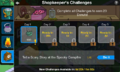
Week 1
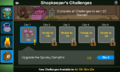
Week 2
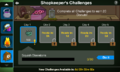
Week 3

Week 4
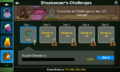
Week 5


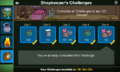
Week 1 Complete
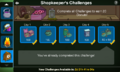
Week 2 Complete
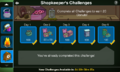
Week 3 Complete
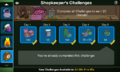
Week 4 Complete
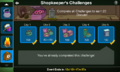
Week 5 Complete


| ||||||||||||||||||||||||||||||||||||||||||||||||||||||||||||||||||||||||||||||||||||||||||||||||||||||||||||||||||||||||||||||||||||||||||||||||||||||||||||||||||||||||||||||||||||
Shopkeeper's Challenges
House of Evil owned
House of Evil not owned
Unreleased
| ||||||||||||||||||||||||||||||||||


Daily Play Combo
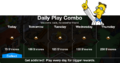
Act 1
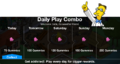
Act 2
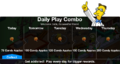
Act 3


Conform-o-meter impact
|
|
Other changes made
October 6 Update (4.17.0 / 4.17.1;"v4_17_THOH2015","4_17_NewUserPowerUpsTHOH2015")
- 4.17.1 (Android, Kindle) / 4.17.0 (iOs)
- "v4_17_THOH2015"
- "4_17_NewUserPowerUpsTHOH2015"
- The app icon, the splash screen and the ambience music were changed to new ones for the event.
- A black aura surrounds the screen.
- A new Leaderboard was added for the event.
- The town landing point was moved to the Spooky Campfire.
- Friend visit's icon was changed to Radioactive Milhouse and Clockwork Bart.
- Monorail Tracks' overlay was changed.
- Kwik-E-Mart, Krusty Burger, Moe's Tavern were added to the Businesses Visitable group.
- Witch Marge cost changed from
 90 to 75.
 - Devil Flanders cost changed from 75 to 120.
- Cauldron cost changed from 75 to 25 and is no longer associated with Witch Marge.
- Flanders The Devil no longer requires "The Black Hole Pt. 4" to be completed, instead requires Level 6 and not having done the quest.
- Bad Dream House questline is restarted for those that already completed it.
- Placing the Victorian UFO now yields
 200, cost changed from 35 to 60.
 - Freakmobile cost changed from 35 to 60.
- Just the Two of Us now requires Kang and Kodos to be active.
- The Day Springfield Stood Still now requires Kodos's Crashed UFO and for Act 1 of the Treehouse of Horror 2015 to be active.
- Portal to Rigel 7 cost changed from 100 to 75.
- Placing Rigellian Queen now yields 100 and costs 100.
- Placing Donut Torture Device now yields 80 and costs 80.
- Placing The Grand Pumpin now yields 60 and costs 60.
- If You Can't Beat 'Em, Hilarium now requires Kang and/or Kodos.
- Tree-hugging decorations, rivers and Springfield Falls changed to Halloween look.
- The unreleased Hide/Show All icon was added, enabling hiding the Hide items list on Edit mode.
- Ninja Homer's Smash Up Flanders House (4h) now yields
 4.
4. - Count Burns's Rest in Peace (24h) now yields
 24.
24. - Mayan Marge's Chant an Ancient Song (8h) now yields
 8.
8. - Shadow Knight Bart's Go on a Killing Spree (12h) now yields
 12.
12. - Pet Cemetery's job changed to Breeding Bunnies and now spawns 10 Bunnies every 10h.
- Mausoleum's job changed to Reviving Skeletons and now spawns 8 Skeletons every 8h.
- Freakmobile's job changed to Resurrecting Zombies and now spawns 12 Disco Zombies every 12h.
- Hollow Snake Trunk now spawns 12 Snakes every 12h.
- The Daily Play Combo was changed to yield event currency.
- New User Power Up related changes: The Simpsons: Tapped Out New User Power Ups content update#October 6 Update (4.17.0 / 4.17.1;"v4_17_THOH2015","4_17_NewUserPowerUpsTHOH2015")
- IRS and Job Manager related changes: The Simpsons: Tapped Out IRS and Job Manager content update#October 21 Update (4.17.2)
October 7 Update ("4_17_THOH2015_Patch1_PostLaunch")
- Fixed The Call of the Campfire Pt. 3 not completing.
October 8 Update (12.30am GMT Server Update)
October 15 Update ("4_17_HalloweenOfHorror")
- The unreleased Official Halloween HQ has been released.
- The Sunken Temple has been changed to a new building with 6 skins depending on the stage.
- The new appearance for the Simpson House that was added in the Level 55 update was released.
- Two new skins, Acorn Kirk and Squirrel Luann, were added to the store for Act 2.
- Holiday Homer was fully programmed.
- Holiday Homer, Acorn Kirk and Squirrel Luann were added to the new characters collection "Treehouse of Horror XXVI Adults".
- Rush Rates for Mechanical Ghost, Clockwork Bart, Apu's Apocalypse Jeep and Holiday Homer were reduced.
- Act 2 and 3 of the event were programmed.
- Week 3, 4 and 5 of the Shopkeeper's Challenges were added.
- The Drive-In Theater and the Space Mutant were added back to the store.
- Bramble Hedge was changed for north-east and southwest directions.
October 16 Update ("v4_17_THOH2015_Patch3_PostLaunch", Server Update)
- The looping campfire upgrade quests no longer require each other to start and now set a value to check what upgrade quest was active last.
- The crafting cost for Moe's Terror, Kill-E-Mart and Krusty Murder changed from 250 to 500.
October 21 Update (4.17.2)
- IRS and Job Manager related changes: The Simpsons: Tapped Out IRS and Job Manager content update#October 21 Update (4.17.2)
October 22 Update 1 ("v4_17_THOH2015_TieIn")
- If Sideshow Bob has not been unlocked, and Bob's Victorian House is bought, his spawn chance is raised by 10%.
- Ghost Pirate Airship was added back to the store.
- Formless Terrors touch priority was lowered from 100 to 8.
- Spawning Formless Terrors in other towns now doesn't pan the camera to the spawn point.
- Bart's Tell a Scary Story doesn't yield Gummies anymore.
- Ancient Ruins will return to the store from November 10 at 8am GMT to November 17th at 8am GMT.
- Squirrel Luann, Fairy Kodos, Acorn Kirk now shows that they require the respective character in the build menu.
- Radioactive Milhouse, Saxophone Lisa and Wizard Martin now shows Improved Halloween jobs! in the build menu and now earn premium payout in Send Youngsters to Make S'mores, spawning 4 nightmares instead of 2 and yielding 60.
October 22 Update 2 (6.40pm GMT Server Update)
- New User Power Up related changes: The Simpsons: Tapped Out New User Power Ups content update#October 22 Update 2 (6.40pm GMT Server Update)
October 23 Update ("4_17_THOH2015_TieIn_Patch1_PostLaunch")
- The event store panel was changed from the Three Panel to One Panel.
October 26 Update ("4_17_THOH2015_TieIn_PostLaunch_Patch2")
- Shopkeeper's Week 3 1st Challenge now correctly states "Squish Skeletons" instead of "Squish Bunnies".
- If the user haven't completed The Call of the Campfire Pt. 13 (if act 2 isn't started), Shopkeeper's Week 3 5th Challenge will correctly say "You're falling behind! Complete "The Call of the Campfire Pt. 13" in order to do this challenge!" instead of "You're falling behind! Complete "The Very Young Folk Pt. 5" in order to do this challenge!" (the message it'd say if act 3 isn't started).
October 28 Update ("4_17_HalloweenPromo")
October 29 Update ("4_17_HalloweenPromo_Patch1_PostLaunch")
- Spooky Campfire jobs "Tell a Scary Story" and "Roast S'mores" are now active in Act 3 too, till The Blameless City Pt. 1 is started.
- Hunt Nightmares now requires The Blameless City to be started.
- Fixed a glitch not granting Scream-son House.
November 5 Update (8pm GMT Server Update)
- Hunt Nightmares time was halved from 8 hours to 4 hours.
November 6 Update ("4_17_HalloweenPromo_Patch2_PostLaunch")
- After defeating M'nthster at the Spooky Campfire, the game detects that he's been defeated there, setting a variable, probably fixing a glitch preventing kids from hunting nightmares.
November 10 Update ("4_17_GinaMalloy")
November 11 Update ("4_17_GinaMalloy_PostLaunch_Patch1")
- The game now spawns the correct nightmares, fixing a glitch that spawned the incorrect ones once released.
November 17 Update (4.17.6,"v4_17_THOH2015_Takedown")
- The app icon, splash screen, friend visit's icon and ambience music were changed back to non-event ones.
- The black aura surrounding the screen was removed.
- Event's Leaderboard was removed.
- The town landing point was restored to town center.
- Fairy Kodos' Secrete Glitter Onto Magic Wand was changed to Secret Glitter Onto Magic Wand.
- Bad Dream House, It Blows and Elf Home were added to the buildings group Pays Taxes.
- The raised chance of Sideshow Bob spawning is now linked to having the Bob's Victorian House instead of having purchased it.
- Tell a Scary Story is now permanent at the Spooky Campfire and yields 175$ and 45 XP.
- Read from the Necronomicon at the Sepulcher of Evil doesn't spawn any more nightmares.
- Higher Class of Politics Pt. 3 now requires reward to be collected to continue the dialogue.
- Pet Disco Zombie, Formless Terror and Star Spawn were added to the shop till November 25 at 8am GMT and in a new character collection was added: "Treehouse of Horror XXVI Nightmares". Pet Skeleton is unreleased.
- Spooky Campfire can now be stored but can't be leveled up anymore, instead it shows the reached level.
- Sunken Temple can now be stored and now when tapped it makes M'nthster appear and disappear with a water pillar.
- My Brother's Keeper doesn't require A Proper Rigellian Thanksgiving Pt. 3 to be completed.
- Fixed a possible bug in Fission Impossible Pt. 3.
- Squirrel Luann's Show Off Her Squirrel Costume is now permanent and premium.
- Early Squirrel Gets The Nut Pt. 2 now doesn't require Luann anymore if the user haven't got her unlocked, instead having Kirk Painfully Get His Costume Glued to His Groin.
- The Impossible Tower can't be placed on Krustyland anymore.
- Midgalaxy Crisis doesn't require A Proper Rigellian Thanksgiving Pt. 1 to be completed anymore.
- Pet Cemetery, Mausoleum, Freakmobile and Hollow Snake Trunk's nightmare spawning jobs were removed.
- Adult jobs at Scream-son House, Kill-E-Mart, Krusty Murder and Moe's Tavern and kid jobs at Brown House were removed.
- Tell a Scary Story now rewards
 90 and 10.
 - Gate to Nowhere's job Breaching Reality now yields 300 and 30 every 24 hours.
- The glitch that allowed some items (like The Impossible Tower) to be placable on the Ocean and on Roads has been fixed.
- Apu's Set Up the Halloween Display is now active till the Treehouse of Horror 2015's quest kill date, November 27, along the other jobs from Halloween of Horror tie-in.
- Clockwork Bart, Wizard Martin, Saxophone Lisa, Fairy Kodos and Pirate Kang's jobs were changed and the temp ones are now permanent:
|
- Clockwork Bart, Wizard Martin, Saxophone Lisa, Fairy Kodos, Pirate Kang, Kang and Kodos have new jobs:
|
Sources
 Overview at Tapped Out - Update Information
 The Simpsons: Tapped Out Official Facebook Page on Facebook