

Difference between revisions of "The Simpsons: Tapped Out Treehouse of Horror 2015 content update"
m (replaced: Space Mutant → {{Chs|Space Mutants}}, Rigellian Queen → {{ap|Rigellian queen|The Man Who Came to Be Dinner}}) |
m (→Returning: replaced: Bad Dream House → {{Bad Dream House}}) |
||
| (3 intermediate revisions by the same user not shown) | |||
| Line 5: | Line 5: | ||
{{quote|Costumes? Check!<br>Party Snacks? Check!<br>Spooky Campfire built with Evil Driftwood? Check and Check!<br><br>An ancient evil stirs in Springfield and the adults have no idea (about this or anything else).<br>It's up to the kids to solve this problem (no matter that they may have caused it)!<br>Play today and fill up your special update treat bag with:<br>*Spooky Campfire Stories (that come to life)<br>*Brand new costumes for your favorite characters<br>*New Daily Challenges<br>*And much much more!|Event description on the App Store}} | {{quote|Costumes? Check!<br>Party Snacks? Check!<br>Spooky Campfire built with Evil Driftwood? Check and Check!<br><br>An ancient evil stirs in Springfield and the adults have no idea (about this or anything else).<br>It's up to the kids to solve this problem (no matter that they may have caused it)!<br>Play today and fill up your special update treat bag with:<br>*Spooky Campfire Stories (that come to life)<br>*Brand new costumes for your favorite characters<br>*New Daily Challenges<br>*And much much more!|Event description on the App Store}} | ||
'''''[[The Simpsons: Tapped Out]]'' Treehouse of Horror 2015 content update''' is a content update and event which was teased by EA on the game's Facebook page October 2, 2015. It was released October 6, 2015, and is the one hundred and fifth content update. It's the game's fourth [[Halloween]] event, after {{TOCU|Treehouse of Horror XXIII}}, {{TOCU|Treehouse of Horror XXIV}} and {{TOCU|Treehouse of Horror XXV}}. It added 5 new characters, 9 new costumes, 5 new buildings, 4 new building skins and 18 new decorations. In the same update, a feature was added but released afterwards: {{TOCU|New User Power Ups}}. | '''''[[The Simpsons: Tapped Out]]'' Treehouse of Horror 2015 content update''' is a content update and event which was teased by EA on the game's Facebook page October 2, 2015. It was released October 6, 2015, and is the one hundred and fifth content update. It's the game's fourth [[Halloween]] event, after {{TOCU|Treehouse of Horror XXIII}}, {{TOCU|Treehouse of Horror XXIV}} and {{TOCU|Treehouse of Horror XXV}}. It added 5 new characters, 9 new costumes, 5 new buildings, 4 new building skins and 18 new decorations. In the same update, a feature was added but released afterwards: {{TOCU|New User Power Ups}}. | ||
| − | ==Characters== | + | == Characters == |
{{Table| | {{Table| | ||
{{THT|Image|width=250px}} | {{THT|Image|width=250px}} | ||
| Line 37: | Line 37: | ||
}} | }} | ||
| − | ===Returning=== | + | === Returning === |
{{Table| | {{Table| | ||
{{THT|Image|width=250px}} | {{THT|Image|width=250px}} | ||
| Line 75: | Line 75: | ||
{{TB|Available from October 20th at 8am GMT to November 27th at 8am GMT.<br>Returns from {{TOCU|Treehouse of Horror XXIII}}, {{TOCU|Treehouse of Horror XXIV}}<br>and {{TOCU|Treehouse of Horror XXV}}.}} | {{TB|Available from October 20th at 8am GMT to November 27th at 8am GMT.<br>Returns from {{TOCU|Treehouse of Horror XXIII}}, {{TOCU|Treehouse of Horror XXIV}}<br>and {{TOCU|Treehouse of Horror XXV}}.}} | ||
}} | }} | ||
| − | ===Costumes=== | + | === Costumes === |
{{Table| | {{Table| | ||
{{THT|Image|width=250px}} | {{THT|Image|width=250px}} | ||
| Line 128: | Line 128: | ||
}} | }} | ||
| − | ====Returning==== | + | ==== Returning ==== |
{{Table| | {{Table| | ||
{{THT|Image|width=250px}} | {{THT|Image|width=250px}} | ||
| Line 188: | Line 188: | ||
{{TB|Unlocked upon starting The Very Young Folk Pt. 5.}} | {{TB|Unlocked upon starting The Very Young Folk Pt. 5.}} | ||
}} | }} | ||
| − | ===Skins=== | + | === Skins === |
{{Table| | {{Table| | ||
{{TH|Image|width=125px}} | {{TH|Image|width=125px}} | ||
| Line 215: | Line 215: | ||
}} | }} | ||
| − | ===Returning=== | + | === Returning === |
{{Table| | {{Table| | ||
{{TH|Image|width=125px}} | {{TH|Image|width=125px}} | ||
| Line 251: | Line 251: | ||
{{TB|Reviving Skeletons (Event)<br>Incubating Premium Zombies (Non event)}} | {{TB|Reviving Skeletons (Event)<br>Incubating Premium Zombies (Non event)}} | ||
{{TBT|[[File:Bad Dream House Tapped Out.png|100px]]}} | {{TBT|[[File:Bad Dream House Tapped Out.png|100px]]}} | ||
| − | {{TB| | + | {{TB|{{Bad Dream House}}}} |
{{TB|{{Donut|85}}}} | {{TB|{{Donut|85}}}} | ||
{{TB|Scaring Unsuspecting Guests}} | {{TB|Scaring Unsuspecting Guests}} | ||
| Line 353: | Line 353: | ||
}} | }} | ||
| − | ===Returning=== | + | === Returning === |
{{Table| | {{Table| | ||
{{TH|Image|width=125px}} | {{TH|Image|width=125px}} | ||
| Line 410: | Line 410: | ||
}} | }} | ||
| − | ==Consumables== | + | == Consumables == |
{{Table| | {{Table| | ||
{{TH|Image|width=125px}} | {{TH|Image|width=125px}} | ||
| Line 419: | Line 419: | ||
{{TB|{{Donut|10}}}} | {{TB|{{Donut|10}}}} | ||
}} | }} | ||
| − | ==Items Origins== | + | == Items Origins == |
{{CollapsibleSection|To view the event's and tie-ins' items origins, click "show":| | {{CollapsibleSection|To view the event's and tie-ins' items origins, click "show":| | ||
{{Table| | {{Table| | ||
| Line 427: | Line 427: | ||
{{THT|CHARACTERS|colspan=3}} | {{THT|CHARACTERS|colspan=3}} | ||
{{TBT|M'nthster (as [[Cthulhu]])}} | {{TBT|M'nthster (as [[Cthulhu]])}} | ||
| − | {{TB|[[Treehouse of Horror XXIV]]<br>[[Diggs]]<br>[[Halloween of Horror]]<br>[[The Great Phatsby: Part Two]]<br>[[Treehouse of Horror XXIX]]}} | + | {{TB|"[[Treehouse of Horror XXIV]]"<br>"[[Diggs]]"<br>"[[Halloween of Horror]]"<br>"[[The Great Phatsby: Part Two]]"<br>"[[Treehouse of Horror XXIX]]"}} |
{{TB|Opening sequence<br>Name seen<br>Man dressed as him<br>Mentioned<br>Unknown}} | {{TB|Opening sequence<br>Name seen<br>Man dressed as him<br>Mentioned<br>Unknown}} | ||
{{TBT|Model Donut}} | {{TBT|Model Donut}} | ||
| − | {{TB|[[Treehouse of Horror IV]]}} | + | {{TB|"[[Treehouse of Horror IV]]"}} |
{{TB|Opening of The Devil and Homer Simpson}} | {{TB|Opening of The Devil and Homer Simpson}} | ||
{{TBT|Kang}} | {{TBT|Kang}} | ||
| Line 437: | Line 437: | ||
{{TBT|Kodos}} | {{TBT|Kodos}} | ||
{{TBT|Hugo}} | {{TBT|Hugo}} | ||
| − | {{TB|[[Treehouse of Horror VII]]}} | + | {{TB|"[[Treehouse of Horror VII]]"}} |
{{TB|The Thing and I}} | {{TB|The Thing and I}} | ||
{{TBT|The Raven}} | {{TBT|The Raven}} | ||
| − | {{TB|[[Treehouse of Horror]]}} | + | {{TB|"[[Treehouse of Horror]]"}} |
{{TB|The Raven}} | {{TB|The Raven}} | ||
{{TBT|Talking Krusty Doll}} | {{TBT|Talking Krusty Doll}} | ||
| − | {{TB|[[Treehouse of Horror III]]}} | + | {{TB|"[[Treehouse of Horror III]]"}} |
{{TB|Clown Without Pity}} | {{TB|Clown Without Pity}} | ||
{{TBT|Space Mutant}} | {{TBT|Space Mutant}} | ||
| − | {{TB|[[Scary Movie]]<br>[[The Telltale Head]]<br>[[Principal Charming]]<br>[[Colonel Homer]], [[Bart's Friend Falls in Love]]<br>[[Homer's Triple Bypass]]<br>[[Postcards from the Wedge]] (merchandise)}} | + | {{TB|[[Scary Movie]]<br>"[[The Telltale Head]]"<br>"[[Principal Charming]]"<br>"[[Colonel Homer]]", "[[Bart's Friend Falls in Love]]"<br>"[[Homer's Triple Bypass]]"<br>"[[Postcards from the Wedge]]" (merchandise)}} |
{{TB|}} | {{TB|}} | ||
{{THT|COSTUMES|colspan=3}} | {{THT|COSTUMES|colspan=3}} | ||
{{TBT|Fairy Kodos}} | {{TBT|Fairy Kodos}} | ||
| − | {{TRs|[[Treehouse of Horror XXIII]]<br>[[Blazed and Confused]]|2}} | + | {{TRs|"[[Treehouse of Horror XXIII]]"<br>"[[Blazed and Confused]]"|2}} |
{{TRs|Hit by the Mayan Gods<br>Opening sequence|2}} | {{TRs|Hit by the Mayan Gods<br>Opening sequence|2}} | ||
{{TBT|Pirate Kang}} | {{TBT|Pirate Kang}} | ||
{{TBT|Radioactive Milhouse}} | {{TBT|Radioactive Milhouse}} | ||
| − | {{TRs|[[Treehouse of Horror III]]|2}} | + | {{TRs|"[[Treehouse of Horror III]]"|2}} |
{{TRs|In the wrapround in Simpson House|2}} | {{TRs|In the wrapround in Simpson House|2}} | ||
{{TBT|Clockwork Bart}} | {{TBT|Clockwork Bart}} | ||
{{TBT|Saxophone Lisa}} | {{TBT|Saxophone Lisa}} | ||
| − | {{TB|[[Treehouse of Horror XXII]]}} | + | {{TB|"[[Treehouse of Horror XXII]]"}} |
{{TB|Opening and Closing sequence}} | {{TB|Opening and Closing sequence}} | ||
{{TBT|Wizard Martin}} | {{TBT|Wizard Martin}} | ||
| − | {{TB|[[Treehouse of Horror VI]]}} | + | {{TB|"[[Treehouse of Horror VI]]"}} |
{{TB|Nightmare on Evergreen Terrace}} | {{TB|Nightmare on Evergreen Terrace}} | ||
{{TBT|Devil Flanders}} | {{TBT|Devil Flanders}} | ||
| − | {{TB|[[Treehouse of Horror IV]]<br>[[Treehouse of Horror XVIII]]<br>[[Treehouse of Horror XXV]]<br>[[The Simpsons 138th Episode Spectacular]]}} | + | {{TB|"[[Treehouse of Horror IV]]"<br>"[[Treehouse of Horror XVIII]]"<br>"[[Treehouse of Horror XXV]]"<br>"[[The Simpsons 138th Episode Spectacular]]"}} |
{{TB|The Devil and Homer Simpson<br>Heck House<br>Opening sequence<br>-}} | {{TB|The Devil and Homer Simpson<br>Heck House<br>Opening sequence<br>-}} | ||
{{TBT|Marge the Witch}} | {{TBT|Marge the Witch}} | ||
| − | {{TB|[[Treehouse of Horror VIII]]}} | + | {{TB|"[[Treehouse of Horror VIII]]"}} |
{{TB|Easy-Bake Coven}} | {{TB|Easy-Bake Coven}} | ||
{{TBT|Holiday Homer}} | {{TBT|Holiday Homer}} | ||
| − | {{TRs|[[Halloween of Horror]]|3}} | + | {{TRs|"[[Halloween of Horror]]"|3}} |
{{TB|It's Homer dressed with the items in the attic}} | {{TB|It's Homer dressed with the items in the attic}} | ||
{{TBT|Acorn Kirk}} | {{TBT|Acorn Kirk}} | ||
| Line 477: | Line 477: | ||
{{THT|BUILDINGS|colspan=3}} | {{THT|BUILDINGS|colspan=3}} | ||
{{TBT|Spooky Campfire}} | {{TBT|Spooky Campfire}} | ||
| − | {{TB|[[Boy-Scoutz 'n the Hood]]}} | + | {{TB|"[[Boy-Scoutz 'n the Hood]]"}} |
{{TB|}} | {{TB|}} | ||
{{TBT|Re-Neducation Center}} | {{TBT|Re-Neducation Center}} | ||
| − | {{TB|[[Treehouse of Horror V]]}} | + | {{TB|"[[Treehouse of Horror V]]"}} |
{{TB|Time and Punisment}} | {{TB|Time and Punisment}} | ||
{{TBT|House of Evil}} | {{TBT|House of Evil}} | ||
| − | {{TB|[[Treehouse of Horror III]]}} | + | {{TB|"[[Treehouse of Horror III]]"}} |
{{TB|Clown Without Pity}} | {{TB|Clown Without Pity}} | ||
{{TBT|Portal to Rigel 7}} | {{TBT|Portal to Rigel 7}} | ||
| Line 489: | Line 489: | ||
{{TB|[[Rigel 7]] is the birth planet of Kang and Kodos}} | {{TB|[[Rigel 7]] is the birth planet of Kang and Kodos}} | ||
{{TBT|Pet Cemetery}} | {{TBT|Pet Cemetery}} | ||
| − | {{TRs|[[Treehouse of Horror III]]|3}} | + | {{TRs|"[[Treehouse of Horror III]]"|3}} |
{{TRs|Dial "Z" for Zombies|3}} | {{TRs|Dial "Z" for Zombies|3}} | ||
{{TBT|Mausoleum}} | {{TBT|Mausoleum}} | ||
{{TBT|Disco Zombie}} | {{TBT|Disco Zombie}} | ||
{{TBT|Bad Dream House}} | {{TBT|Bad Dream House}} | ||
| − | {{TB|[[Treehouse of Horror]]}} | + | {{TB|"[[Treehouse of Horror]]"}} |
{{TB|Bad Dream House}} | {{TB|Bad Dream House}} | ||
{{TBT|Official Halloween HQ}} | {{TBT|Official Halloween HQ}} | ||
| − | {{TB|[[Halloween of Horror]]}} | + | {{TB|"[[Halloween of Horror]]"}} |
{{TB|}} | {{TB|}} | ||
{{TBT|Bob's Victorian House}} | {{TBT|Bob's Victorian House}} | ||
| − | {{TB|[[Treehouse of Horror XXVI]]}} | + | {{TB|"[[Treehouse of Horror XXVI]]"}} |
{{TB|Wanted: Dead, Then Alive}} | {{TB|Wanted: Dead, Then Alive}} | ||
{{TBT|Drive-In Theater}} | {{TBT|Drive-In Theater}} | ||
| − | {{TB|[[Lisa the Vegetarian]]<br>[[Dumbbell Indemnity]]<br>[[Wild Barts Can't Be Broken]]<br>[[The Old Man and the Key]]}} | + | {{TB|"[[Lisa the Vegetarian]]"<br>"[[Dumbbell Indemnity]]"<br>"[[Wild Barts Can't Be Broken]]"<br>"[[The Old Man and the Key]]"}} |
{{TB|}} | {{TB|}} | ||
{{THT|BUILDINGS' SKINS|colspan=3}} | {{THT|BUILDINGS' SKINS|colspan=3}} | ||
{{TBT|Heck House}} | {{TBT|Heck House}} | ||
| − | {{TB|[[Treehouse of Horror XVIII]]}} | + | {{TB|"[[Treehouse of Horror XVIII]]"}} |
{{TB|Heck House}} | {{TB|Heck House}} | ||
{{TBT|Everscream Terrors}} | {{TBT|Everscream Terrors}} | ||
| − | {{TB|[[Halloween of Horror]]}} | + | {{TB|"[[Halloween of Horror]]"}} |
{{TB|}} | {{TB|}} | ||
{{THT|DECORATIONS|colspan=3}} | {{THT|DECORATIONS|colspan=3}} | ||
{{TBT|The Shinning Maze}} | {{TBT|The Shinning Maze}} | ||
| − | {{TB|[[Treehouse of Horror V]]}} | + | {{TB|"[[Treehouse of Horror V]]"}} |
{{TB|The Shinning}} | {{TB|The Shinning}} | ||
{{TBT|Spooky Grove}} | {{TBT|Spooky Grove}} | ||
| − | {{TB|[[Boy-Scoutz 'n the Hood]]}} | + | {{TB|"[[Boy-Scoutz 'n the Hood]]"}} |
{{TB|}} | {{TB|}} | ||
{{TBT|Biohazard Wall}} | {{TBT|Biohazard Wall}} | ||
| − | {{TRs|[[Treehouse of Horror XX]]|3}} | + | {{TRs|"[[Treehouse of Horror XX]]"|3}} |
{{TRs|Don't Have a Cow, Mankind|3}} | {{TRs|Don't Have a Cow, Mankind|3}} | ||
{{TBT|Biohazard Tower}} | {{TBT|Biohazard Tower}} | ||
{{TBT|Apu's Apocalypse Jeep}} | {{TBT|Apu's Apocalypse Jeep}} | ||
{{TBT|U.F.P.}} | {{TBT|U.F.P.}} | ||
| − | {{TB|[[Treehouse of Horror X]]}} | + | {{TB|"[[Treehouse of Horror X]]"}} |
{{TB|Opening sequence}} | {{TB|Opening sequence}} | ||
{{TBT|Wailing Wall}} | {{TBT|Wailing Wall}} | ||
| − | {{TRs|[[Treehouse of Horror XII]]|2}} | + | {{TRs|"[[Treehouse of Horror XII]]"|2}} |
{{TRs|Wiz Kids|2}} | {{TRs|Wiz Kids|2}} | ||
{{TBT|Spooky Wall}} | {{TBT|Spooky Wall}} | ||
{{TBT|Jack-o-Lantern}} | {{TBT|Jack-o-Lantern}} | ||
| − | {{TRs|[[Treehouse of Horror XIX]]|2}} | + | {{TRs|"[[Treehouse of Horror XIX]]"|2}} |
{{TRs|It's the Grand Pumpkin, Milhouse|2}} | {{TRs|It's the Grand Pumpkin, Milhouse|2}} | ||
{{TBT|The Grand Pumpkin}} | {{TBT|The Grand Pumpkin}} | ||
| Line 540: | Line 540: | ||
{{TBT|Dead Tree}} | {{TBT|Dead Tree}} | ||
{{TBT|Donut Torture Device}} | {{TBT|Donut Torture Device}} | ||
| − | {{TB|[[Treehouse of Horror IV]]}} | + | {{TB|"[[Treehouse of Horror IV]]"}} |
{{TB|The Devil and Homer Simpson}} | {{TB|The Devil and Homer Simpson}} | ||
{{TBT|Hollow Snake Trunk}} | {{TBT|Hollow Snake Trunk}} | ||
| − | {{TB|[[Whacking Day]]}} | + | {{TB|"[[Whacking Day]]"}} |
{{TB|}} | {{TB|}} | ||
{{TBT|Victorian UFO}} | {{TBT|Victorian UFO}} | ||
| − | {{TB|[[Treehouse of Horror XV]]}} | + | {{TB|"[[Treehouse of Horror XV]]"}} |
{{TB|Four Beheadings and a Funeral}} | {{TB|Four Beheadings and a Funeral}} | ||
{{TBT|Cauldron}} | {{TBT|Cauldron}} | ||
| − | {{TRs|[[Treehouse of Horror VIII]]|2}} | + | {{TRs|"[[Treehouse of Horror VIII]]"|2}} |
{{TB|Easy-Bake Coven}} | {{TB|Easy-Bake Coven}} | ||
{{TBT|Freakmobile}} | {{TBT|Freakmobile}} | ||
{{TB|The HΩmega Man}} | {{TB|The HΩmega Man}} | ||
{{TBT|Rigellian Queen}} | {{TBT|Rigellian Queen}} | ||
| − | {{TB|[[The Man Who Came to Be Dinner]]}} | + | {{TB|"[[The Man Who Came to Be Dinner]]"}} |
{{TB|}} | {{TB|}} | ||
{{TBT|Halloween Balloons}} | {{TBT|Halloween Balloons}} | ||
| − | {{TB|[[Halloween of Horror]]}} | + | {{TB|"[[Halloween of Horror]]"}} |
{{TB|}} | {{TB|}} | ||
{{TBT|Ancient Ornamental Pond}} | {{TBT|Ancient Ornamental Pond}} | ||
| − | {{TB|[[Treehouse of Horror XXVI]]}} | + | {{TB|"[[Treehouse of Horror XXVI]]"}} |
{{TB|Homerzilla}} | {{TB|Homerzilla}} | ||
{{TBT|Spooky Tent}} | {{TBT|Spooky Tent}} | ||
| − | {{TB|[[Bart of Darkness]]<br>[[Grampa vs. Sexual Inadequacy]]}} | + | {{TB|"[[Bart of Darkness]]"<br>"[[Grampa vs. Sexual Inadequacy]]"}} |
{{TB|}} | {{TB|}} | ||
{{THT|UNRELEASED DECORATIONS|colspan=3}} | {{THT|UNRELEASED DECORATIONS|colspan=3}} | ||
{{TBT|Operation Exodus Rocket}} | {{TBT|Operation Exodus Rocket}} | ||
| − | {{TB|[[Treehouse of Horror X]]}} | + | {{TB|"[[Treehouse of Horror X]]"}} |
{{TB|Life's a Glitch, Then You Die}} | {{TB|Life's a Glitch, Then You Die}} | ||
}} | }} | ||
| Line 588: | Line 588: | ||
}} | }} | ||
| − | ==Act 1 Gameplay== | + | == Act 1 Gameplay == |
{{CollapsibleSection|To view Act 1's questline, click "show":| | {{CollapsibleSection|To view Act 1's questline, click "show":| | ||
| − | ===The Call of the Campfire=== | + | === The Call of the Campfire === |
| − | ====The Call of the Campfire Pt. 1==== | + | ==== The Call of the Campfire Pt. 1 ==== |
{{Table| | {{Table| | ||
{{THT|After the user logs in:|colspan=2}} | {{THT|After the user logs in:|colspan=2}} | ||
| Line 616: | Line 616: | ||
{{Tapped Out Homer Icon}} | {{Tapped Out Homer Icon}} | ||
{{TB|Lots of them.}} | {{TB|Lots of them.}} | ||
| − | {{THT|'''Task''' | + | {{THT|'''Task:''' Make Lisa do Babyish Busy Work (6s, Simpson Home)<br>If the user has Bart: '''Task:''' Make Bart do Babyish Busy Work (6s, Simpson Home)<br>On job start:|colspan=2}} |
{{Tapped Out Lisa Icon}} | {{Tapped Out Lisa Icon}} | ||
{{TB|It's so demeaning! Sending us off to make crafts just to get us out of the way.}} | {{TB|It's so demeaning! Sending us off to make crafts just to get us out of the way.}} | ||
| Line 638: | Line 638: | ||
{{THT|Quest reward: {{Cash|100}} and {{XP|10}}|colspan=2}} | {{THT|Quest reward: {{Cash|100}} and {{XP|10}}|colspan=2}} | ||
}} | }} | ||
| − | ====The Call of the Campfire Pt. 2==== | + | ==== The Call of the Campfire Pt. 2 ==== |
{{Table| | {{Table| | ||
{{THT|After tapping on Lisa's exclamation mark:|colspan=2}} | {{THT|After tapping on Lisa's exclamation mark:|colspan=2}} | ||
| Line 665: | Line 665: | ||
{{Tapped Out Lisa Icon}} | {{Tapped Out Lisa Icon}} | ||
{{TB|Let's just pick up more old wood near the water.}} | {{TB|Let's just pick up more old wood near the water.}} | ||
| − | {{THT|If the user doesn't have a beach unlocked: '''Task''' | + | {{THT|If the user doesn't have a beach unlocked: '''Task:''' Place River<br>If the user doesn't have Bart: '''Task:''' Make Lisa Collect Mysterious Driftwood (1m, River or Beach)<br>If the user has Bart: '''Task:''' Make Lisa and Bart Collect Mysterious Driftwood (1m, River or Beach, Bart)|colspan=2}} |
{{Tapped Out Lisa Icon}} | {{Tapped Out Lisa Icon}} | ||
{{TB|This wood feels odd.}} | {{TB|This wood feels odd.}} | ||
| Line 678: | Line 678: | ||
{{THT|Quest reward: {{Cash|100}} and {{XP|10}}|colspan=2}} | {{THT|Quest reward: {{Cash|100}} and {{XP|10}}|colspan=2}} | ||
}} | }} | ||
| − | ====The Call of the Campfire Pt. 3==== | + | ==== The Call of the Campfire Pt. 3 ==== |
{{Table| | {{Table| | ||
{{THT|After tapping on Lisa's exclamation mark:|colspan=2}} | {{THT|After tapping on Lisa's exclamation mark:|colspan=2}} | ||
| Line 711: | Line 711: | ||
{{Tapped Out Bart Icon}} | {{Tapped Out Bart Icon}} | ||
{{TB|Creepy is exactly what we want!}} | {{TB|Creepy is exactly what we want!}} | ||
| − | {{THT|'''Task''' | + | {{THT|'''Task:''' Build Spooky Campfire<br>'''Task:''' Reach Level 12 and Build Bart's Treehouse<br>'''Task:''' Make Bart Tell a Scary Story (4h, Spooky Campfire)<br>'''Task:''' Make Youngsters Gather Around the Spooky Campfire [x4] (1m, Spooky Campfire)|colspan=2}} |
{{Tapped Out Bart Icon}} | {{Tapped Out Bart Icon}} | ||
{{TB|Hoo-kay, for my spooky story I'd like to read off this scroll that Lisa's so scared of...}} | {{TB|Hoo-kay, for my spooky story I'd like to read off this scroll that Lisa's so scared of...}} | ||
| Line 772: | Line 772: | ||
{{THT|Quest reward: {{Cash|100}} and {{XP|10}}|colspan=2}} | {{THT|Quest reward: {{Cash|100}} and {{XP|10}}|colspan=2}} | ||
}} | }} | ||
| − | ====The Call of the Campfire Pt. 4==== | + | ==== The Call of the Campfire Pt. 4 ==== |
{{Table| | {{Table| | ||
{{THT|After tapping on Bart's exclamation mark:|colspan=2}} | {{THT|After tapping on Bart's exclamation mark:|colspan=2}} | ||
| Line 797: | Line 797: | ||
{{Tapped Out Bart Icon}} | {{Tapped Out Bart Icon}} | ||
{{TB|If I saw what you see in the mirror, I'd be scared too.}} | {{TB|If I saw what you see in the mirror, I'd be scared too.}} | ||
| − | {{THT|'''Task''' | + | {{THT|'''Task:''' Build the Springfield Library<br>'''Task:''' Make Martin Tell a Scary Story (4h, Spooky Campfire)|colspan=2}} |
{{Tapped Out Wizard Martin Icon}} | {{Tapped Out Wizard Martin Icon}} | ||
{{TB|A young woman visited her blind grandfather who had moved into a new apartment.}} | {{TB|A young woman visited her blind grandfather who had moved into a new apartment.}} | ||
| Line 836: | Line 836: | ||
{{THT|[[File:Zombies Spawning.png|300px]][[File:HW2015 Act 1 Event Guide.png|300px]]<br>Quest reward: {{Cash|100}} and {{SmoreS|100}}|colspan=2}} | {{THT|[[File:Zombies Spawning.png|300px]][[File:HW2015 Act 1 Event Guide.png|300px]]<br>Quest reward: {{Cash|100}} and {{SmoreS|100}}|colspan=2}} | ||
}} | }} | ||
| − | ====The Call of the Campfire Pt. 5==== | + | ==== The Call of the Campfire Pt. 5 ==== |
{{Table| | {{Table| | ||
{{THT|After tapping on Bart's exclamation mark:|colspan=2}} | {{THT|After tapping on Bart's exclamation mark:|colspan=2}} | ||
| Line 863: | Line 863: | ||
{{Tapped Out Lisa Icon}} | {{Tapped Out Lisa Icon}} | ||
{{TB|S'mores.}} | {{TB|S'mores.}} | ||
| − | {{THT|'''Task''' | + | {{THT|'''Task:''' Send Kids on S'mores Jobs to Spawn Zombies [x2] (4h, Spooky Campfire)<br>'''Task:''' Collect Event Currency to Unlock 1st Prize<br>'''Task:''' Tap Zombies [x10]<br>Quest reward: {{Cash|100}} and {{SmoreS|100}}|colspan=2}} |
}} | }} | ||
| − | ====The Call of the Campfire Pt. 6==== | + | ==== The Call of the Campfire Pt. 6 ==== |
{{Table| | {{Table| | ||
{{THT|After tapping on Lisa's exclamation mark:|colspan=2}} | {{THT|After tapping on Lisa's exclamation mark:|colspan=2}} | ||
| Line 884: | Line 884: | ||
{{Tapped Out Lisa Icon}} | {{Tapped Out Lisa Icon}} | ||
{{TB|Oh, it's my favorite Aesop's fable! Briefly, it goes like this...}} | {{TB|Oh, it's my favorite Aesop's fable! Briefly, it goes like this...}} | ||
| − | {{THT|'''Task''' | + | {{THT|'''Task:''' Make Lisa Accidentally Tell A Scary Story (4h, Spooky Campfire)|colspan=2}} |
{{Tapped Out Saxophone Lisa Icon}} | {{Tapped Out Saxophone Lisa Icon}} | ||
{{TB|A farmer found a viper, coiled and frozen in the snow. The farmer took pity and tucked the poor creature into his coat.}} | {{TB|A farmer found a viper, coiled and frozen in the snow. The farmer took pity and tucked the poor creature into his coat.}} | ||
| Line 910: | Line 910: | ||
{{THT|Quest reward: {{Cash|100}} and {{SmoreS|100}}|colspan=2}} | {{THT|Quest reward: {{Cash|100}} and {{SmoreS|100}}|colspan=2}} | ||
}} | }} | ||
| − | ====The Call of the Campfire Pt. 7==== | + | ==== The Call of the Campfire Pt. 7 ==== |
{{Table| | {{Table| | ||
{{THT|After tapping on Lisa's exclamation mark:|colspan=2}} | {{THT|After tapping on Lisa's exclamation mark:|colspan=2}} | ||
| Line 939: | Line 939: | ||
{{Tapped Out M'nthster Icon}} | {{Tapped Out M'nthster Icon}} | ||
{{TB|Anyhoo, have fun giving these to your friends.}} | {{TB|Anyhoo, have fun giving these to your friends.}} | ||
| − | {{THT|Reward: {{FormlessT|1}}<br>'''Task''' | + | {{THT|Reward: {{FormlessT|1}}<br>'''Task:''' Send Formless Terrors to Other Springfields<br>Quest reward: {{Cash|100}} and {{SmoreS|100}}|colspan=2}} |
}} | }} | ||
| − | ====The Call of the Campfire Pt. 8==== | + | ==== The Call of the Campfire Pt. 8 ==== |
{{Table| | {{Table| | ||
{{THT|After tapping on Bart's exclamation mark:|colspan=2}} | {{THT|After tapping on Bart's exclamation mark:|colspan=2}} | ||
| Line 955: | Line 955: | ||
{{Tapped Out Bart Icon}} | {{Tapped Out Bart Icon}} | ||
{{TB|But a little more cursed firewood and it will be disturbing and BIG.}} | {{TB|But a little more cursed firewood and it will be disturbing and BIG.}} | ||
| − | {{THT|'''Task''' | + | {{THT|'''Task:''' Upgrade the Spooky Campfire|colspan=2}} |
{{Tapped Out Lisa Icon}} | {{Tapped Out Lisa Icon}} | ||
{{TB|Bart! You made the campfire bigger!}} | {{TB|Bart! You made the campfire bigger!}} | ||
| Line 968: | Line 968: | ||
{{THT|Quest reward: {{Cash|100}} and {{SmoreS|100}}|colspan=2}} | {{THT|Quest reward: {{Cash|100}} and {{SmoreS|100}}|colspan=2}} | ||
}} | }} | ||
| − | ====The Call of the Campfire Pt. 9==== | + | ==== The Call of the Campfire Pt. 9 ==== |
{{Table| | {{Table| | ||
{{THT|After tapping on Milhouse's exclamation mark:|colspan=2}} | {{THT|After tapping on Milhouse's exclamation mark:|colspan=2}} | ||
| Line 975: | Line 975: | ||
{{Tapped Out Milhouse Icon}} | {{Tapped Out Milhouse Icon}} | ||
{{TB|Now it's my turn to tell a scary story.}} | {{TB|Now it's my turn to tell a scary story.}} | ||
| − | {{THT|'''Task''' | + | {{THT|'''Task:''' Make Milhouse Tell a Scary Story (4h, Spooky Campfire)|colspan=2}} |
{{Tapped Out Lisa Icon}} | {{Tapped Out Lisa Icon}} | ||
{{TB|Milhouse, are you crazy? You know what's going to happen if you tell a monster story.}} | {{TB|Milhouse, are you crazy? You know what's going to happen if you tell a monster story.}} | ||
| Line 999: | Line 999: | ||
{{THT|Quest reward: {{Cash|100}} and {{SmoreS|100}}|colspan=2}} | {{THT|Quest reward: {{Cash|100}} and {{SmoreS|100}}|colspan=2}} | ||
}} | }} | ||
| − | ====The Call of the Campfire Pt. 10==== | + | ==== The Call of the Campfire Pt. 10 ==== |
{{Table| | {{Table| | ||
{{THT|After tapping on Bart's exclamation mark:|colspan=2}} | {{THT|After tapping on Bart's exclamation mark:|colspan=2}} | ||
| Line 1,016: | Line 1,016: | ||
{{Tapped Out Lisa Icon}} | {{Tapped Out Lisa Icon}} | ||
{{TB|I dunno, Milhouse, you ran away from bunnies!}} | {{TB|I dunno, Milhouse, you ran away from bunnies!}} | ||
| − | {{THT|'''Task''' | + | {{THT|'''Task:''' Make Milhouse Hide in Shame (4h, Van Houten House)<br>Quest reward: {{Cash|100}} and {{SmoreS|100}}|colspan=2}} |
}} | }} | ||
| − | ====The Call of the Campfire Pt. 11==== | + | ==== The Call of the Campfire Pt. 11 ==== |
{{Table| | {{Table| | ||
{{THT|After tapping on Bart's exclamation mark:|colspan=2}} | {{THT|After tapping on Bart's exclamation mark:|colspan=2}} | ||
| Line 1,035: | Line 1,035: | ||
{{Tapped Out Bart Icon}} | {{Tapped Out Bart Icon}} | ||
{{TB|I've been known to get into some trickery myself. Check this out!}} | {{TB|I've been known to get into some trickery myself. Check this out!}} | ||
| − | {{THT|'''Task''' | + | {{THT|'''Task:''' Make Bart Place a Prank Call (4h, Spooky Campfire)|colspan=2}} |
{{Tapped Out Moe Icon}} | {{Tapped Out Moe Icon}} | ||
{{TB|Moe's Tavern here.}} | {{TB|Moe's Tavern here.}} | ||
| Line 1,056: | Line 1,056: | ||
{{THT|Quest reward: {{Cash|100}} and {{SmoreS|100}}|colspan=2}} | {{THT|Quest reward: {{Cash|100}} and {{SmoreS|100}}|colspan=2}} | ||
}} | }} | ||
| − | ====The Call of the Campfire Pt. 12==== | + | ==== The Call of the Campfire Pt. 12 ==== |
{{Table| | {{Table| | ||
{{THT|After tapping on Bart's exclamation mark:|colspan=2}} | {{THT|After tapping on Bart's exclamation mark:|colspan=2}} | ||
| Line 1,067: | Line 1,067: | ||
{{Tapped Out M'nthster Icon}} | {{Tapped Out M'nthster Icon}} | ||
{{TB|He's my brother from another Mother-Father.}} | {{TB|He's my brother from another Mother-Father.}} | ||
| − | {{THT|'''Task''' | + | {{THT|'''Task:''' Make Bart Tell a Scary Story (4h, Spooky Campfire)|colspan=2}} |
{{Tapped Out Clockwork Bart Scary Story Icon}} | {{Tapped Out Clockwork Bart Scary Story Icon}} | ||
{{TB|A vain young man was traveling on a train. Suddenly, he heard shouts coming from the front of the train.}} | {{TB|A vain young man was traveling on a train. Suddenly, he heard shouts coming from the front of the train.}} | ||
| Line 1,092: | Line 1,092: | ||
{{THT|[[File:Skeletons Spawning.png|300px]]<br>Quest reward: {{Cash|100}} and {{SmoreS|100}}|colspan=2}} | {{THT|[[File:Skeletons Spawning.png|300px]]<br>Quest reward: {{Cash|100}} and {{SmoreS|100}}|colspan=2}} | ||
}} | }} | ||
| − | ====The Call of the Campfire Pt. 13==== | + | ==== The Call of the Campfire Pt. 13 ==== |
{{Table| | {{Table| | ||
{{THT|After tapping on Bart's exclamation mark:|colspan=2}} | {{THT|After tapping on Bart's exclamation mark:|colspan=2}} | ||
| Line 1,109: | Line 1,109: | ||
{{Tapped Out Bart Icon}} | {{Tapped Out Bart Icon}} | ||
{{TB|Respect, man, that thing was long.}} | {{TB|Respect, man, that thing was long.}} | ||
| − | {{THT|'''Task''' | + | {{THT|'''Task:''' Make Bart Plan His Next Prank With M'nthster (4h, Spooky Campfire)<br>Quest reward: {{Cash|100}} and {{SmoreS|100}}|colspan=2}} |
}} | }} | ||
| − | ====The Unspeakable==== | + | ==== The Unspeakable ==== |
{{Table| | {{Table| | ||
{{THT|After tapping on Homer's exclamation mark:|colspan=2}} | {{THT|After tapping on Homer's exclamation mark:|colspan=2}} | ||
| Line 1,130: | Line 1,130: | ||
{{Tapped Out Marge Icon}} | {{Tapped Out Marge Icon}} | ||
{{TB|Trust me, you'll like this better.}} | {{TB|Trust me, you'll like this better.}} | ||
| − | {{THT|'''Task''' | + | {{THT|'''Task:''' Make Homer Wait Impatiently (8h, Simpson Home)|colspan=2}} |
{{Tapped Out Marge Icon}} | {{Tapped Out Marge Icon}} | ||
{{TB|Meow, Homie!}} | {{TB|Meow, Homie!}} | ||
| Line 1,141: | Line 1,141: | ||
}} | }} | ||
| − | ==Act 2 Gameplay== | + | == Act 2 Gameplay == |
{{CollapsibleSection|To view Act 2's questline, click "show":| | {{CollapsibleSection|To view Act 2's questline, click "show":| | ||
| − | ===The Very Young Folk=== | + | === The Very Young Folk === |
| − | ====The Very Young Folk Pt. 1==== | + | ==== The Very Young Folk Pt. 1 ==== |
{{Table| | {{Table| | ||
{{THT|After tapping on Bart's exclamation mark:|colspan=2}} | {{THT|After tapping on Bart's exclamation mark:|colspan=2}} | ||
| Line 1,159: | Line 1,159: | ||
{{Tapped Out Bart Icon}} | {{Tapped Out Bart Icon}} | ||
{{TB|Tonight!}} | {{TB|Tonight!}} | ||
| − | {{THT|'''Task''' | + | {{THT|'''Task:''' Make Bart Sneak Out to the Campfire (1h, Spooky Campfire)|colspan=2}} |
{{Tapped Out Bart Icon}} | {{Tapped Out Bart Icon}} | ||
{{TB|Hey-ho, M'nthster-man! I got my pranking pants on and I'm ready to rock!}} | {{TB|Hey-ho, M'nthster-man! I got my pranking pants on and I'm ready to rock!}} | ||
| Line 1,168: | Line 1,168: | ||
{{THT|Quest reward: {{Cash|100}} and [[File:Tapped Out Gummies.png|25px]]100|colspan=2}} | {{THT|Quest reward: {{Cash|100}} and [[File:Tapped Out Gummies.png|25px]]100|colspan=2}} | ||
}} | }} | ||
| − | ====The Very Young Folk Pt. 2==== | + | ==== The Very Young Folk Pt. 2 ==== |
{{Table| | {{Table| | ||
{{THT|After tapping on Bart's exclamation mark:|colspan=2}} | {{THT|After tapping on Bart's exclamation mark:|colspan=2}} | ||
| Line 1,189: | Line 1,189: | ||
{{Tapped Out Bart Icon}} | {{Tapped Out Bart Icon}} | ||
{{TB|What?! Okay, there is definitely something going on!}} | {{TB|What?! Okay, there is definitely something going on!}} | ||
| − | {{THT|'''Task''' | + | {{THT|'''Task:''' Make Bart Search for M'nthster (6h, Spooky Campfire)<br>'''Task:''' Make Lisa Search for M'nthster (6h, Spooky Campfire)<br>Quest reward: {{Cash|100}} and [[File:Tapped Out Gummies.png|25px]]100|colspan=2}} |
}} | }} | ||
| − | ====The Very Young Folk Pt. 3==== | + | ==== The Very Young Folk Pt. 3 ==== |
{{Table| | {{Table| | ||
{{THT|After completing The Springfield Horror Pt. 1 and tapping on Bart's exclamation mark:|colspan=2}} | {{THT|After completing The Springfield Horror Pt. 1 and tapping on Bart's exclamation mark:|colspan=2}} | ||
| Line 1,222: | Line 1,222: | ||
{{Tapped Out Bart Icon}} | {{Tapped Out Bart Icon}} | ||
{{TB|C'mon Lis, we don't have time to listen to these drooling dome-heads.}} | {{TB|C'mon Lis, we don't have time to listen to these drooling dome-heads.}} | ||
| − | {{THT|'''Task''' | + | {{THT|'''Task:''' Make Bart Search for M'nthster (6h, Spooky Campfire)<br>'''Task:''' Make Lisa Search for M'nthster (6h, Spooky Campfire)|colspan=2}} |
{{Tapped Out Lisa Icon}} | {{Tapped Out Lisa Icon}} | ||
{{TB|I'm getting really worried about Mom and Dad!}} | {{TB|I'm getting really worried about Mom and Dad!}} | ||
| Line 1,229: | Line 1,229: | ||
{{THT|Quest reward: {{Cash|100}} and [[File:Tapped Out Gummies.png|25px]]100|colspan=2}} | {{THT|Quest reward: {{Cash|100}} and [[File:Tapped Out Gummies.png|25px]]100|colspan=2}} | ||
}} | }} | ||
| − | ====The Very Young Folk Pt. 4==== | + | ==== The Very Young Folk Pt. 4 ==== |
{{Table| | {{Table| | ||
{{THT|After completing The Springfield Horror Pt. 2 and tapping on Lisa's exclamation mark:|colspan=2}} | {{THT|After completing The Springfield Horror Pt. 2 and tapping on Lisa's exclamation mark:|colspan=2}} | ||
| Line 1,244: | Line 1,244: | ||
{{Tapped Out Lisa Icon}} | {{Tapped Out Lisa Icon}} | ||
{{TB|They're obviously possessed. We've got to put a stop to this!}} | {{TB|They're obviously possessed. We've got to put a stop to this!}} | ||
| − | {{THT|'''Task''' | + | {{THT|'''Task:''' Make Youngsters Search for M'nthster (6h, Spooky Campfire)|colspan=2}} |
{{Tapped Out Bart Icon}} | {{Tapped Out Bart Icon}} | ||
{{TB|He's a giant dragon-crab with tentacles on his face. How can he be this hard to find!?}} | {{TB|He's a giant dragon-crab with tentacles on his face. How can he be this hard to find!?}} | ||
{{THT|Quest reward: {{Cash|100}} and [[File:Tapped Out Gummies.png|25px]]100|colspan=2}} | {{THT|Quest reward: {{Cash|100}} and [[File:Tapped Out Gummies.png|25px]]100|colspan=2}} | ||
}} | }} | ||
| − | ====The Very Young Folk Pt. 5==== | + | ==== The Very Young Folk Pt. 5 ==== |
{{Table| | {{Table| | ||
{{THT|After tapping on Bart's exclamation mark:|colspan=2}} | {{THT|After tapping on Bart's exclamation mark:|colspan=2}} | ||
| Line 1,270: | Line 1,270: | ||
{{Tapped Out M'nthster Icon}} | {{Tapped Out M'nthster Icon}} | ||
{{TB|Now cower at the glory of my rising!}} | {{TB|Now cower at the glory of my rising!}} | ||
| − | {{THT|'''Task''' | + | {{THT|'''Task:''' Reach level 15 and Place Squidport Entrance<br>'''Task:''' Place the Sunken Temple|colspan=2}} |
{{Tapped Out Lisa Icon}} | {{Tapped Out Lisa Icon}} | ||
{{TB|Oh Bart, this is not good.}} | {{TB|Oh Bart, this is not good.}} | ||
| Line 1,283: | Line 1,283: | ||
{{THT|[[File:Continue Act 3.png|300px]]<br>Quest reward: {{Cash|100}} and [[File:Tapped Out Gummies.png|25px]]100|colspan=2}} | {{THT|[[File:Continue Act 3.png|300px]]<br>Quest reward: {{Cash|100}} and [[File:Tapped Out Gummies.png|25px]]100|colspan=2}} | ||
}} | }} | ||
| − | ===The Springfield Horror=== | + | === The Springfield Horror === |
| − | ====The Springfield Horror Pt. 1==== | + | ==== The Springfield Horror Pt. 1 ==== |
{{Table| | {{Table| | ||
{{THT|After completing The Very Young Folk Pt. 1 and tapping on Homer's exclamation mark:|colspan=2}} | {{THT|After completing The Very Young Folk Pt. 1 and tapping on Homer's exclamation mark:|colspan=2}} | ||
| Line 1,293: | Line 1,293: | ||
{{Tapped Out Homer Icon}} | {{Tapped Out Homer Icon}} | ||
{{TB|My masterpiece lives!}} | {{TB|My masterpiece lives!}} | ||
| − | {{THT|'''Task''' | + | {{THT|'''Task:''' Make Homer Plug in the Lights at Everscream Terrors (4h, Simpson House)<br>'''Task:''' Place the Everscream Terrors House|colspan=2}} |
{{Tapped Out Homer Icon}} | {{Tapped Out Homer Icon}} | ||
{{TB|That's the signal to let all the adults in Springfield know...}} | {{TB|That's the signal to let all the adults in Springfield know...}} | ||
{{THT|[[File:HW2015 Act 2 Event Guide.png|300px]]<br>Quest reward: {{Cash|100}} and [[File:Tapped Out Gummies.png|25px]]100|colspan=2}} | {{THT|[[File:HW2015 Act 2 Event Guide.png|300px]]<br>Quest reward: {{Cash|100}} and [[File:Tapped Out Gummies.png|25px]]100|colspan=2}} | ||
}} | }} | ||
| − | ====The Springfield Horror Pt. 2==== | + | ==== The Springfield Horror Pt. 2 ==== |
{{Table| | {{Table| | ||
{{THT|After tapping on Homer's exclamation mark:|colspan=2}} | {{THT|After tapping on Homer's exclamation mark:|colspan=2}} | ||
{{Tapped Out Marge Icon}} | {{Tapped Out Marge Icon}} | ||
{{TB|The change is upon us!}} | {{TB|The change is upon us!}} | ||
| − | {{THT|'''Task''' | + | {{THT|'''Task:''' Make Adults Gather at the Simpsons House [x3] (8h, Simpson House)<br>'''Characters: '''Homer, Marge, Grampa, Luann, Kirk, Holiday Homer, Witch Marge, Squirrel Luann, Acorn Kirk|colspan=2}} |
{{Tapped Out Kirk Icon}} | {{Tapped Out Kirk Icon}} | ||
{{TB|Tonight I can fulfill my fantasy of being a sexy temptress!}} | {{TB|Tonight I can fulfill my fantasy of being a sexy temptress!}} | ||
| Line 1,318: | Line 1,318: | ||
{{THT|Quest reward: {{Cash|100}} and [[File:Tapped Out Gummies.png|25px]]100|colspan=2}} | {{THT|Quest reward: {{Cash|100}} and [[File:Tapped Out Gummies.png|25px]]100|colspan=2}} | ||
}} | }} | ||
| − | ====The Springfield Horror Pt. 3==== | + | ==== The Springfield Horror Pt. 3 ==== |
{{Table| | {{Table| | ||
{{THT|After tapping on Homer's exclamation mark:|colspan=2}} | {{THT|After tapping on Homer's exclamation mark:|colspan=2}} | ||
| Line 1,331: | Line 1,331: | ||
{{Tapped Out Krusty Icon}} | {{Tapped Out Krusty Icon}} | ||
{{TB|With all our burgers, we're serving forget-me-fries. So you and all your co-workers can forget the unspeakable things you did while hammered at the office party.}} | {{TB|With all our burgers, we're serving forget-me-fries. So you and all your co-workers can forget the unspeakable things you did while hammered at the office party.}} | ||
| − | {{THT|'''Task''' | + | {{THT|'''Task:''' Reach Level 15 and Build Moe's Tavern<br>'''Task:''' Craft Moe's Terror<br>'''Task:''' Craft Kill-E-Mart<br>'''Task:''' Craft Krusty Murder<br>Quest reward: {{Cash|100}} and [[File:Tapped Out Gummies.png|25px]]100|colspan=2}} |
}} | }} | ||
| − | ====The Springfield Horror Pt. 4==== | + | ==== The Springfield Horror Pt. 4 ==== |
{{Table| | {{Table| | ||
{{THT|After tapping on Apu's exclamation mark:|colspan=2}} | {{THT|After tapping on Apu's exclamation mark:|colspan=2}} | ||
| Line 1,348: | Line 1,348: | ||
{{Tapped Out Krusty Icon}} | {{Tapped Out Krusty Icon}} | ||
{{TB|Must wash eyes!!}} | {{TB|Must wash eyes!!}} | ||
| − | {{THT|'''Task''' | + | {{THT|'''Task:''' Make Adults Unwind With Wine [x5] (2h, Moe's Terror)<br>'''Characters: '''</strong>Homer, Holiday Homer, Carl, Willy, Sea Captain, Lenny<br>'''Task:''' Make Adults Have Fun with Cameras [x5] (4h, Kill-E-Mart)<br>'''Characters: '''</strong>Homer, Holiday Homer, Witch Marge, Marge, Cletus, Krusty, Comic Book Guy<br>'''Task:''' Make Adults Play with Food [x5] (1h, Krusty Murder)<br>'''Characters: '''</strong>Homer, Holiday Homer, Skinner, Comic Book Guy, Wiggum, Quimby|colspan=2}} |
{{Tapped Out Krusty Icon}} | {{Tapped Out Krusty Icon}} | ||
{{TB|It sure is nice to see Springfielders finally let their hair down.}} | {{TB|It sure is nice to see Springfielders finally let their hair down.}} | ||
| Line 1,360: | Line 1,360: | ||
}} | }} | ||
}} | }} | ||
| − | ==Act 3 Gameplay== | + | == Act 3 Gameplay == |
{{CollapsibleSection|To view Act 3's questline, click "show":| | {{CollapsibleSection|To view Act 3's questline, click "show":| | ||
| − | ===The Sandwich Horror=== | + | === The Sandwich Horror === |
{{Table| | {{Table| | ||
{{THT|After tapping on Homer's exclamation mark:|colspan=2}} | {{THT|After tapping on Homer's exclamation mark:|colspan=2}} | ||
| Line 1,375: | Line 1,375: | ||
{{Tapped Out Homer Icon}} | {{Tapped Out Homer Icon}} | ||
{{TB|Run! It's my daughter. She 'thinks-I'm-perfect-I-don't-wanna-disappoint-her. Oops, dropped my boa.}} | {{TB|Run! It's my daughter. She 'thinks-I'm-perfect-I-don't-wanna-disappoint-her. Oops, dropped my boa.}} | ||
| − | {{THT|'''Task''' | + | {{THT|'''Task:''' Make Adults Gather at the Simpsons House [x5] (8h, Simpson Home)<br>'''Characters: '''</strong>Homer, Marge, Grampa, Luann, Kirk, Holiday Homer, Witch Marge, Squirrel Luann, Acorn Kirk|colspan=2}} |
{{Tapped Out Bart Icon}} | {{Tapped Out Bart Icon}} | ||
{{TB|Lisa! Did you find Mom and Dad?}} | {{TB|Lisa! Did you find Mom and Dad?}} | ||
| Line 1,392: | Line 1,392: | ||
{{THT|[[File:HW2015 Act 3 Event Guide.png|300px]]<br>Quest reward: {{Cash|100}} and [[File:Tapped Out Candy Apples.png|25px]]100|colspan=2}} | {{THT|[[File:HW2015 Act 3 Event Guide.png|300px]]<br>Quest reward: {{Cash|100}} and [[File:Tapped Out Candy Apples.png|25px]]100|colspan=2}} | ||
}} | }} | ||
| − | ===The Blameless City=== | + | === The Blameless City === |
{{Table|align=center|width=500px| | {{Table|align=center|width=500px| | ||
{{THT|M'nthster Candy Apples Glitch}} | {{THT|M'nthster Candy Apples Glitch}} | ||
{{THT|A new glitch has been found by EA forum users, where rapidly tapping M'nthster while he's moving and generally anytime he's on screen tappable, you might get lucky and earn Candy Apples faster! Users reported even unlocking all prizes! Tap fast and you may get lucky too!}} | {{THT|A new glitch has been found by EA forum users, where rapidly tapping M'nthster while he's moving and generally anytime he's on screen tappable, you might get lucky and earn Candy Apples faster! Users reported even unlocking all prizes! Tap fast and you may get lucky too!}} | ||
}} | }} | ||
| − | ====The Blameless City Pt. 1==== | + | ==== The Blameless City Pt. 1 ==== |
{{Table| | {{Table| | ||
{{THT|After completing The Sandwich Horror:|colspan=2}} | {{THT|After completing The Sandwich Horror:|colspan=2}} | ||
| Line 1,414: | Line 1,414: | ||
{{Tapped Out Bart Icon}} | {{Tapped Out Bart Icon}} | ||
{{TB|Skyfinger rules!}} | {{TB|Skyfinger rules!}} | ||
| − | {{THT|'''Task''' | + | {{THT|'''Task:''' Tap M'nthster to Knock Him Out of the Sky [x10]<br>[[File:M'nthster Flying.png|200px]]|colspan=2}} |
{{Tapped Out Bart Icon}} | {{Tapped Out Bart Icon}} | ||
{{TB|Now, men... and girl, victory is within reach! Who is with me?}} | {{TB|Now, men... and girl, victory is within reach! Who is with me?}} | ||
| Line 1,429: | Line 1,429: | ||
{{THT|Quest reward: {{Cash|100}} and [[File:Tapped Out Candy Apples.png|25px]]100|colspan=2}} | {{THT|Quest reward: {{Cash|100}} and [[File:Tapped Out Candy Apples.png|25px]]100|colspan=2}} | ||
}} | }} | ||
| − | ====The Blameless City Pt. 2==== | + | ==== The Blameless City Pt. 2 ==== |
{{Table| | {{Table| | ||
{{THT|After completing The Blameless City Pt. 1:|colspan=2}} | {{THT|After completing The Blameless City Pt. 1:|colspan=2}} | ||
| Line 1,442: | Line 1,442: | ||
{{Tapped Out Lisa Icon}} | {{Tapped Out Lisa Icon}} | ||
{{TB|Christmas.}} | {{TB|Christmas.}} | ||
| − | {{THT|'''Task''' | + | {{THT|'''Task:''' Defeat M'nthster at the Campfire [x10]<br>[[File:M'nthster at Spooky Campfire.png|200px]]<br>On job start:|colspan=2}} |
{{Tapped Out Lisa Icon}} | {{Tapped Out Lisa Icon}} | ||
{{TB|He's losing strength! Throw more tinsel at him!}} | {{TB|He's losing strength! Throw more tinsel at him!}} | ||
| Line 1,455: | Line 1,455: | ||
}} | }} | ||
| − | ====The Blameless City Pt. 3==== | + | ==== The Blameless City Pt. 3 ==== |
{{Table| | {{Table| | ||
{{THT|After completing The Blameless City Pt. 2:|colspan=2}} | {{THT|After completing The Blameless City Pt. 2:|colspan=2}} | ||
| Line 1,468: | Line 1,468: | ||
{{Tapped Out Lisa Icon}} | {{Tapped Out Lisa Icon}} | ||
{{TB|Okay, okay, you're right. Sink it!}} | {{TB|Okay, okay, you're right. Sink it!}} | ||
| − | {{THT|'''Task''' | + | {{THT|'''Task:''' Tap on the Sunken Temple [x10]<br>[[File:M'nthster at Sunken Temple.png|200px]]|colspan=2}} |
{{Tapped Out Lisa Icon}} | {{Tapped Out Lisa Icon}} | ||
{{TB|Kang, Kodos, I'm sorry to tell you we have killed your cousin.}} | {{TB|Kang, Kodos, I'm sorry to tell you we have killed your cousin.}} | ||
| Line 1,486: | Line 1,486: | ||
}} | }} | ||
| − | ====The Blameless City Pt. 4==== | + | ==== The Blameless City Pt. 4 ==== |
{{Table| | {{Table| | ||
{{THT|After tapping on Lisa's exclamation mark:|colspan=2}} | {{THT|After tapping on Lisa's exclamation mark:|colspan=2}} | ||
| Line 1,495: | Line 1,495: | ||
{{Tapped Out Kodos Icon}} | {{Tapped Out Kodos Icon}} | ||
{{TB|Tap, tap while you still can!}} | {{TB|Tap, tap while you still can!}} | ||
| − | {{THT|'''Task''' | + | {{THT|'''Task:''' Tap Star Spawn [x10]<br>[[File:Sunken Temple Menu.png|300px]]<br>Quest reward: {{Cash|100}} and [[File:Tapped Out Candy Apples.png|25px]]100<br>At this point you're qualified for recieving the Takedown on November 18th at 1am GMT.|colspan=2}} |
}} | }} | ||
| − | ====The Blameless City Pt. 5==== | + | ==== The Blameless City Pt. 5 ==== |
{{Table| | {{Table| | ||
{{THT|After the user logs in on November 17th at 1am GMT and tapping on Bart's exclamation mark:|colspan=2}} | {{THT|After the user logs in on November 17th at 1am GMT and tapping on Bart's exclamation mark:|colspan=2}} | ||
| Line 1,514: | Line 1,514: | ||
{{Tapped Out Bart Icon}} | {{Tapped Out Bart Icon}} | ||
{{TB|I bid you TAP children of Springfield!!}} | {{TB|I bid you TAP children of Springfield!!}} | ||
| − | {{THT|'''Task''' | + | {{THT|'''Task:''' Defeat M'nthster and Sink the Sunken Temple<br>Quest reward: {{Cash|100}} and [[File:Tapped Out Candy Apples.png|25px]]100|colspan=2}} |
}} | }} | ||
| − | ===Something Strange in the Neighborhood=== | + | === Something Strange in the Neighborhood === |
{{Table| | {{Table| | ||
{{THT|After completing The Blameless City Pt. 2 and tapping on Bart's exclamation mark:|colspan=2}} | {{THT|After completing The Blameless City Pt. 2 and tapping on Bart's exclamation mark:|colspan=2}} | ||
| Line 1,530: | Line 1,530: | ||
{{Tapped Out Lisa Icon}} | {{Tapped Out Lisa Icon}} | ||
{{TB|Hey, just 'cause I was right doesn't mean I made it happen!}} | {{TB|Hey, just 'cause I was right doesn't mean I made it happen!}} | ||
| − | {{THT|'''Task''' | + | {{THT|'''Task:''' Send Kids to Hunt Nightmares (4h, Brown House)|colspan=2}} |
{{Tapped Out Lisa Icon}} | {{Tapped Out Lisa Icon}} | ||
{{TB|We're making progress! Keep doing what you're doing.}} | {{TB|We're making progress! Keep doing what you're doing.}} | ||
| Line 1,540: | Line 1,540: | ||
}} | }} | ||
}} | }} | ||
| − | ==Ending Gameplay== | + | == Ending Gameplay == |
{{CollapsibleSection|To view the Ending's questline, click "show":| | {{CollapsibleSection|To view the Ending's questline, click "show":| | ||
| − | ===Prize Track Completed=== | + | === Prize Track Completed === |
{{Table| | {{Table| | ||
{{THT|After completing The Blameless City Pt. 4 and unlocking the Re-Neducation Center:<br>Quest reward: {{Cash|100}} and [[File:Tapped Out Candy Apples.png|25px]]100|colspan=2}} | {{THT|After completing The Blameless City Pt. 4 and unlocking the Re-Neducation Center:<br>Quest reward: {{Cash|100}} and [[File:Tapped Out Candy Apples.png|25px]]100|colspan=2}} | ||
| Line 1,561: | Line 1,561: | ||
{{THT|[[File:Prize Track Over.png|300px]]|colspan=2}} | {{THT|[[File:Prize Track Over.png|300px]]|colspan=2}} | ||
}} | }} | ||
| − | ===Event Ending Reminder=== | + | === Event Ending Reminder === |
{{Table| | {{Table| | ||
{{THT|After completing The Blameless City Pt. 4 and the user logs in on November 14:<br>Quest reward: {{Cash|100}} and [[File:Tapped Out Candy Apples.png|25px]]100|colspan=2}} | {{THT|After completing The Blameless City Pt. 4 and the user logs in on November 14:<br>Quest reward: {{Cash|100}} and [[File:Tapped Out Candy Apples.png|25px]]100|colspan=2}} | ||
| Line 1,577: | Line 1,577: | ||
}} | }} | ||
| − | ===Event Takedown Reminder=== | + | === Event Takedown Reminder === |
{{Table| | {{Table| | ||
{{THT|After completing The Blameless City Pt. 4 and the user logs in on November 18:<br>Quest reward: {{Cash|100}} and [[File:Tapped Out Candy Apples.png|25px]]100|colspan=2}} | {{THT|After completing The Blameless City Pt. 4 and the user logs in on November 18:<br>Quest reward: {{Cash|100}} and [[File:Tapped Out Candy Apples.png|25px]]100|colspan=2}} | ||
| Line 1,610: | Line 1,610: | ||
}} | }} | ||
}} | }} | ||
| − | ==Premium | + | == Premium gameplay == |
| − | ===The Boy who LARP'd=== | + | === The Boy who LARP'd === |
{{CollapsibleSection|To view Wizard Martin's questline, click "show":| | {{CollapsibleSection|To view Wizard Martin's questline, click "show":| | ||
| − | ====The Boy who LARP'd Pt. 1==== | + | ==== The Boy who LARP'd Pt. 1 ==== |
{{Table| | {{Table| | ||
{{THT|After unlocking Wizard Martin:|colspan=2}} | {{THT|After unlocking Wizard Martin:|colspan=2}} | ||
| Line 1,622: | Line 1,622: | ||
{{Tapped Out Wizard Martin Icon}} | {{Tapped Out Wizard Martin Icon}} | ||
{{TB|To The Place Of Awakening!}} | {{TB|To The Place Of Awakening!}} | ||
| − | {{THT|'''Task''' | + | {{THT|'''Task:''' Make Wizard Martin Search for Adventuring Companions (4h, Springfield Elementary)|colspan=2}} |
{{Tapped Out Bart Icon}} | {{Tapped Out Bart Icon}} | ||
{{TB|Oh Martin, you constantly top your own lameness.}} | {{TB|Oh Martin, you constantly top your own lameness.}} | ||
| Line 1,631: | Line 1,631: | ||
{{THT|Quest reward: {{Cash|100}} and {{XP|10}}|colspan=2}} | {{THT|Quest reward: {{Cash|100}} and {{XP|10}}|colspan=2}} | ||
}} | }} | ||
| − | ====The Boy who LARP'd Pt. 2==== | + | ==== The Boy who LARP'd Pt. 2 ==== |
{{Table| | {{Table| | ||
{{THT|After tapping on Martin's exclamation mark:|colspan=2}} | {{THT|After tapping on Martin's exclamation mark:|colspan=2}} | ||
| Line 1,640: | Line 1,640: | ||
{{Tapped Out Wizard Martin Icon}} | {{Tapped Out Wizard Martin Icon}} | ||
{{TB|That's what I call the coffee place.}} | {{TB|That's what I call the coffee place.}} | ||
| − | {{THT|'''Task''' | + | {{THT|'''Task:''' Reach Level 14 and Build The Java Server<br>'''Task:''' Make Wizard Martin Search for Friends Online (4h, Java Server)|colspan=2}} |
{{Tapped Out Wizard Martin Icon}} | {{Tapped Out Wizard Martin Icon}} | ||
{{TB|What's this? Doth my screen deceive me? Someone is seeking a mage of my power level and mana-capacity!}} | {{TB|What's this? Doth my screen deceive me? Someone is seeking a mage of my power level and mana-capacity!}} | ||
{{THT|Quest reward: {{Cash|100}} and {{XP|10}}|colspan=2}} | {{THT|Quest reward: {{Cash|100}} and {{XP|10}}|colspan=2}} | ||
}} | }} | ||
| − | ====The Boy who LARP'd Pt. 3==== | + | ==== The Boy who LARP'd Pt. 3 ==== |
{{Table| | {{Table| | ||
{{THT|After tapping on Martin's exclamation mark:|colspan=2}} | {{THT|After tapping on Martin's exclamation mark:|colspan=2}} | ||
| Line 1,654: | Line 1,654: | ||
{{Tapped Out Comic Book Guy Icon}} | {{Tapped Out Comic Book Guy Icon}} | ||
{{TB|I am intrigued. Let the testing begin!}} | {{TB|I am intrigued. Let the testing begin!}} | ||
| − | {{THT|'''Task''' | + | {{THT|'''Task:''' Make Wizard Martin Prove his Worth (4h)|colspan=2}} |
{{Tapped Out Comic Book Guy Icon}} | {{Tapped Out Comic Book Guy Icon}} | ||
{{TB|Most impressive. You remind me of myself, when I was still but an XXL.}} | {{TB|Most impressive. You remind me of myself, when I was still but an XXL.}} | ||
| Line 1,661: | Line 1,661: | ||
{{THT|Quest reward: {{Cash|100}} and {{XP|10}}|colspan=2}} | {{THT|Quest reward: {{Cash|100}} and {{XP|10}}|colspan=2}} | ||
}} | }} | ||
| − | ====The Boy who LARP'd Pt. 4==== | + | ==== The Boy who LARP'd Pt. 4 ==== |
{{Table| | {{Table| | ||
{{THT|After tapping on Martin's exclamation mark:|colspan=2}} | {{THT|After tapping on Martin's exclamation mark:|colspan=2}} | ||
| Line 1,672: | Line 1,672: | ||
{{Tapped Out Wizard Martin Icon}} | {{Tapped Out Wizard Martin Icon}} | ||
{{TB|Then I say, pick away!}} | {{TB|Then I say, pick away!}} | ||
| − | {{THT|'''Task''' | + | {{THT|'''Task:''' Make Wizard Martin Ace an Online Trivia Test (4h, Androids Dungeon)|colspan=2}} |
{{Tapped Out Comic Book Guy Icon}} | {{Tapped Out Comic Book Guy Icon}} | ||
{{TB|Good, good, Han shot first... You spelled Khazad-dum correctly...}} | {{TB|Good, good, Han shot first... You spelled Khazad-dum correctly...}} | ||
| Line 1,683: | Line 1,683: | ||
{{THT|Quest reward: {{Cash|100}} and {{XP|10}}|colspan=2}} | {{THT|Quest reward: {{Cash|100}} and {{XP|10}}|colspan=2}} | ||
}} | }} | ||
| − | ====The Boy who LARP'd Pt. 5==== | + | ==== The Boy who LARP'd Pt. 5 ==== |
{{Table| | {{Table| | ||
{{THT|After tapping on Martin's exclamation mark:|colspan=2}} | {{THT|After tapping on Martin's exclamation mark:|colspan=2}} | ||
| Line 1,690: | Line 1,690: | ||
{{Tapped Out Comic Book Guy Icon}} | {{Tapped Out Comic Book Guy Icon}} | ||
{{TB|Single combat.}} | {{TB|Single combat.}} | ||
| − | {{THT|'''Task''' | + | {{THT|'''Task:''' Build the Android's Dungeon<br>'''Task:''' Make Wizard Martin and Comic Book Guy Engage in Single Combat (4h, Android's Dungeon, Comic Book Guy)|colspan=2}} |
{{Tapped Out Comic Book Guy Icon}} | {{Tapped Out Comic Book Guy Icon}} | ||
{{TB|Wow, (PANT) you're good. (WHEEZE) We've been goin' at it for what? Five... minutes?}} | {{TB|Wow, (PANT) you're good. (WHEEZE) We've been goin' at it for what? Five... minutes?}} | ||
| Line 1,702: | Line 1,702: | ||
}} | }} | ||
}} | }} | ||
| − | ===The Saxamaphone=== | + | === The Saxamaphone === |
{{CollapsibleSection|To view Saxophone Lisa's questline, click "show":| | {{CollapsibleSection|To view Saxophone Lisa's questline, click "show":| | ||
| − | ====The Saxamaphone Pt.1==== | + | ==== The Saxamaphone Pt.1 ==== |
{{Table| | {{Table| | ||
{{THT|After unlocking Saxophone Lisa:|colspan=2}} | {{THT|After unlocking Saxophone Lisa:|colspan=2}} | ||
| Line 1,713: | Line 1,713: | ||
{{Tapped Out Saxophone Lisa Icon}} | {{Tapped Out Saxophone Lisa Icon}} | ||
{{TB|I feel a solo coming on!}} | {{TB|I feel a solo coming on!}} | ||
| − | {{THT|'''Task''' | + | {{THT|'''Task:''' Make Saxophone Lisa Practice a Saxophone Solo at home (4h, Simpson Home)<br>Quest reward: {{Cash|100}} and {{XP|10}}|colspan=2}} |
}} | }} | ||
| − | ====The Saxamaphone Pt.2==== | + | ==== The Saxamaphone Pt.2 ==== |
{{Table| | {{Table| | ||
{{THT|After tapping on Lisa's exclamation mark:|colspan=2}} | {{THT|After tapping on Lisa's exclamation mark:|colspan=2}} | ||
| Line 1,729: | Line 1,729: | ||
{{Tapped Out Marge Icon}} | {{Tapped Out Marge Icon}} | ||
{{TB|Of course! And you in that little costume! Priceless!}} | {{TB|Of course! And you in that little costume! Priceless!}} | ||
| − | {{THT|'''Task''' | + | {{THT|'''Task:''' Reach Level 12 and Build Springfield Elementary<br>'''Task:''' Make Saxophone Lisa Play a Saxophone Solo at Springfield Elementary (4h, Springfield Elementary)|colspan=2}} |
{{Tapped Out Sherri and Terri Icon}} | {{Tapped Out Sherri and Terri Icon}} | ||
{{TB|Saxophones don't play saxophones! Your costume makes no sense.}} | {{TB|Saxophones don't play saxophones! Your costume makes no sense.}} | ||
| Line 1,738: | Line 1,738: | ||
{{THT|Quest reward: {{Cash|100}} and {{XP|10}}|colspan=2}} | {{THT|Quest reward: {{Cash|100}} and {{XP|10}}|colspan=2}} | ||
}} | }} | ||
| − | ====The Saxamaphone Pt.3==== | + | ==== The Saxamaphone Pt.3 ==== |
{{Table| | {{Table| | ||
{{THT|After tapping on Lisa's exclamation mark:|colspan=2}} | {{THT|After tapping on Lisa's exclamation mark:|colspan=2}} | ||
| Line 1,753: | Line 1,753: | ||
{{Tapped Out Marge Icon}} | {{Tapped Out Marge Icon}} | ||
{{TB|I think you should go out and find a more mature audience.}} | {{TB|I think you should go out and find a more mature audience.}} | ||
| − | {{THT|'''Task''' | + | {{THT|'''Task:''' Reach Level 20 and Build the Town Hall<br>'''Task:''' Make Saxophone Lisa Play a Saxophone Solo at the Town Hall (4h, Town Hall)|colspan=2}} |
{{Tapped Out Quimby Icon}} | {{Tapped Out Quimby Icon}} | ||
{{TB|I don't know what you're, er ah, protesting, but stop immediately or I'll have you arrested.}} | {{TB|I don't know what you're, er ah, protesting, but stop immediately or I'll have you arrested.}} | ||
| Line 1,762: | Line 1,762: | ||
{{THT|Quest reward: {{Cash|100}} and {{XP|10}}|colspan=2}} | {{THT|Quest reward: {{Cash|100}} and {{XP|10}}|colspan=2}} | ||
}} | }} | ||
| − | ====The Saxamaphone Pt.4==== | + | ==== The Saxamaphone Pt.4 ==== |
{{Table| | {{Table| | ||
{{THT|After tapping on Lisa's exclamation mark:|colspan=2}} | {{THT|After tapping on Lisa's exclamation mark:|colspan=2}} | ||
| Line 1,773: | Line 1,773: | ||
{{Tapped Out Saxophone Lisa Icon}} | {{Tapped Out Saxophone Lisa Icon}} | ||
{{TB|I've got it! I'll busk in the street. All the jazz greats started out that way!}} | {{TB|I've got it! I'll busk in the street. All the jazz greats started out that way!}} | ||
| − | {{THT|'''Task''' | + | {{THT|'''Task:''' Make Saxophone Lisa Play Street Music (4h)|colspan=2}} |
{{Tapped Out Barney Icon}} | {{Tapped Out Barney Icon}} | ||
{{TB|Quiet little saxophone girl! Some of us are trying to sleep.}} | {{TB|Quiet little saxophone girl! Some of us are trying to sleep.}} | ||
| Line 1,782: | Line 1,782: | ||
{{THT|Quest reward: {{Cash|100}} and {{XP|10}}|colspan=2}} | {{THT|Quest reward: {{Cash|100}} and {{XP|10}}|colspan=2}} | ||
}} | }} | ||
| − | ====The Saxamaphone Pt. 5==== | + | ==== The Saxamaphone Pt. 5 ==== |
{{Table| | {{Table| | ||
{{THT|After tapping on Lisa's exclamation mark:|colspan=2}} | {{THT|After tapping on Lisa's exclamation mark:|colspan=2}} | ||
| Line 1,803: | Line 1,803: | ||
{{Tapped Out Saxophone Lisa Icon}} | {{Tapped Out Saxophone Lisa Icon}} | ||
{{TB|LOUDLY.}} | {{TB|LOUDLY.}} | ||
| − | {{THT|'''Task''' | + | {{THT|'''Task:''' Make Saxophone Lisa Play a Saxophone Solo (4h)|colspan=2}} |
{{Tapped Out Homer Icon}} | {{Tapped Out Homer Icon}} | ||
{{TB|Lisa's been practicing for a long time. I'm gonna tell her she's good enough to play at the Squid Port.}} | {{TB|Lisa's been practicing for a long time. I'm gonna tell her she's good enough to play at the Squid Port.}} | ||
| Line 1,813: | Line 1,813: | ||
}} | }} | ||
}} | }} | ||
| − | ===Truth, Justice, and the Milhouse Way=== | + | === Truth, Justice, and the Milhouse Way === |
{{CollapsibleSection|To view Radioactive Milhouse's questline, click "show":| | {{CollapsibleSection|To view Radioactive Milhouse's questline, click "show":| | ||
| − | ====Truth, Justice, and the Milhouse Way Pt. 1==== | + | ==== Truth, Justice, and the Milhouse Way Pt. 1 ==== |
{{Table| | {{Table| | ||
{{THT|After tapping on Milhouse's exclamation mark:|colspan=2}} | {{THT|After tapping on Milhouse's exclamation mark:|colspan=2}} | ||
| Line 1,828: | Line 1,828: | ||
{{Tapped Out Milhouse Icon}} | {{Tapped Out Milhouse Icon}} | ||
{{TB|I always wear my protective cup.}} | {{TB|I always wear my protective cup.}} | ||
| − | {{THT|'''Task''' | + | {{THT|'''Task:''' Make Radioactive Milhouse Wear His Costume to School (1h, Springfield Elementary)|colspan=2}} |
{{Tapped Out Radioactive Milhouse Icon}} | {{Tapped Out Radioactive Milhouse Icon}} | ||
{{TB|I feel powerful in this costume. Brave and invulnerable!}} | {{TB|I feel powerful in this costume. Brave and invulnerable!}} | ||
| Line 1,839: | Line 1,839: | ||
{{THT|Quest reward: {{Cash|100}} and {{XP|10}}|colspan=2}} | {{THT|Quest reward: {{Cash|100}} and {{XP|10}}|colspan=2}} | ||
}} | }} | ||
| − | ====Truth, Justice, and the Milhouse Way Pt. 2==== | + | ==== Truth, Justice, and the Milhouse Way Pt. 2 ==== |
{{Table| | {{Table| | ||
{{THT|After tapping on Milhouse's exclamation mark:|colspan=2}} | {{THT|After tapping on Milhouse's exclamation mark:|colspan=2}} | ||
| Line 1,856: | Line 1,856: | ||
{{Tapped Out Sherri and Terri Icon}} | {{Tapped Out Sherri and Terri Icon}} | ||
{{TB|Whoa.}} | {{TB|Whoa.}} | ||
| − | {{THT|'''Task''' | + | {{THT|'''Task:''' Make Youngsters Gawk at Milhouse's Costume [x5] (2h, Springfield Elementary)<br>'''Task:''' Make Radioactive Milhouse Bask in the Attention (1h, Springfield Elementary)|colspan=2}} |
{{Tapped Out Jimbo Icon}} | {{Tapped Out Jimbo Icon}} | ||
{{TB|Now that Milhouse is no longer a nerd, we'll be making less in lunch money hijacking.}} | {{TB|Now that Milhouse is no longer a nerd, we'll be making less in lunch money hijacking.}} | ||
| Line 1,864: | Line 1,864: | ||
}} | }} | ||
| − | ====Truth, Justice, and the Milhouse Way Pt. 3==== | + | ==== Truth, Justice, and the Milhouse Way Pt. 3 ==== |
{{Table| | {{Table| | ||
{{THT|After tapping on Milhouse's exclamation mark:|colspan=2}} | {{THT|After tapping on Milhouse's exclamation mark:|colspan=2}} | ||
| Line 1,877: | Line 1,877: | ||
{{Tapped Out Radioactive Milhouse Icon}} | {{Tapped Out Radioactive Milhouse Icon}} | ||
{{TB|Back off, bullies! Leave the lady's lunch alone!}} | {{TB|Back off, bullies! Leave the lady's lunch alone!}} | ||
| − | {{THT|'''Task''' | + | {{THT|'''Task:''' Make Radioactive Milhouse Stand Up to Bullies (3h, Springfield Elementary)|colspan=2}} |
{{Tapped Out Jimbo Icon}} | {{Tapped Out Jimbo Icon}} | ||
{{TB|You're dead, Radioactive Nerd!}} | {{TB|You're dead, Radioactive Nerd!}} | ||
{{THT|Quest reward: {{Cash|100}} and {{XP|10}}|colspan=2}} | {{THT|Quest reward: {{Cash|100}} and {{XP|10}}|colspan=2}} | ||
}} | }} | ||
| − | ====Truth, Justice, and the Milhouse Way Pt. 4==== | + | ==== Truth, Justice, and the Milhouse Way Pt. 4 ==== |
{{Table| | {{Table| | ||
{{THT|After tapping on Milhouse's exclamation mark:|colspan=2}} | {{THT|After tapping on Milhouse's exclamation mark:|colspan=2}} | ||
| Line 1,893: | Line 1,893: | ||
{{Tapped Out Lisa Icon}} | {{Tapped Out Lisa Icon}} | ||
{{TB|Oh yes, it's an adorable story.}} | {{TB|Oh yes, it's an adorable story.}} | ||
| − | {{THT|'''Task''' | + | {{THT|'''Task:''' Make Radioactive Milhouse Get the Girl (2h, Springfield Elementary)<br>'''Task:''' Make Lisa Reject Milhouse (1h, Springfield Elementary)|colspan=2}} |
{{Tapped Out Lisa Icon}} | {{Tapped Out Lisa Icon}} | ||
{{TB|So who's this girl you got? Someone I know?}} | {{TB|So who's this girl you got? Someone I know?}} | ||
| Line 1,902: | Line 1,902: | ||
{{THT|Quest reward: {{Cash|100}} and {{XP|10}}|colspan=2}} | {{THT|Quest reward: {{Cash|100}} and {{XP|10}}|colspan=2}} | ||
}} | }} | ||
| − | ====Truth, Justice, and the Milhouse Way Pt. 5==== | + | ==== Truth, Justice, and the Milhouse Way Pt. 5 ==== |
{{Table| | {{Table| | ||
{{THT|After tapping on Milhouse's exclamation mark:|colspan=2}} | {{THT|After tapping on Milhouse's exclamation mark:|colspan=2}} | ||
| Line 1,911: | Line 1,911: | ||
{{Tapped Out Jimbo Icon}} | {{Tapped Out Jimbo Icon}} | ||
{{TB|He's making them bite us! Run!}} | {{TB|He's making them bite us! Run!}} | ||
| − | {{THT|'''Task''' | + | {{THT|'''Task:''' Make Radioactive Milhouse Be a Hero (24h, Springfield Elementary)|colspan=2}} |
{{Tapped Out Lisa Icon}} | {{Tapped Out Lisa Icon}} | ||
{{TB|Heh, heh, I decided to introduce my ant farm to the wild.}} | {{TB|Heh, heh, I decided to introduce my ant farm to the wild.}} | ||
| Line 1,926: | Line 1,926: | ||
}} | }} | ||
| − | ===Willie's Labyrinth=== | + | === Willie's Labyrinth === |
{{CollapsibleSection|To view The Shinning Maze's questline, click "show":| | {{CollapsibleSection|To view The Shinning Maze's questline, click "show":| | ||
| − | ====Willie's Labyrinth Pt. 1==== | + | ==== Willie's Labyrinth Pt. 1 ==== |
{{Table| | {{Table| | ||
{{THT|After placing The Shinning Maze:|colspan=2}} | {{THT|After placing The Shinning Maze:|colspan=2}} | ||
| Line 1,943: | Line 1,943: | ||
{{Tapped Out Willie Icon}} | {{Tapped Out Willie Icon}} | ||
{{TB|The maze is nigh-unbeatable. When you're cold and thirsty and clinging to the last shred of your sanity, it's the only way we'll find ye.}} | {{TB|The maze is nigh-unbeatable. When you're cold and thirsty and clinging to the last shred of your sanity, it's the only way we'll find ye.}} | ||
| − | {{THT|'''Task''' | + | {{THT|'''Task:''' Make Youngsters Get Lost in the Maze [x5] (4h, The Shinning Maze)|colspan=2}} |
{{Tapped Out Sherri and Terri Icon}} | {{Tapped Out Sherri and Terri Icon}} | ||
{{TB|Come and play with us forever!}} | {{TB|Come and play with us forever!}} | ||
| Line 1,950: | Line 1,950: | ||
{{THT|Quest reward: {{Cash|100}} and {{XP|10}}|colspan=2}} | {{THT|Quest reward: {{Cash|100}} and {{XP|10}}|colspan=2}} | ||
}} | }} | ||
| − | ====Willie's Labyrinth Pt. 2==== | + | ==== Willie's Labyrinth Pt. 2 ==== |
{{Table| | {{Table| | ||
{{THT|After tapping on Lisa's exclamation mark:|colspan=2}} | {{THT|After tapping on Lisa's exclamation mark:|colspan=2}} | ||
| Line 1,963: | Line 1,963: | ||
{{Tapped Out Lisa Icon}} | {{Tapped Out Lisa Icon}} | ||
{{TB|You can keep your flare gun.}} | {{TB|You can keep your flare gun.}} | ||
| − | {{THT|'''Task''' | + | {{THT|'''Task:''' Make Lisa Get Lost in the Maze (6h, The Shinning Maze)|colspan=2}} |
{{Tapped Out Lisa Icon}} | {{Tapped Out Lisa Icon}} | ||
{{TB|Help! Help! I've been in here for hours! Please come and get me! I don't want to have to eat my own arm!}} | {{TB|Help! Help! I've been in here for hours! Please come and get me! I don't want to have to eat my own arm!}} | ||
| Line 1,972: | Line 1,972: | ||
{{THT|Quest reward: {{Cash|100}} and {{XP|10}}|colspan=2}} | {{THT|Quest reward: {{Cash|100}} and {{XP|10}}|colspan=2}} | ||
}} | }} | ||
| − | ====Willie's Labyrinth Pt. 3==== | + | ==== Willie's Labyrinth Pt. 3 ==== |
{{Table| | {{Table| | ||
{{THT|After tapping on Willy's exclamation mark:|colspan=2}} | {{THT|After tapping on Willy's exclamation mark:|colspan=2}} | ||
| Line 1,991: | Line 1,991: | ||
{{Tapped Out Bart Icon}} | {{Tapped Out Bart Icon}} | ||
{{TB|Sure, all work and no play, yadda, yadda, yadda.}} | {{TB|Sure, all work and no play, yadda, yadda, yadda.}} | ||
| − | {{THT|'''Task''' | + | {{THT|'''Task:''' Make Bart Find a Shortcut Through the Maze (2h, The Shinning Maze)|colspan=2}} |
{{Tapped Out Willie Icon}} | {{Tapped Out Willie Icon}} | ||
{{TB|What did ye do to me maze, ye little monster?}} | {{TB|What did ye do to me maze, ye little monster?}} | ||
| Line 2,003: | Line 2,003: | ||
}} | }} | ||
}} | }} | ||
| − | ===Under the Tentacles=== | + | === Under the Tentacles === |
{{CollapsibleSection|To view Fairy Kodos' questline, click "show":| | {{CollapsibleSection|To view Fairy Kodos' questline, click "show":| | ||
| − | ====Under the Tentacles Pt. 1==== | + | ==== Under the Tentacles Pt. 1 ==== |
{{Table| | {{Table| | ||
{{THT|After tapping on Kodos's exclamation mark:|colspan=2}} | {{THT|After tapping on Kodos's exclamation mark:|colspan=2}} | ||
| Line 2,022: | Line 2,022: | ||
{{Tapped Out Fairy Kodos Icon}} | {{Tapped Out Fairy Kodos Icon}} | ||
{{TB|Hahahahaha!}} | {{TB|Hahahahaha!}} | ||
| − | {{THT|'''Task''' | + | {{THT|'''Task:''' Make Fairy Kodos Flirt With Human Males (8h, Brown House)<br>'''Glitch: '''If Kodos' Flirt with Human Males task doesn't autocomplete, move away from the Simpson House for a few, come back, she'll have the thumbs up icon on top of her.<br>Another thing to try is going to Krustyland or friend towns' screen and back to sync the game.|colspan=2}} |
{{Tapped Out Fairy Kodos Icon}} | {{Tapped Out Fairy Kodos Icon}} | ||
{{TB|Greetings fat human! Give me a dollar and I will waggle my fleshiest body parts in your face!}} | {{TB|Greetings fat human! Give me a dollar and I will waggle my fleshiest body parts in your face!}} | ||
| Line 2,033: | Line 2,033: | ||
{{THT|Quest reward: {{Cash|100}} and {{XP|10}}|colspan=2}} | {{THT|Quest reward: {{Cash|100}} and {{XP|10}}|colspan=2}} | ||
}} | }} | ||
| − | ====Under the Tentacles Pt. 2==== | + | ==== Under the Tentacles Pt. 2 ==== |
{{Table| | {{Table| | ||
{{THT|After tapping on Kodos's exclamation mark:|colspan=2}} | {{THT|After tapping on Kodos's exclamation mark:|colspan=2}} | ||
| Line 2,048: | Line 2,048: | ||
{{Tapped Out Smithers Icon}} | {{Tapped Out Smithers Icon}} | ||
{{TB|I thought you'd never ask.}} | {{TB|I thought you'd never ask.}} | ||
| − | {{THT|'''Task''' | + | {{THT|'''Task:''' Reach Level 25 and Build Burns Manor<br>'''Task:''' Make Fairy Kodos and Smithers Spread Glitter Around Town (24h, Smithers)|colspan=2}} |
{{Tapped Out Smithers Icon}} | {{Tapped Out Smithers Icon}} | ||
{{TB|You're handsome in a really unique way. Like that gorilla in Japan.}} | {{TB|You're handsome in a really unique way. Like that gorilla in Japan.}} | ||
| Line 2,059: | Line 2,059: | ||
{{THT|Quest reward: {{Cash|100}} and {{XP|10}}|colspan=2}} | {{THT|Quest reward: {{Cash|100}} and {{XP|10}}|colspan=2}} | ||
}} | }} | ||
| − | ====Under the Tentacles Pt. 3==== | + | ==== Under the Tentacles Pt. 3 ==== |
{{Table| | {{Table| | ||
{{THT|After tapping on Kodos's exclamation mark:|colspan=2}} | {{THT|After tapping on Kodos's exclamation mark:|colspan=2}} | ||
| Line 2,074: | Line 2,074: | ||
{{Tapped Out Fairy Kodos Icon}} | {{Tapped Out Fairy Kodos Icon}} | ||
{{TB|Yes, yes! Keeping it nice and breezy! Now get in the cage!}} | {{TB|Yes, yes! Keeping it nice and breezy! Now get in the cage!}} | ||
| − | {{THT|'''Task''' | + | {{THT|'''Task:''' Make Smithers Cage Dance (2h, Brown House)|colspan=2}} |
{{Tapped Out Smithers Icon}} | {{Tapped Out Smithers Icon}} | ||
{{TB|Put on some Grace Jones and stand back!}} | {{TB|Put on some Grace Jones and stand back!}} | ||
{{THT|Quest reward: {{Cash|100}} and {{XP|10}}|colspan=2}} | {{THT|Quest reward: {{Cash|100}} and {{XP|10}}|colspan=2}} | ||
}} | }} | ||
| − | ====Under the Tentacles Pt. 4==== | + | ==== Under the Tentacles Pt. 4 ==== |
{{Table| | {{Table| | ||
{{THT|After tapping on Kodos's exclamation mark:|colspan=2}} | {{THT|After tapping on Kodos's exclamation mark:|colspan=2}} | ||
| Line 2,092: | Line 2,092: | ||
{{Tapped Out Mr. Burns Icon}} | {{Tapped Out Mr. Burns Icon}} | ||
{{TB|See here, Madam, my eyes need blinking! Release my assistant at once!}} | {{TB|See here, Madam, my eyes need blinking! Release my assistant at once!}} | ||
| − | {{THT|'''Task''' | + | {{THT|'''Task:''' Make Burns Stage a Daring Rescue (2h, Brown House)|colspan=2}} |
{{Tapped Out Mr. Burns Icon}} | {{Tapped Out Mr. Burns Icon}} | ||
{{TB|Stand back or I will salt you like a sidewalk slug!}} | {{TB|Stand back or I will salt you like a sidewalk slug!}} | ||
| Line 2,105: | Line 2,105: | ||
}} | }} | ||
| − | ===Early Squirrel Gets the Nut=== | + | === Early Squirrel Gets the Nut === |
{{CollapsibleSection|To view Acorn Kirk's questline, click "show":| | {{CollapsibleSection|To view Acorn Kirk's questline, click "show":| | ||
| − | ====Early Squirrel Gets the Nut Pt. 1==== | + | ==== Early Squirrel Gets the Nut Pt. 1 ==== |
{{Table| | {{Table| | ||
{{THT|After tapping on Kirk's exclamation mark:|colspan=2}} | {{THT|After tapping on Kirk's exclamation mark:|colspan=2}} | ||
| Line 2,130: | Line 2,130: | ||
{{Tapped Out Luann Icon}} | {{Tapped Out Luann Icon}} | ||
{{TB|Don't tell me you lost your pants again!}} | {{TB|Don't tell me you lost your pants again!}} | ||
| − | {{THT|'''Task''' | + | {{THT|'''Task:''' Make Acorn Kirk Look for His Pants (2h, Van Houten House)|colspan=2}} |
{{Tapped Out Luann Icon}} | {{Tapped Out Luann Icon}} | ||
{{TB|This year for our costumes I thought we'd go...}} | {{TB|This year for our costumes I thought we'd go...}} | ||
| Line 2,143: | Line 2,143: | ||
{{THT|Quest reward: {{Cash|100}} and {{XP|10}}|colspan=2}} | {{THT|Quest reward: {{Cash|100}} and {{XP|10}}|colspan=2}} | ||
}} | }} | ||
| − | ====Early Squirrel Gets the Nut Pt. 2==== | + | ==== Early Squirrel Gets the Nut Pt. 2 ==== |
{{Table| | {{Table| | ||
{{THT|After tapping on Kirk's exclamation mark:|colspan=2}} | {{THT|After tapping on Kirk's exclamation mark:|colspan=2}} | ||
| Line 2,156: | Line 2,156: | ||
{{Tapped Out Squirrel Luann Icon}} | {{Tapped Out Squirrel Luann Icon}} | ||
{{TB|There are clear plastic straps that fasten around your butt-cheeks. But mostly, it's held on by spirit-gum.}} | {{TB|There are clear plastic straps that fasten around your butt-cheeks. But mostly, it's held on by spirit-gum.}} | ||
| − | {{THT|If the user has Luann: '''Task''' | + | {{THT|If the user has Luann: '''Task:''' Make Luann Painfully Glue Kirk's Costume to His Groin. (6h, Van Houten House, Kirk)<br>If the user doesn't have Luann: '''Task:''' Make Kirk Get His Costume Painfully Glued to His Groin (6h, Van Houten House)|colspan=2}} |
{{Tapped Out Acorn Kirk Icon}} | {{Tapped Out Acorn Kirk Icon}} | ||
{{TB|I feel kind of silly.}} | {{TB|I feel kind of silly.}} | ||
| Line 2,165: | Line 2,165: | ||
{{THT|Quest reward: {{Cash|100}} and {{XP|10}}|colspan=2}} | {{THT|Quest reward: {{Cash|100}} and {{XP|10}}|colspan=2}} | ||
}} | }} | ||
| − | ====Early Squirrel Gets the Nut Pt. 3==== | + | ==== Early Squirrel Gets the Nut Pt. 3 ==== |
{{Table| | {{Table| | ||
{{THT|After tapping on Kirk's exclamation mark:|colspan=2}} | {{THT|After tapping on Kirk's exclamation mark:|colspan=2}} | ||
| Line 2,174: | Line 2,174: | ||
{{Tapped Out Acorn Kirk Icon}} | {{Tapped Out Acorn Kirk Icon}} | ||
{{TB|And why are they chasing me!}} | {{TB|And why are they chasing me!}} | ||
| − | {{THT|'''Task''' | + | {{THT|'''Task:''' Make Acorn Kirk Get Attacked by Squirrels (24h)|colspan=2}} |
{{Tapped Out Wiggum Icon}} | {{Tapped Out Wiggum Icon}} | ||
{{TB|Hold it right there, Sick-O! Ugh, people like you make me sick!}} | {{TB|Hold it right there, Sick-O! Ugh, people like you make me sick!}} | ||
| Line 2,187: | Line 2,187: | ||
{{THT|Quest reward: {{Cash|100}} and {{XP|10}}|colspan=2}} | {{THT|Quest reward: {{Cash|100}} and {{XP|10}}|colspan=2}} | ||
}} | }} | ||
| − | ====Early Squirrel Gets the Nut Pt. 4==== | + | ==== Early Squirrel Gets the Nut Pt. 4 ==== |
{{Table| | {{Table| | ||
{{THT|After tapping on Kirk's exclamation mark:|colspan=2}} | {{THT|After tapping on Kirk's exclamation mark:|colspan=2}} | ||
| Line 2,204: | Line 2,204: | ||
{{Tapped Out Acorn Kirk Icon}} | {{Tapped Out Acorn Kirk Icon}} | ||
{{TB|Squirrels ate my crotch-acorn! Now, back to what I was saying about my dignity...}} | {{TB|Squirrels ate my crotch-acorn! Now, back to what I was saying about my dignity...}} | ||
| − | {{THT|'''Task''' | + | {{THT|'''Task:''' Make Kirk Argue (6h, Van Houten House)<br>'''Task:''' Make Luann Argue (6h, Van Houten House)|colspan=2}} |
{{Tapped Out Squirrel Luann Icon}} | {{Tapped Out Squirrel Luann Icon}} | ||
{{TB|Luckily, I made you a spare costume!}} | {{TB|Luckily, I made you a spare costume!}} | ||
| Line 2,217: | Line 2,217: | ||
{{THT|Quest reward: {{Cash|100}} and {{XP|10}}|colspan=2}} | {{THT|Quest reward: {{Cash|100}} and {{XP|10}}|colspan=2}} | ||
}} | }} | ||
| − | ====Early Squirrel Gets the Nut Pt. 5==== | + | ==== Early Squirrel Gets the Nut Pt. 5 ==== |
{{Table| | {{Table| | ||
{{THT|After tapping on Kirk's exclamation mark:|colspan=2}} | {{THT|After tapping on Kirk's exclamation mark:|colspan=2}} | ||
| Line 2,226: | Line 2,226: | ||
{{Tapped Out Squirrel Luann Icon}} | {{Tapped Out Squirrel Luann Icon}} | ||
{{TB|Kirk! You sneezed off your acorn! It's rolling down that hill!}} | {{TB|Kirk! You sneezed off your acorn! It's rolling down that hill!}} | ||
| − | {{THT|'''Task''' | + | {{THT|'''Task:''' Make Acorn Kirk Chase His Acorn (8h, Van Houten House)|colspan=2}} |
{{Tapped Out Wiggum Icon}} | {{Tapped Out Wiggum Icon}} | ||
{{TB|That's right, naked dude, you better catch that acorn' or I'll fine you for littering!}} | {{TB|That's right, naked dude, you better catch that acorn' or I'll fine you for littering!}} | ||
| Line 2,233: | Line 2,233: | ||
}} | }} | ||
| − | ===Cover Squirrel=== | + | === Cover Squirrel === |
{{CollapsibleSection|To view Squirrel Luann's questline, click "show":| | {{CollapsibleSection|To view Squirrel Luann's questline, click "show":| | ||
| − | ====Cover Squirrel Pt. 1==== | + | ==== Cover Squirrel Pt. 1 ==== |
{{Table| | {{Table| | ||
{{THT|After tapping on Luann's exclamation mark:|colspan=2}} | {{THT|After tapping on Luann's exclamation mark:|colspan=2}} | ||
| Line 2,248: | Line 2,248: | ||
{{Tapped Out Luann Icon}} | {{Tapped Out Luann Icon}} | ||
{{TB|A woman should be able to walk down the street dressed like a giant squirrel without having to hear comments about it!}} | {{TB|A woman should be able to walk down the street dressed like a giant squirrel without having to hear comments about it!}} | ||
| − | {{THT|'''Task''' | + | {{THT|'''Task:''' Make Squirrel Luann Petition for Women's Rights (4h)|colspan=2}} |
{{Tapped Out Miss Springfield Icon}} | {{Tapped Out Miss Springfield Icon}} | ||
{{TB|You're right, Luann, people are always saying I'm easy just cause-a the way I dress.}} | {{TB|You're right, Luann, people are always saying I'm easy just cause-a the way I dress.}} | ||
| Line 2,255: | Line 2,255: | ||
{{THT|Quest reward: {{Cash|100}} and {{XP|10}}|colspan=2}} | {{THT|Quest reward: {{Cash|100}} and {{XP|10}}|colspan=2}} | ||
}} | }} | ||
| − | ====Cover Squirrel Pt. 2==== | + | ==== Cover Squirrel Pt. 2 ==== |
{{Table| | {{Table| | ||
{{THT|After tapping on Luann's exclamation mark:|colspan=2}} | {{THT|After tapping on Luann's exclamation mark:|colspan=2}} | ||
| Line 2,264: | Line 2,264: | ||
{{Tapped Out Squirrel Luann Icon}} | {{Tapped Out Squirrel Luann Icon}} | ||
{{TB|This year, we'll all wear sexless, non-form-fitting ghost costumes.}} | {{TB|This year, we'll all wear sexless, non-form-fitting ghost costumes.}} | ||
| − | {{THT|'''Task''' | + | {{THT|'''Task:''' Make Springfield Women Buy Ghost Costumes [x5] (1h, Kwik-E-Mart)|colspan=2}} |
{{Tapped Out Marge Icon}} | {{Tapped Out Marge Icon}} | ||
{{TB|This is basically a white burka. Oh, I had such a pretty witch costume this year.}} | {{TB|This is basically a white burka. Oh, I had such a pretty witch costume this year.}} | ||
| Line 2,273: | Line 2,273: | ||
{{THT|Quest reward: {{Cash|100}} and {{XP|10}}|colspan=2}} | {{THT|Quest reward: {{Cash|100}} and {{XP|10}}|colspan=2}} | ||
}} | }} | ||
| − | ====Cover Squirrel Pt. 3==== | + | ==== Cover Squirrel Pt. 3 ==== |
{{Table| | {{Table| | ||
{{THT|After tapping on Luann's exclamation mark:|colspan=2}} | {{THT|After tapping on Luann's exclamation mark:|colspan=2}} | ||
| Line 2,288: | Line 2,288: | ||
{{Tapped Out Kirk Icon}} | {{Tapped Out Kirk Icon}} | ||
{{TB|No! That doesn't give it away. I would totally believe there was a man under there.}} | {{TB|No! That doesn't give it away. I would totally believe there was a man under there.}} | ||
| − | {{THT|'''Task''' | + | {{THT|'''Task:''' Make Squirrel Luann Cut up her Ghost Outfit (2h, Van Houten House)|colspan=2}} |
{{Tapped Out Squirrel Luann Icon}} | {{Tapped Out Squirrel Luann Icon}} | ||
{{TB|Oh look, something destroyed my ghost costume. Looks like I'll have to go back to being a sexy squirrel.}} | {{TB|Oh look, something destroyed my ghost costume. Looks like I'll have to go back to being a sexy squirrel.}} | ||
{{THT|Quest reward: {{Cash|100}} and {{XP|10}}|colspan=2}} | {{THT|Quest reward: {{Cash|100}} and {{XP|10}}|colspan=2}} | ||
}} | }} | ||
| − | ====Cover Squirrel Pt. 4==== | + | ==== Cover Squirrel Pt. 4 ==== |
{{Table| | {{Table| | ||
{{THT|After tapping on Luann's exclamation mark:|colspan=2}} | {{THT|After tapping on Luann's exclamation mark:|colspan=2}} | ||
| Line 2,304: | Line 2,304: | ||
{{Tapped Out Squirrel Luann Icon}} | {{Tapped Out Squirrel Luann Icon}} | ||
{{TB|Being a feminist is fun!}} | {{TB|Being a feminist is fun!}} | ||
| − | {{THT|'''Task''' | + | {{THT|'''Task:''' Make Squirrel Luann Show Off Her Squirrel Costume (8h)|colspan=2}} |
{{Tapped Out Patty Icon}} | {{Tapped Out Patty Icon}} | ||
{{TB|What's going on? How come you get to wear a cute costume?}} | {{TB|What's going on? How come you get to wear a cute costume?}} | ||
| Line 2,313: | Line 2,313: | ||
{{THT|Quest reward: {{Cash|100}} and {{XP|10}}|colspan=2}} | {{THT|Quest reward: {{Cash|100}} and {{XP|10}}|colspan=2}} | ||
}} | }} | ||
| − | ====Cover Squirrel Pt. 5==== | + | ==== Cover Squirrel Pt. 5 ==== |
{{Table| | {{Table| | ||
{{THT|After tapping on Luann's exclamation mark:|colspan=2}} | {{THT|After tapping on Luann's exclamation mark:|colspan=2}} | ||
| Line 2,322: | Line 2,322: | ||
{{Tapped Out Marge Icon}} | {{Tapped Out Marge Icon}} | ||
{{TB|Halloween only comes once a year! Live it up!}} | {{TB|Halloween only comes once a year! Live it up!}} | ||
| − | {{THT|'''Task''' | + | {{THT|'''Task:''' Make Springfield Women Sexify Their Outfits [x5] (8h, Kwik-E-Mart)|colspan=2}} |
{{Tapped Out Marge Icon}} | {{Tapped Out Marge Icon}} | ||
{{TB|I have an idea – Let's objectify the men!}} | {{TB|I have an idea – Let's objectify the men!}} | ||
| Line 2,330: | Line 2,330: | ||
}} | }} | ||
}} | }} | ||
| − | ===What Is Dead May Never Die=== | + | === What Is Dead May Never Die === |
{{Table| | {{Table| | ||
| − | {{THT|After unlocking Disco Zombie:<br>'''Task''' | + | {{THT|After unlocking Disco Zombie:<br>'''Task:''' Tap the Disco Zombie<br>Quest reward: {{Cash|100}} and {{XP|10}}|colspan=2}} |
}} | }} | ||
| − | ===Spawn of the Elder God=== | + | === Spawn of the Elder God === |
{{Table| | {{Table| | ||
| − | {{THT|After unlocking Star Spawn:<br>'''Task''' | + | {{THT|After unlocking Star Spawn:<br>'''Task:''' Tap the Star Spawn<br>Quest reward: {{Cash|100}} and {{XP|10}}|colspan=2}} |
}} | }} | ||
| − | ===Formless Tappers=== | + | === Formless Tappers === |
{{Table| | {{Table| | ||
| − | {{THT|After unlocking Formless Terror:<br>'''Task''' | + | {{THT|After unlocking Formless Terror:<br>'''Task:''' Tap the Formless Terror<br>Quest reward: {{Cash|100}} and {{XP|10}}|colspan=2}} |
}} | }} | ||
| − | ===No Bones About It=== | + | === No Bones About It === |
{{Table| | {{Table| | ||
| − | {{THT|After unlocking Helter Skeleter:<br>'''Task''' | + | {{THT|After unlocking Helter Skeleter:<br>'''Task:''' Tap the Helter Skeleter<br>Quest reward: {{Cash|100}} and {{XP|10}}|colspan=2}} |
}} | }} | ||
| − | ==Kang and Kodos Gameplay== | + | == Kang and Kodos Gameplay == |
| − | ===Midgalaxy Crisis=== | + | === Midgalaxy Crisis === |
{{CollapsibleSection|To view this questline, click "show":| | {{CollapsibleSection|To view this questline, click "show":| | ||
| − | ====Midgalaxy Crisis Pt. 1==== | + | ==== Midgalaxy Crisis Pt. 1 ==== |
{{Table| | {{Table| | ||
{{THT|After completing A Proper Rigellian Thanksgiving Pt. 1 and tapping on Kang's exclamation mark:|colspan=2}} | {{THT|After completing A Proper Rigellian Thanksgiving Pt. 1 and tapping on Kang's exclamation mark:|colspan=2}} | ||
| Line 2,369: | Line 2,369: | ||
{{Tapped Out Kodos Icon}} | {{Tapped Out Kodos Icon}} | ||
{{TB|Like she always does?}} | {{TB|Like she always does?}} | ||
| − | {{THT|'''Task''' | + | {{THT|'''Task:''' Make Kang Ponder His Character (6h, Brown House)|colspan=2}} |
{{Tapped Out Kang Icon}} | {{Tapped Out Kang Icon}} | ||
{{TB|How did this happen? I'm still young.}} | {{TB|How did this happen? I'm still young.}} | ||
| Line 2,376: | Line 2,376: | ||
{{THT|Quest reward: {{Cash|100}} and {{XP|10}}|colspan=2}} | {{THT|Quest reward: {{Cash|100}} and {{XP|10}}|colspan=2}} | ||
}} | }} | ||
| − | ====Midgalaxy Crisis Pt. 2==== | + | ==== Midgalaxy Crisis Pt. 2 ==== |
{{Table| | {{Table| | ||
{{THT|After tapping on Kang's exclamation mark:|colspan=2}} | {{THT|After tapping on Kang's exclamation mark:|colspan=2}} | ||
| Line 2,383: | Line 2,383: | ||
{{Tapped Out Kang Icon}} | {{Tapped Out Kang Icon}} | ||
{{TB|You're about to see Kang, the unpredictable, do something you've never seen before!}} | {{TB|You're about to see Kang, the unpredictable, do something you've never seen before!}} | ||
| − | {{THT|'''Task''' | + | {{THT|'''Task:''' Make Kang Crack the Whip (1h)<br>'''Task:''' Make Homer Hide in the Brown House (24h, Brown House)<br>Quest reward: {{Cash|100}} and {{XP|10}}|colspan=2}} |
}} | }} | ||
| − | ====Midgalaxy Crisis Pt. 3==== | + | ==== Midgalaxy Crisis Pt. 3 ==== |
{{Table| | {{Table| | ||
{{THT|After tapping on Kang's exclamation mark:|colspan=2}} | {{THT|After tapping on Kang's exclamation mark:|colspan=2}} | ||
| Line 2,402: | Line 2,402: | ||
{{Tapped Out Bart Icon}} | {{Tapped Out Bart Icon}} | ||
{{TB|Possums aren't smart or brave, how do they survive?}} | {{TB|Possums aren't smart or brave, how do they survive?}} | ||
| − | {{THT|'''Task''' | + | {{THT|'''Task:''' Make Homer Play Dead (4h)|colspan=2}} |
{{Tapped Out Kang Icon}} | {{Tapped Out Kang Icon}} | ||
{{TB|The humans have left us an offering.}} | {{TB|The humans have left us an offering.}} | ||
| Line 2,415: | Line 2,415: | ||
{{THT|Quest reward: {{Cash|100}} and {{XP|10}}|colspan=2}} | {{THT|Quest reward: {{Cash|100}} and {{XP|10}}|colspan=2}} | ||
}} | }} | ||
| − | ====Midgalaxy Crisis Pt. 4==== | + | ==== Midgalaxy Crisis Pt. 4 ==== |
{{Table| | {{Table| | ||
{{THT|After tapping on Kang's exclamation mark:|colspan=2}} | {{THT|After tapping on Kang's exclamation mark:|colspan=2}} | ||
| Line 2,426: | Line 2,426: | ||
{{Tapped Out Kang Icon}} | {{Tapped Out Kang Icon}} | ||
{{TB|And probing.}} | {{TB|And probing.}} | ||
| − | {{THT|'''Task''' | + | {{THT|'''Task:''' Make Kang Activate the Beacon (10m)|colspan=2}} |
{{Tapped Out Homer Icon}} | {{Tapped Out Homer Icon}} | ||
{{TB|You guys are trying to set some kind of probing record.}} | {{TB|You guys are trying to set some kind of probing record.}} | ||
| Line 2,443: | Line 2,443: | ||
}} | }} | ||
| − | ===Where No Probe Has Gone Before=== | + | === Where No Probe Has Gone Before === |
{{CollapsibleSection|To view this questline, click "show":| | {{CollapsibleSection|To view this questline, click "show":| | ||
| − | ====Where No Probe Has Gone Before Pt. 1==== | + | ==== Where No Probe Has Gone Before Pt. 1 ==== |
{{Table| | {{Table| | ||
{{THT|After completing Midgalaxy Crisis Pt. 4 and tapping on Kang's exclamation mark:|colspan=2}} | {{THT|After completing Midgalaxy Crisis Pt. 4 and tapping on Kang's exclamation mark:|colspan=2}} | ||
| Line 2,456: | Line 2,456: | ||
{{Tapped Out Kodos Icon}} | {{Tapped Out Kodos Icon}} | ||
{{TB|And it's dishwasher safe!}} | {{TB|And it's dishwasher safe!}} | ||
| − | {{THT|'''Task''' | + | {{THT|'''Task:''' Make Kodos Demonstrate Superior Technology (1h)|colspan=2}} |
{{Tapped Out Kodos Icon}} | {{Tapped Out Kodos Icon}} | ||
{{TB|What do you think?!}} | {{TB|What do you think?!}} | ||
| Line 2,467: | Line 2,467: | ||
{{THT|Quest reward: {{Cash|100}} and {{XP|10}}|colspan=2}} | {{THT|Quest reward: {{Cash|100}} and {{XP|10}}|colspan=2}} | ||
}} | }} | ||
| − | ====Where No Probe Has Gone Before Pt. 2==== | + | ==== Where No Probe Has Gone Before Pt. 2 ==== |
{{Table| | {{Table| | ||
{{THT|After tapping on Kodos's exclamation mark:|colspan=2}} | {{THT|After tapping on Kodos's exclamation mark:|colspan=2}} | ||
| Line 2,476: | Line 2,476: | ||
{{Tapped Out Kodos Icon}} | {{Tapped Out Kodos Icon}} | ||
{{TB|Never underestimate the power of packaging stickers!}} | {{TB|Never underestimate the power of packaging stickers!}} | ||
| − | {{THT|'''Task''' | + | {{THT|'''Task:''' Make Kodos Develop New Probe Technology (12h, Brown House)|colspan=2}} |
{{Tapped Out Kang Icon}} | {{Tapped Out Kang Icon}} | ||
{{TB|Could it have more lights and beeps?}} | {{TB|Could it have more lights and beeps?}} | ||
| Line 2,487: | Line 2,487: | ||
{{THT|Quest reward: {{Cash|100}} and {{XP|10}}|colspan=2}} | {{THT|Quest reward: {{Cash|100}} and {{XP|10}}|colspan=2}} | ||
}} | }} | ||
| − | ====Where No Probe Has Gone Before Pt. 3==== | + | ==== Where No Probe Has Gone Before Pt. 3 ==== |
{{Table| | {{Table| | ||
{{THT|After tapping on Kodos's exclamation mark:|colspan=2}} | {{THT|After tapping on Kodos's exclamation mark:|colspan=2}} | ||
| Line 2,498: | Line 2,498: | ||
{{Tapped Out Kodos Icon}} | {{Tapped Out Kodos Icon}} | ||
{{TB|Kang? Where'd you go?}} | {{TB|Kang? Where'd you go?}} | ||
| − | {{THT|'''Task''' | + | {{THT|'''Task:''' Make Kang Chase Laser Dot [x2] (2h, Brown House)|colspan=2}} |
{{Tapped Out Kodos Icon}} | {{Tapped Out Kodos Icon}} | ||
{{TB|Kang, this is not a glorified cat toy! Remember the serious and vital purpose of this essential tool.}} | {{TB|Kang, this is not a glorified cat toy! Remember the serious and vital purpose of this essential tool.}} | ||
| Line 2,511: | Line 2,511: | ||
{{THT|Quest reward: {{Cash|100}} and {{XP|10}}|colspan=2}} | {{THT|Quest reward: {{Cash|100}} and {{XP|10}}|colspan=2}} | ||
}} | }} | ||
| − | ====Where No Probe Has Gone Before Pt. 4==== | + | ==== Where No Probe Has Gone Before Pt. 4 ==== |
{{Table| | {{Table| | ||
{{THT|After tapping on Kodos's exclamation mark:|colspan=2}} | {{THT|After tapping on Kodos's exclamation mark:|colspan=2}} | ||
| Line 2,524: | Line 2,524: | ||
{{Tapped Out Kang Icon}} | {{Tapped Out Kang Icon}} | ||
{{TB|Ugh. I shouldn't have touched that. I'm going to wash my tentacle.}} | {{TB|Ugh. I shouldn't have touched that. I'm going to wash my tentacle.}} | ||
| − | {{THT|'''Task''' | + | {{THT|'''Task:''' Make Kodos Refine Probe Technology (24h, Brown House)<br>Quest reward: {{Cash|100}} and {{XP|10}}|colspan=2}} |
}} | }} | ||
| − | ====Where No Probe Has Gone Before Pt. 5==== | + | ==== Where No Probe Has Gone Before Pt. 5 ==== |
{{Table| | {{Table| | ||
{{THT|After tapping on Kodos's exclamation mark:|colspan=2}} | {{THT|After tapping on Kodos's exclamation mark:|colspan=2}} | ||
| Line 2,535: | Line 2,535: | ||
{{Tapped Out Kodos Icon}} | {{Tapped Out Kodos Icon}} | ||
{{TB|If you have any problems, let me know personally – don't leave negative feedback!}} | {{TB|If you have any problems, let me know personally – don't leave negative feedback!}} | ||
| − | {{THT|'''Task''' | + | {{THT|'''Task:''' Make Kang Probe Homer (36h, Homer)<br>'''Task:''' Make Kodos 8 Hour Evil Laugh (8h)|colspan=2}} |
{{Tapped Out Kodos Icon}} | {{Tapped Out Kodos Icon}} | ||
{{TB|Kang, have you finished probing the fat, bald human? We need to keep moving if you want to break the record!}} | {{TB|Kang, have you finished probing the fat, bald human? We need to keep moving if you want to break the record!}} | ||
| Line 2,543: | Line 2,543: | ||
}} | }} | ||
}} | }} | ||
| − | ==Dates== | + | == Dates == |
{{Table| | {{Table| | ||
{{TH|Date and Time}} | {{TH|Date and Time}} | ||
| Line 2,651: | Line 2,651: | ||
{{TB|Quests Kill Date, Radioactive Milhouse, Saxophone Lisa, Wizard Martin, Spooky Campfire, Fairy Kodos,<br>Devil Flanders, Heck House, Marge the Witch, Portal to Rigel 7, Rigellian Queen, Acorn Kirk, Squirrel Luann}} | {{TB|Quests Kill Date, Radioactive Milhouse, Saxophone Lisa, Wizard Martin, Spooky Campfire, Fairy Kodos,<br>Devil Flanders, Heck House, Marge the Witch, Portal to Rigel 7, Rigellian Queen, Acorn Kirk, Squirrel Luann}} | ||
}} | }} | ||
| − | ==Nightmare Spawn and Currency Earning Jobs== | + | == Nightmare Spawn and Currency Earning Jobs == |
| − | ===All Acts=== | + | === All Acts === |
| − | ====Items==== | + | ==== Items ==== |
{{Table| | {{Table| | ||
{{TH|Item}} | {{TH|Item}} | ||
| Line 2,680: | Line 2,680: | ||
{{TB|[[File:TSTO Random Nightmare Icon.png|20px]]24 Random Nightmares}} | {{TB|[[File:TSTO Random Nightmare Icon.png|20px]]24 Random Nightmares}} | ||
}} | }} | ||
| − | ====Characters==== | + | ==== Characters ==== |
{{Table| | {{Table| | ||
{{TH|Character}} | {{TH|Character}} | ||
| Line 2,709: | Line 2,709: | ||
}} | }} | ||
| − | ===Act 1 and 2=== | + | === Act 1 and 2 === |
<gallery> | <gallery> | ||
File:Spooky Campfire Act 1 and 2 Menu.png|Spooky Campfire Act 1 and 2 Menu | File:Spooky Campfire Act 1 and 2 Menu.png|Spooky Campfire Act 1 and 2 Menu | ||
| Line 2,718: | Line 2,718: | ||
</gallery> | </gallery> | ||
| − | ====Tell a Scary Story==== | + | ==== Tell a Scary Story ==== |
{{Table| | {{Table| | ||
{{TH|Character}} | {{TH|Character}} | ||
| Line 2,741: | Line 2,741: | ||
}} | }} | ||
| − | ====Send Youngsters to Make S'mores==== | + | ==== Send Youngsters to Make S'mores ==== |
{{Table| | {{Table| | ||
{{TH|Characters}} | {{TH|Characters}} | ||
| Line 2,760: | Line 2,760: | ||
{{TB|[[File:Tapped Out Smores.png|20px]]16}} | {{TB|[[File:Tapped Out Smores.png|20px]]16}} | ||
}} | }} | ||
| − | ===Act 2=== | + | === Act 2 === |
<gallery> | <gallery> | ||
File:THOH2015 Find Building.png|Find Building Screen | File:THOH2015 Find Building.png|Find Building Screen | ||
| Line 2,769: | Line 2,769: | ||
</gallery> | </gallery> | ||
| − | ====Gather at the Simpson's House==== | + | ==== Gather at the Simpson's House ==== |
{{Table| | {{Table| | ||
{{TH|Characters}} | {{TH|Characters}} | ||
| Line 2,784: | Line 2,784: | ||
{{TB|[[File:Tapped Out Gummies.png|20px]]60}} | {{TB|[[File:Tapped Out Gummies.png|20px]]60}} | ||
}} | }} | ||
| − | ====Unwind With Wine==== | + | ==== Unwind With Wine ==== |
{{Table| | {{Table| | ||
{{TH|Characters}} | {{TH|Characters}} | ||
| Line 2,795: | Line 2,795: | ||
{{TB|[[File:Tapped Out Gummies.png|20px]]6}} | {{TB|[[File:Tapped Out Gummies.png|20px]]6}} | ||
}} | }} | ||
| − | ====Have Fun With Cameras==== | + | ==== Have Fun With Cameras ==== |
{{Table| | {{Table| | ||
{{TH|Characters}} | {{TH|Characters}} | ||
| Line 2,808: | Line 2,808: | ||
{{TB|[[File:Tapped Out Gummies.png|20px]]18}} | {{TB|[[File:Tapped Out Gummies.png|20px]]18}} | ||
}} | }} | ||
| − | ====Play With Food==== | + | ==== Play With Food ==== |
{{Table| | {{Table| | ||
{{TH|Characters}} | {{TH|Characters}} | ||
| Line 2,820: | Line 2,820: | ||
}} | }} | ||
| − | ====Characters==== | + | ==== Characters ==== |
{{Table| | {{Table| | ||
{{TH|Character}} | {{TH|Character}} | ||
| Line 2,834: | Line 2,834: | ||
}} | }} | ||
| − | ===Act 3=== | + | === Act 3 === |
<gallery> | <gallery> | ||
File:Spooky Campfire Act 3 Menu.png|Spooky Campfire Act 3 Menu (Active) | File:Spooky Campfire Act 3 Menu.png|Spooky Campfire Act 3 Menu (Active) | ||
| Line 2,848: | Line 2,848: | ||
File:Sunk Temple.png|Sunk Temple | File:Sunk Temple.png|Sunk Temple | ||
</gallery> | </gallery> | ||
| − | ====Fight M'nthster==== | + | ==== Fight M'nthster ==== |
{{Table| | {{Table| | ||
{{TH|Characters}} | {{TH|Characters}} | ||
| Line 2,864: | Line 2,864: | ||
{{TB|[[File:Tapped Out Candy Apples.png|20px]]8}} | {{TB|[[File:Tapped Out Candy Apples.png|20px]]8}} | ||
}} | }} | ||
| − | ====Hunt Nightmares==== | + | ==== Hunt Nightmares ==== |
{{Table| | {{Table| | ||
{{TH|Characters}} | {{TH|Characters}} | ||
| Line 2,889: | Line 2,889: | ||
{{TB|[[File:Tapped Out Snakes.png|20px]]2}} | {{TB|[[File:Tapped Out Snakes.png|20px]]2}} | ||
}} | }} | ||
| − | ====Defeating M'nthster==== | + | ==== Defeating M'nthster ==== |
{{Table| | {{Table| | ||
{{TH|Attack}} | {{TH|Attack}} | ||
| Line 2,903: | Line 2,903: | ||
}} | }} | ||
| − | ====Characters==== | + | ==== Characters ==== |
{{Table| | {{Table| | ||
{{TH|Character}} | {{TH|Character}} | ||
| Line 2,917: | Line 2,917: | ||
}} | }} | ||
| − | ==Prizes== | + | == Prizes == |
{{Table| | {{Table| | ||
{{THT|'''Note: '''While collecting the items, you'll find yourself getting a weird number in the prize track screen. The game is actually showing you how many you need to reach that prize, not the total like other events. The total will show up on the lower left of the screen.}} | {{THT|'''Note: '''While collecting the items, you'll find yourself getting a weird number in the prize track screen. The game is actually showing you how many you need to reach that prize, not the total like other events. The total will show up on the lower left of the screen.}} | ||
| Line 2,976: | Line 2,976: | ||
}} | }} | ||
| − | ===Captain Kang=== | + | === Captain Kang === |
{{CollapsibleSection|To view Pirate Kang's questline, click "show":| | {{CollapsibleSection|To view Pirate Kang's questline, click "show":| | ||
| − | ====Captain Kang Pt. 1==== | + | ==== Captain Kang Pt. 1 ==== |
{{Table| | {{Table| | ||
{{THT|After tapping on Kang's exclamation mark:|colspan=2}} | {{THT|After tapping on Kang's exclamation mark:|colspan=2}} | ||
| Line 2,991: | Line 2,991: | ||
{{Tapped Out Pirate Kang Icon}} | {{Tapped Out Pirate Kang Icon}} | ||
{{TB|No, not even a little bit.}} | {{TB|No, not even a little bit.}} | ||
| − | {{THT|'''Task''' | + | {{THT|'''Task:''' Make Pirate Kang Walk on Peg Tentacles (4h)|colspan=2}} |
{{Tapped Out Kodos Icon}} | {{Tapped Out Kodos Icon}} | ||
{{TB|I was standing still and you have yet to get close to me.}} | {{TB|I was standing still and you have yet to get close to me.}} | ||
{{THT|Quest reward: {{Cash|100}} and {{XP|10}}|colspan=2}} | {{THT|Quest reward: {{Cash|100}} and {{XP|10}}|colspan=2}} | ||
}} | }} | ||
| − | ====Captain Kang Pt. 2==== | + | ==== Captain Kang Pt. 2 ==== |
{{Table| | {{Table| | ||
{{THT|After tapping on Kang's exclamation mark:|colspan=2}} | {{THT|After tapping on Kang's exclamation mark:|colspan=2}} | ||
| Line 3,005: | Line 3,005: | ||
{{Tapped Out Kodos Icon}} | {{Tapped Out Kodos Icon}} | ||
{{TB|Your pirate disguise will not be convincing if you do not do your research! This is Halloween! You do not want to blow your cover!}} | {{TB|Your pirate disguise will not be convincing if you do not do your research! This is Halloween! You do not want to blow your cover!}} | ||
| − | {{THT|'''Task''' | + | {{THT|'''Task:''' Reach Level 12 and Build the Springfield Library<br>'''Task:''' Make Pirate Kang Research Pirates (4h, Springfield Library)|colspan=2}} |
{{Tapped Out Kodos Icon}} | {{Tapped Out Kodos Icon}} | ||
{{TB|What did you learn of pirates?}} | {{TB|What did you learn of pirates?}} | ||
| Line 3,014: | Line 3,014: | ||
{{THT|Quest reward: {{Cash|100}} and {{XP|10}}|colspan=2}} | {{THT|Quest reward: {{Cash|100}} and {{XP|10}}|colspan=2}} | ||
}} | }} | ||
| − | ====Captain Kang Pt. 3==== | + | ==== Captain Kang Pt. 3 ==== |
{{Table| | {{Table| | ||
{{THT|After tapping on Kang's exclamation mark:|colspan=2}} | {{THT|After tapping on Kang's exclamation mark:|colspan=2}} | ||
| Line 3,027: | Line 3,027: | ||
{{Tapped Out Pirate Kang Icon}} | {{Tapped Out Pirate Kang Icon}} | ||
{{TB|Teach me!}} | {{TB|Teach me!}} | ||
| − | {{THT|'''Task''' | + | {{THT|'''Task:''' Make Pirate Kang Talk Like a Pirate (8h)|colspan=2}} |
{{Tapped Out Lisa Icon}} | {{Tapped Out Lisa Icon}} | ||
{{TB|Just say, "Y'arrrgh" at the start of every sentence. "Yarrgh, it's a nice day" or "Yarrgh, I'll have a half-caff latte."}} | {{TB|Just say, "Y'arrrgh" at the start of every sentence. "Yarrgh, it's a nice day" or "Yarrgh, I'll have a half-caff latte."}} | ||
| Line 3,044: | Line 3,044: | ||
{{THT|Quest reward: {{Cash|100}} and {{XP|10}}|colspan=2}} | {{THT|Quest reward: {{Cash|100}} and {{XP|10}}|colspan=2}} | ||
}} | }} | ||
| − | ====Captain Kang Pt. 4==== | + | ==== Captain Kang Pt. 4 ==== |
{{Table| | {{Table| | ||
{{THT|After tapping on Kang's exclamation mark:|colspan=2}} | {{THT|After tapping on Kang's exclamation mark:|colspan=2}} | ||
| Line 3,053: | Line 3,053: | ||
{{Tapped Out Kodos Icon}} | {{Tapped Out Kodos Icon}} | ||
{{TB|This sounds like my kind of fun!}} | {{TB|This sounds like my kind of fun!}} | ||
| − | {{THT|'''Task''' | + | {{THT|'''Task:''' Reach level 15 and Place Squidport Entrance<br>'''Task:''' Make Pirate Kang Pirate a Ship (4h, Squidport Entrance)|colspan=2}} |
{{Tapped Out Kodos Icon}} | {{Tapped Out Kodos Icon}} | ||
{{TB|Okay we've got a ship. Do you know how to get it started?}} | {{TB|Okay we've got a ship. Do you know how to get it started?}} | ||
| Line 3,065: | Line 3,065: | ||
}} | }} | ||
}} | }} | ||
| − | ===The One that Got Away=== | + | === The One that Got Away === |
{{CollapsibleSection|To view Model Donut's questline, click "show":| | {{CollapsibleSection|To view Model Donut's questline, click "show":| | ||
{{Table| | {{Table| | ||
| Line 3,111: | Line 3,111: | ||
{{Tapped Out Homer Icon}} | {{Tapped Out Homer Icon}} | ||
{{TB|Ow.}} | {{TB|Ow.}} | ||
| − | {{THT|'''Task''' | + | {{THT|'''Task:''' Make Homer Lament the One That Got Away (8h, Simpson House)<br>Quest reward: {{Cash|100}} and {{XP|10}}|colspan=2}} |
}} | }} | ||
}} | }} | ||
| − | ===Gate to Nowhere=== | + | === Gate to Nowhere === |
{{Table| | {{Table| | ||
{{THT|After unlocking Gate to Nowhere:|colspan=2}} | {{THT|After unlocking Gate to Nowhere:|colspan=2}} | ||
| − | {{THT|'''Task''' | + | {{THT|'''Task:''' Place Gate to Nowhere<br>Quest reward: {{Cash|100}} and {{XP|10}}|colspan=2}} |
}} | }} | ||
| − | ===The Ultra-Prankster=== | + | === The Ultra-Prankster === |
{{CollapsibleSection|To view Clockwork Bart's questline, click "show":| | {{CollapsibleSection|To view Clockwork Bart's questline, click "show":| | ||
| − | ====The Ultra-Prankster Pt. 1==== | + | ==== The Ultra-Prankster Pt. 1 ==== |
{{Table| | {{Table| | ||
{{THT|After unlocking Clockwork Bart:|colspan=2}} | {{THT|After unlocking Clockwork Bart:|colspan=2}} | ||
| Line 3,139: | Line 3,139: | ||
{{Tapped Out Marge Icon}} | {{Tapped Out Marge Icon}} | ||
{{TB|Just go!}} | {{TB|Just go!}} | ||
| − | {{THT|'''Task''' | + | {{THT|'''Task:''' Make Clockwork Bart Go Ultra-Pranking (4h)<br>Quest reward: {{Cash|100}} and {{XP|10}}|colspan=2}} |
}} | }} | ||
| − | ====The Ultra-Prankster Pt. 2==== | + | ==== The Ultra-Prankster Pt. 2 ==== |
{{Table| | {{Table| | ||
{{THT|After tapping on Bart's exclamation mark:|colspan=2}} | {{THT|After tapping on Bart's exclamation mark:|colspan=2}} | ||
| Line 3,148: | Line 3,148: | ||
{{Tapped Out Clockwork Bart Icon}} | {{Tapped Out Clockwork Bart Icon}} | ||
{{TB|A spot o' moloko-plus ought to perk me back up!}} | {{TB|A spot o' moloko-plus ought to perk me back up!}} | ||
| − | {{THT|'''Task''' | + | {{THT|'''Task:''' Make Clockwork Bart Drink Milk Plus (4h, Kwik-E-Mart)|colspan=2}} |
{{Tapped Out Apu Icon}} | {{Tapped Out Apu Icon}} | ||
{{TB|Hey! You are not allowed to drink the little plastic cups of creamer unless you buy coffee.}} | {{TB|Hey! You are not allowed to drink the little plastic cups of creamer unless you buy coffee.}} | ||
| Line 3,157: | Line 3,157: | ||
{{THT|Quest reward: {{Cash|100}} and {{XP|10}}|colspan=2}} | {{THT|Quest reward: {{Cash|100}} and {{XP|10}}|colspan=2}} | ||
}} | }} | ||
| − | ====The Ultra-Prankster Pt. 3==== | + | ==== The Ultra-Prankster Pt. 3 ==== |
{{Table| | {{Table| | ||
{{THT|After tapping on Bart's exclamation mark:|colspan=2}} | {{THT|After tapping on Bart's exclamation mark:|colspan=2}} | ||
{{Tapped Out Clockwork Bart Icon}} | {{Tapped Out Clockwork Bart Icon}} | ||
{{TB|Hmmm, Old Man Skinny could use a bit of "Kick Me" signage...}} | {{TB|Hmmm, Old Man Skinny could use a bit of "Kick Me" signage...}} | ||
| − | {{THT|'''Task''' | + | {{THT|'''Task:''' Make Clockwork Bart Ultra-Prank Skinner (1h, Springfield Elementary)|colspan=2}} |
{{Tapped Out Clockwork Bart Icon}} | {{Tapped Out Clockwork Bart Icon}} | ||
{{TB|Heh-heh, everyone played "Kick Skinny's Can" and the Principato was none the wiser.}} | {{TB|Heh-heh, everyone played "Kick Skinny's Can" and the Principato was none the wiser.}} | ||
| Line 3,173: | Line 3,173: | ||
{{THT|Quest reward: {{Cash|100}} and {{XP|10}}|colspan=2}} | {{THT|Quest reward: {{Cash|100}} and {{XP|10}}|colspan=2}} | ||
}} | }} | ||
| − | ====The Ultra-Prankster Pt. 4==== | + | ==== The Ultra-Prankster Pt. 4 ==== |
{{Table| | {{Table| | ||
{{THT|After tapping on Bart's exclamation mark:|colspan=2}} | {{THT|After tapping on Bart's exclamation mark:|colspan=2}} | ||
| Line 3,186: | Line 3,186: | ||
{{Tapped Out Willie Icon}} | {{Tapped Out Willie Icon}} | ||
{{TB|An' I plan to make the most of it!}} | {{TB|An' I plan to make the most of it!}} | ||
| − | {{THT|'''Task''' | + | {{THT|'''Task:''' Make Willie Rehabilitate Bart (4h, Willie's Shack, Bart)|colspan=2}} |
{{Tapped Out Clockwork Bart Icon}} | {{Tapped Out Clockwork Bart Icon}} | ||
{{TB|Oh. God. Sawdust and puke! Unwrapped gum, sticking to a trashcan!}} | {{TB|Oh. God. Sawdust and puke! Unwrapped gum, sticking to a trashcan!}} | ||
| Line 3,201: | Line 3,201: | ||
{{THT|Quest reward: {{Cash|100}} and {{XP|10}}|colspan=2}} | {{THT|Quest reward: {{Cash|100}} and {{XP|10}}|colspan=2}} | ||
}} | }} | ||
| − | ====The Ultra-Prankster Pt. 5==== | + | ==== The Ultra-Prankster Pt. 5 ==== |
{{Table| | {{Table| | ||
{{THT|After tapping on Bart's exclamation mark:|colspan=2}} | {{THT|After tapping on Bart's exclamation mark:|colspan=2}} | ||
| Line 3,210: | Line 3,210: | ||
{{Tapped Out Milhouse Icon}} | {{Tapped Out Milhouse Icon}} | ||
{{TB|What?! But you're the one who got me into fireworks. You can't stop now! I'm addicted to boom!}} | {{TB|What?! But you're the one who got me into fireworks. You can't stop now! I'm addicted to boom!}} | ||
| − | {{THT|'''Task''' | + | {{THT|'''Task:''' Make Milhouse convince Bart to go Ultra Pranking (4h, Bart)|colspan=2}} |
{{Tapped Out Milhouse Icon}} | {{Tapped Out Milhouse Icon}} | ||
{{TB|C'mon, my eyebrows haven't been singed off in weeks.}} | {{TB|C'mon, my eyebrows haven't been singed off in weeks.}} | ||
| Line 3,217: | Line 3,217: | ||
{{THT|Quest reward: {{Cash|100}} and {{XP|10}}|colspan=2}} | {{THT|Quest reward: {{Cash|100}} and {{XP|10}}|colspan=2}} | ||
}} | }} | ||
| − | ====The Ultra-Prankster Pt. 6==== | + | ==== The Ultra-Prankster Pt. 6 ==== |
{{Table| | {{Table| | ||
{{THT|After tapping on Bart's exclamation mark:|colspan=2}} | {{THT|After tapping on Bart's exclamation mark:|colspan=2}} | ||
| Line 3,228: | Line 3,228: | ||
{{Tapped Out Clockwork Bart Icon}} | {{Tapped Out Clockwork Bart Icon}} | ||
{{TB|Holy schnikey, that's ten times worse!}} | {{TB|Holy schnikey, that's ten times worse!}} | ||
| − | {{THT|'''Task''' | + | {{THT|'''Task:''' Make Clockwork Bart Ultra-Prank Skinner (1h, Springfield Elementary)<br>'''Task:''' Make Milhouse provide Bart Moral Support (1h, Springfield Elementary)|colspan=2}} |
{{Tapped Out Skinner Icon}} | {{Tapped Out Skinner Icon}} | ||
{{TB|Simpson! Stop putting potatoes in my my tail-pipes!}} | {{TB|Simpson! Stop putting potatoes in my my tail-pipes!}} | ||
| Line 3,240: | Line 3,240: | ||
}} | }} | ||
}} | }} | ||
| − | ===Festiween=== | + | === Festiween === |
{{CollapsibleSection|To view Holiday Homer's questline, click "show":| | {{CollapsibleSection|To view Holiday Homer's questline, click "show":| | ||
| − | ====Festiween Pt. 1==== | + | ==== Festiween Pt. 1 ==== |
{{Table| | {{Table| | ||
{{THT|After tapping on Homer's exclamation mark:|colspan=2}} | {{THT|After tapping on Homer's exclamation mark:|colspan=2}} | ||
| Line 3,249: | Line 3,249: | ||
{{Tapped Out Holiday Homer Icon}} | {{Tapped Out Holiday Homer Icon}} | ||
{{TB|Look at my bunny tail! Let's have Easter right now! Why should we be slaves to the calendar?!}} | {{TB|Look at my bunny tail! Let's have Easter right now! Why should we be slaves to the calendar?!}} | ||
| − | {{THT|'''Task''' | + | {{THT|'''Task:''' Make Holiday Homer Hop Around Town (3h)|colspan=2}} |
{{Tapped Out Bart Icon}} | {{Tapped Out Bart Icon}} | ||
{{TB|Dad, you're giving out eggs? It's Halloween. It's supposed to be scary.}} | {{TB|Dad, you're giving out eggs? It's Halloween. It's supposed to be scary.}} | ||
| Line 3,258: | Line 3,258: | ||
{{THT|Quest reward: {{Cash|100}} and {{XP|10}}|colspan=2}} | {{THT|Quest reward: {{Cash|100}} and {{XP|10}}|colspan=2}} | ||
}} | }} | ||
| − | ====Festiween Pt. 2==== | + | ==== Festiween Pt. 2 ==== |
{{Table| | {{Table| | ||
{{THT|After tapping on Homer's exclamation mark:|colspan=2}} | {{THT|After tapping on Homer's exclamation mark:|colspan=2}} | ||
| Line 3,267: | Line 3,267: | ||
{{Tapped Out Marge Icon}} | {{Tapped Out Marge Icon}} | ||
{{TB|Homer, remember the Judge said it's still breaking and entering even if you're wearing a Santa costume!}} | {{TB|Homer, remember the Judge said it's still breaking and entering even if you're wearing a Santa costume!}} | ||
| − | {{THT|'''Task''' | + | {{THT|'''Task:''' Make Holiday Homer Deliver Candy to Youngsters (2h, Homes)|colspan=2}} |
{{Tapped Out Holiday Homer Icon}} | {{Tapped Out Holiday Homer Icon}} | ||
{{TB|Hey kids, I can't break or enter so I'm just dropping your candy down the chimney.}} | {{TB|Hey kids, I can't break or enter so I'm just dropping your candy down the chimney.}} | ||
| Line 3,276: | Line 3,276: | ||
{{THT|Quest reward: {{Cash|100}} and {{XP|10}}|colspan=2}} | {{THT|Quest reward: {{Cash|100}} and {{XP|10}}|colspan=2}} | ||
}} | }} | ||
| − | ====Festiween Pt. 3==== | + | ==== Festiween Pt. 3 ==== |
{{Table| | {{Table| | ||
{{THT|After tapping on Lisa's exclamation mark:|colspan=2}} | {{THT|After tapping on Lisa's exclamation mark:|colspan=2}} | ||
| Line 3,287: | Line 3,287: | ||
{{Tapped Out Marge Icon}} | {{Tapped Out Marge Icon}} | ||
{{TB|I'll shoo him out the door. Let me get my broom.}} | {{TB|I'll shoo him out the door. Let me get my broom.}} | ||
| − | {{THT|'''Task''' | + | {{THT|'''Task:''' Make Holiday Homer Pinch Springfielders (4h, Homes)|colspan=2}} |
{{Tapped Out Lisa Icon}} | {{Tapped Out Lisa Icon}} | ||
{{TB|Aren't you going to stop Dad?}} | {{TB|Aren't you going to stop Dad?}} | ||
| Line 3,296: | Line 3,296: | ||
{{THT|Quest reward: {{Cash|100}} and {{XP|10}}|colspan=2}} | {{THT|Quest reward: {{Cash|100}} and {{XP|10}}|colspan=2}} | ||
}} | }} | ||
| − | ====Festiween Pt. 4==== | + | ==== Festiween Pt. 4 ==== |
{{Table| | {{Table| | ||
{{THT|After tapping on Lisa's exclamation mark:|colspan=2}} | {{THT|After tapping on Lisa's exclamation mark:|colspan=2}} | ||
| Line 3,309: | Line 3,309: | ||
{{Tapped Out Lisa Icon}} | {{Tapped Out Lisa Icon}} | ||
{{TB|I'm taking cover.}} | {{TB|I'm taking cover.}} | ||
| − | {{THT|'''Task''' | + | {{THT|'''Task:''' Make Holiday Homer Shoot People with Cupid Arrows (1h)|colspan=2}} |
{{Tapped Out Ralph Icon}} | {{Tapped Out Ralph Icon}} | ||
{{TB|Someone shooted me with a arrow! And made the sound get quiet... and the lights... go... out...}} | {{TB|Someone shooted me with a arrow! And made the sound get quiet... and the lights... go... out...}} | ||
| Line 3,321: | Line 3,321: | ||
}} | }} | ||
}} | }} | ||
| − | ===Lobotomy of Love=== | + | === Lobotomy of Love === |
{{CollapsibleSection|To view Re-Neducation Center's questline, click "show":| | {{CollapsibleSection|To view Re-Neducation Center's questline, click "show":| | ||
| − | ====Lobotomy of Love Pt. 1==== | + | ==== Lobotomy of Love Pt. 1 ==== |
{{Table| | {{Table| | ||
{{THT|After tapping on Wiggum's exclamation mark:|colspan=2}} | {{THT|After tapping on Wiggum's exclamation mark:|colspan=2}} | ||
| Line 3,340: | Line 3,340: | ||
{{Tapped Out Wiggum Icon}} | {{Tapped Out Wiggum Icon}} | ||
{{TB|Just pull over all the purple cars, Lou.}} | {{TB|Just pull over all the purple cars, Lou.}} | ||
| − | {{THT|'''Task''' | + | {{THT|'''Task:''' Make Wiggum Set Up Mandatory Checkpoints [x2] (1h, Re-Neducation Center)|colspan=2}} |
{{Tapped Out Bumblebee Man Icon}} | {{Tapped Out Bumblebee Man Icon}} | ||
{{TB|Ay, yi, yi! I'm being arrested for being a bee!}} | {{TB|Ay, yi, yi! I'm being arrested for being a bee!}} | ||
| Line 3,351: | Line 3,351: | ||
{{THT|Quest reward: {{Cash|100}} and {{XP|10}}|colspan=2}} | {{THT|Quest reward: {{Cash|100}} and {{XP|10}}|colspan=2}} | ||
}} | }} | ||
| − | ====Lobotomy of Love Pt. 2==== | + | ==== Lobotomy of Love Pt. 2 ==== |
{{Table| | {{Table| | ||
{{THT|After tapping on Ned's exclamation mark:|colspan=2}} | {{THT|After tapping on Ned's exclamation mark:|colspan=2}} | ||
| Line 3,364: | Line 3,364: | ||
{{Tapped Out Snake Icon}} | {{Tapped Out Snake Icon}} | ||
{{TB|Oh. That makes total senz-z-z-z-z}} | {{TB|Oh. That makes total senz-z-z-z-z}} | ||
| − | {{THT|'''Task''' | + | {{THT|'''Task:''' Reach Level 19 and Build Springfield Penitentiary<br>'''Task:''' Make Snake Enjoy Milk and Cookies (2h, Re-Neducation Center)<br>'''Task:''' Make Flanders Operate the Smile Machine (4h, Re-Neducation Center)|colspan=2}} |
{{Tapped Out Snake Smile Icon}} | {{Tapped Out Snake Smile Icon}} | ||
{{TB|Can't stop smiling!!}} | {{TB|Can't stop smiling!!}} | ||
| Line 3,373: | Line 3,373: | ||
{{THT|Quest reward: {{Cash|100}} and {{XP|10}}|colspan=2}} | {{THT|Quest reward: {{Cash|100}} and {{XP|10}}|colspan=2}} | ||
}} | }} | ||
| − | ====Lobotomy of Love Pt. 3==== | + | ==== Lobotomy of Love Pt. 3 ==== |
{{Table| | {{Table| | ||
{{THT|After tapping on Ned's exclamation mark:|colspan=2}} | {{THT|After tapping on Ned's exclamation mark:|colspan=2}} | ||
| Line 3,382: | Line 3,382: | ||
{{Tapped Out Ned Icon}} | {{Tapped Out Ned Icon}} | ||
{{TB|But their frowns are permanently upside-down!}} | {{TB|But their frowns are permanently upside-down!}} | ||
| − | {{THT|'''Task''' | + | {{THT|'''Task:''' Send Criminals to Get Re-Neducated [x3] (2h, Re-Neducation Center)|colspan=2}} |
{{Tapped Out Wiggum Icon}} | {{Tapped Out Wiggum Icon}} | ||
{{TB|Uh, we've just noticed the smiling criminals are still committing crimes.}} | {{TB|Uh, we've just noticed the smiling criminals are still committing crimes.}} | ||
| Line 3,397: | Line 3,397: | ||
}} | }} | ||
| − | ==Crafting== | + | == Crafting == |
{{Table|align=center|width=500px| | {{Table|align=center|width=500px| | ||
{{THT|Excellent Craft Option}} | {{THT|Excellent Craft Option}} | ||
| Line 3,464: | Line 3,464: | ||
}} | }} | ||
| − | ===A Proper Rigellian Thanksgiving=== | + | === A Proper Rigellian Thanksgiving === |
{{CollapsibleSection|To view the Crafting's questline, click "show":| | {{CollapsibleSection|To view the Crafting's questline, click "show":| | ||
| − | ====Act 1, 2 and 3==== | + | ==== Act 1, 2 and 3 ==== |
| − | =====A Proper Rigellian Thanksgiving Pt. 1===== | + | ===== A Proper Rigellian Thanksgiving Pt. 1 ===== |
{{Table| | {{Table| | ||
{{THT|After completing The Call of the Campfire Pt. 4:|colspan=2}} | {{THT|After completing The Call of the Campfire Pt. 4:|colspan=2}} | ||
| Line 3,484: | Line 3,484: | ||
{{Tapped Out Kodos Icon}} | {{Tapped Out Kodos Icon}} | ||
{{TB|IT'S BAD LUCK NOT TO BE!}} | {{TB|IT'S BAD LUCK NOT TO BE!}} | ||
| − | {{THT|'''Task''' | + | {{THT|'''Task:''' Craft the Spooky Grove<br>[[File:THOH2015 Crafting Menu.png|300px]]<br>Quest reward: {{Cash|100}} and {{XP|10}} and<br>[[File:Tapped Out Unlock Kang.png|100px]][[File:Tapped Out Kang New Character.png|300px]]|colspan=2}} |
}} | }} | ||
| − | =====A Proper Rigellian Thanksgiving Pt. 2===== | + | ===== A Proper Rigellian Thanksgiving Pt. 2 ===== |
{{Table| | {{Table| | ||
{{THT|After completing A Proper Rigellian Thanksgiving Pt. 1:|colspan=2}} | {{THT|After completing A Proper Rigellian Thanksgiving Pt. 1:|colspan=2}} | ||
| − | {{THT|'''Task''' | + | {{THT|'''Task:''' Craft the Spooky House<br>Quest reward: {{Cash|100}} and {{XP|10}}|colspan=2}} |
}} | }} | ||
| − | =====A Proper Rigellian Thanksgiving Pt. 3===== | + | ===== A Proper Rigellian Thanksgiving Pt. 3 ===== |
{{Table| | {{Table| | ||
{{THT|After completing A Proper Rigellian Thanksgiving Pt. 2:|colspan=2}} | {{THT|After completing A Proper Rigellian Thanksgiving Pt. 2:|colspan=2}} | ||
| − | {{THT|'''Task''' | + | {{THT|'''Task:''' Craft Hugo<br>Quest reward: {{Cash|100}} and {{XP|10}}|colspan=2}} |
}} | }} | ||
| − | ====Act 2 and 3==== | + | ==== Act 2 and 3 ==== |
| − | =====A Proper Rigellian Thanksgiving Pt. 4===== | + | ===== A Proper Rigellian Thanksgiving Pt. 4 ===== |
{{Table| | {{Table| | ||
{{THT|After completing A Proper Rigellian Thanksgiving Pt. 3 and the user logs in on October 20:|colspan=2}} | {{THT|After completing A Proper Rigellian Thanksgiving Pt. 3 and the user logs in on October 20:|colspan=2}} | ||
| − | {{THT|'''Task''' | + | {{THT|'''Task:''' Craft the Wailing Wall<br>Quest reward: {{Cash|100}} and {{XP|10}}|colspan=2}} |
}} | }} | ||
| − | =====A Proper Rigellian Thanksgiving Pt. 5===== | + | ===== A Proper Rigellian Thanksgiving Pt. 5 ===== |
{{Table| | {{Table| | ||
{{THT|After completing A Proper Rigellian Thanksgiving Pt. 4:|colspan=2}} | {{THT|After completing A Proper Rigellian Thanksgiving Pt. 4:|colspan=2}} | ||
| − | {{THT|'''Task''' | + | {{THT|'''Task:''' Craft Halloween Balloons<br>Quest reward: {{Cash|100}} and {{XP|10}}|colspan=2}} |
}} | }} | ||
| − | =====A Proper Rigellian Thanksgiving Pt. 6===== | + | ===== A Proper Rigellian Thanksgiving Pt. 6 ===== |
{{Table| | {{Table| | ||
{{THT|After completing A Proper Rigellian Thanksgiving Pt. 5:|colspan=2}} | {{THT|After completing A Proper Rigellian Thanksgiving Pt. 5:|colspan=2}} | ||
| − | {{THT|'''Task''' | + | {{THT|'''Task:''' Craft the Jack-O-Lantern<br>Quest reward: {{Cash|100}} and {{XP|10}}|colspan=2}} |
}} | }} | ||
| − | =====A Proper Rigellian Thanksgiving Pt. 7===== | + | ===== A Proper Rigellian Thanksgiving Pt. 7 ===== |
{{Table| | {{Table| | ||
{{THT|After completing A Proper Rigellian Thanksgiving Pt. 6:|colspan=2}} | {{THT|After completing A Proper Rigellian Thanksgiving Pt. 6:|colspan=2}} | ||
| − | {{THT|'''Task''' | + | {{THT|'''Task:''' Craft the Spooky Wall<br>Quest reward: {{Cash|100}} and {{XP|10}}|colspan=2}} |
}} | }} | ||
| − | ====Act 3==== | + | ==== Act 3 ==== |
| − | =====A Proper Rigellian Thanksgiving Pt. 8===== | + | ===== A Proper Rigellian Thanksgiving Pt. 8 ===== |
{{Table| | {{Table| | ||
{{THT|After completing A Proper Rigellian Thanksgiving Pt. 7 and the user logs in on November 4:|colspan=2}} | {{THT|After completing A Proper Rigellian Thanksgiving Pt. 7 and the user logs in on November 4:|colspan=2}} | ||
| − | {{THT|'''Task''' | + | {{THT|'''Task:''' Craft the Biohazard Tower<br>Quest reward: {{Cash|100}} and {{XP|10}}|colspan=2}} |
}} | }} | ||
| − | =====A Proper Rigellian Thanksgiving Pt. 9===== | + | ===== A Proper Rigellian Thanksgiving Pt. 9 ===== |
{{Table| | {{Table| | ||
{{THT|After completing A Proper Rigellian Thanksgiving Pt. 8:|colspan=2}} | {{THT|After completing A Proper Rigellian Thanksgiving Pt. 8:|colspan=2}} | ||
| − | {{THT|'''Task''' | + | {{THT|'''Task:''' Craft the Biohazard Wall<br>Quest reward: {{Cash|100}} and {{XP|10}}|colspan=2}} |
}} | }} | ||
| − | =====A Proper Rigellian Thanksgiving Pt. 10===== | + | ===== A Proper Rigellian Thanksgiving Pt. 10 ===== |
{{Table| | {{Table| | ||
{{THT|After completing A Proper Rigellian Thanksgiving Pt. 9:|colspan=2}} | {{THT|After completing A Proper Rigellian Thanksgiving Pt. 9:|colspan=2}} | ||
| − | {{THT|'''Task''' | + | {{THT|'''Task:''' Craft U.B.O.<br>Quest reward: {{Cash|100}} and {{XP|10}}|colspan=2}} |
}} | }} | ||
}} | }} | ||
| − | ===My Brother's Keeper=== | + | === My Brother's Keeper === |
{{CollapsibleSection|To view Hugo's questline, click "show":| | {{CollapsibleSection|To view Hugo's questline, click "show":| | ||
| − | ====My Brother's Keeper Pt. 1==== | + | ==== My Brother's Keeper Pt. 1 ==== |
{{Table| | {{Table| | ||
{{THT|After tapping on Bart's exclamation mark:|colspan=2}} | {{THT|After tapping on Bart's exclamation mark:|colspan=2}} | ||
| Line 3,558: | Line 3,558: | ||
{{Tapped Out Bart Icon}} | {{Tapped Out Bart Icon}} | ||
{{TB|Sure, what are we having?}} | {{TB|Sure, what are we having?}} | ||
| − | {{THT|'''Task''' | + | {{THT|'''Task:''' Make Hugo Eat Fish Heads (4h)<br>'''Task:''' Make Bart Lose his Lunch (4h, Simpson House)<br>Quest reward: {{Cash|100}} and {{XP|10}}|colspan=2}} |
}} | }} | ||
| − | ====My Brother's Keeper Pt. 2==== | + | ==== My Brother's Keeper Pt. 2 ==== |
{{Table| | {{Table| | ||
{{THT|After tapping on Bart's exclamation mark:|colspan=2}} | {{THT|After tapping on Bart's exclamation mark:|colspan=2}} | ||
| Line 3,587: | Line 3,587: | ||
{{Tapped Out Bart Icon}} | {{Tapped Out Bart Icon}} | ||
{{TB|I know you are, but what am I?}} | {{TB|I know you are, but what am I?}} | ||
| − | {{THT|'''Task''' | + | {{THT|'''Task:''' Make Hugo Clean his Room (8h, Simpson House)<br>'''Task:''' Make Bart Sleep in Simpson Attic (24h, Simpson House)|colspan=2}} |
{{Tapped Out Marge Icon}} | {{Tapped Out Marge Icon}} | ||
{{TB|Homer, did you notice that Hugo and Bart have switched lives?}} | {{TB|Homer, did you notice that Hugo and Bart have switched lives?}} | ||
| Line 3,598: | Line 3,598: | ||
{{THT|Quest reward: {{Cash|100}} and {{XP|10}}|colspan=2}} | {{THT|Quest reward: {{Cash|100}} and {{XP|10}}|colspan=2}} | ||
}} | }} | ||
| − | ====My Brother's Keeper Pt. 3==== | + | ==== My Brother's Keeper Pt. 3 ==== |
{{Table| | {{Table| | ||
{{THT|After tapping on Hugo's exclamation mark:|colspan=2}} | {{THT|After tapping on Hugo's exclamation mark:|colspan=2}} | ||
| Line 3,609: | Line 3,609: | ||
{{Tapped Out Hugo Icon}} | {{Tapped Out Hugo Icon}} | ||
{{TB|'Kay. Have fun!}} | {{TB|'Kay. Have fun!}} | ||
| − | {{THT|'''Task''' | + | {{THT|'''Task:''' Make Hugo Walk the Pigeon Rat (12h)<br>'''Task:''' Make Bart Practice Stitching Things Together (1h, Simpson House)<br>On job start:|colspan=2}} |
{{Tapped Out Hugo Icon}} | {{Tapped Out Hugo Icon}} | ||
{{TB|Oh, Pigeon-Rat? Can you believe we are finally free to scurry/fly where we please?}} | {{TB|Oh, Pigeon-Rat? Can you believe we are finally free to scurry/fly where we please?}} | ||
| Line 3,616: | Line 3,616: | ||
{{THT|Quest reward: {{Cash|100}} and {{XP|10}}|colspan=2}} | {{THT|Quest reward: {{Cash|100}} and {{XP|10}}|colspan=2}} | ||
}} | }} | ||
| − | ====My Brother's Keeper Pt. 4==== | + | ==== My Brother's Keeper Pt. 4 ==== |
{{Table| | {{Table| | ||
{{THT|After tapping on Hugo's exclamation mark:|colspan=2}} | {{THT|After tapping on Hugo's exclamation mark:|colspan=2}} | ||
| Line 3,633: | Line 3,633: | ||
{{Tapped Out Hugo Icon}} | {{Tapped Out Hugo Icon}} | ||
{{TB|Well, I'm off to school! I'm going to try to make something called, "friends!"}} | {{TB|Well, I'm off to school! I'm going to try to make something called, "friends!"}} | ||
| − | {{THT|'''Task''' | + | {{THT|'''Task:''' Make Hugo Eat Fish Heads (4h)<br>'''Task:''' Make Youngsters Eat Lunch at their Desks [x5] (1h, Springfield Elementary)<br>'''Task:''' Make Bart Try to Eat Fish Heads (4h, Simpson House)<br>On job start:|colspan=2}} |
{{Tapped Out Hugo Icon}} | {{Tapped Out Hugo Icon}} | ||
{{TB|Why am I the only child eating his lunch in the cafeteria?}} | {{TB|Why am I the only child eating his lunch in the cafeteria?}} | ||
| Line 3,648: | Line 3,648: | ||
{{THT|Quest reward: {{Cash|100}} and {{XP|10}}|colspan=2}} | {{THT|Quest reward: {{Cash|100}} and {{XP|10}}|colspan=2}} | ||
}} | }} | ||
| − | ====My Brother's Keeper Pt. 5==== | + | ==== My Brother's Keeper Pt. 5 ==== |
{{Table| | {{Table| | ||
{{THT|After tapping on Hugo's exclamation mark:|colspan=2}} | {{THT|After tapping on Hugo's exclamation mark:|colspan=2}} | ||
| Line 3,663: | Line 3,663: | ||
{{Tapped Out Homer Icon}} | {{Tapped Out Homer Icon}} | ||
{{TB|Hey, keep it down. Don't make me go up there!}} | {{TB|Hey, keep it down. Don't make me go up there!}} | ||
| − | {{THT|'''Task''' | + | {{THT|'''Task:''' Make Bart Try to Sew him and Hugo Together (4h, Simpson House, Hugo)<br>'''Task:''' Make Homer Go Up There (2h, Simpson House)<br>On job start:|colspan=2}} |
{{Tapped Out Homer Icon}} | {{Tapped Out Homer Icon}} | ||
{{TB|If you two can't be quiet I will have to separate you. So don't sew yourself to your brother!}} | {{TB|If you two can't be quiet I will have to separate you. So don't sew yourself to your brother!}} | ||
{{THT|Quest reward: {{Cash|100}} and {{XP|10}}|colspan=2}} | {{THT|Quest reward: {{Cash|100}} and {{XP|10}}|colspan=2}} | ||
}} | }} | ||
| − | ====My Brother's Keeper Pt. 6==== | + | ==== My Brother's Keeper Pt. 6 ==== |
{{Table| | {{Table| | ||
{{THT|After tapping on Bart's exclamation mark:|colspan=2}} | {{THT|After tapping on Bart's exclamation mark:|colspan=2}} | ||
| Line 3,687: | Line 3,687: | ||
{{Tapped Out Bart Icon}} | {{Tapped Out Bart Icon}} | ||
{{TB|Knock yourself out.}} | {{TB|Knock yourself out.}} | ||
| − | {{THT|'''Task''' | + | {{THT|'''Task:''' Make Bart Realize it's Good to Be Bad (2h, Simpson House)<br>'''Task:''' Make Hugo Sleep in Simpson Attic (24h, Simpson House)<br>Quest reward: {{Cash|100}} and {{XP|10}}|colspan=2}} |
}} | }} | ||
}} | }} | ||
| − | ==Spooky Campfire Level Up== | + | == Spooky Campfire Level Up == |
[[File:Spooky Campfire Level Up Screen.png|300px]] | [[File:Spooky Campfire Level Up Screen.png|300px]] | ||
{{Table| | {{Table| | ||
| Line 3,721: | Line 3,721: | ||
{{TB|Level 5, every 4 level.}} | {{TB|Level 5, every 4 level.}} | ||
}} | }} | ||
| − | ===Getting Wood=== | + | === Getting Wood === |
{{CollapsibleSection|To view the Spooky Campfire Level Up's questline, click "show":| | {{CollapsibleSection|To view the Spooky Campfire Level Up's questline, click "show":| | ||
| − | ====Getting Wood Pt. 1==== | + | ==== Getting Wood Pt. 1 ==== |
{{Table| | {{Table| | ||
{{THT|After completing The Call Of The Campfire Pt. 8:|colspan=2}} | {{THT|After completing The Call Of The Campfire Pt. 8:|colspan=2}} | ||
| − | {{THT|'''Task''' | + | {{THT|'''Task:''' Upgrade the Spooky Campfire to Level 4<br>Quest reward: {{Cash|100}} and [[File:Tapped Out Smores.png|25px]]100/[[File:Tapped Out Gummies.png|25px]]100/[[File:Tapped Out Candy Apples.png|25px]]100|colspan=2}} |
}} | }} | ||
| − | ====Getting Wood Pt. 2==== | + | ==== Getting Wood Pt. 2 ==== |
{{Table| | {{Table| | ||
{{THT|After completing Getting Wood Pt. 1:|colspan=2}} | {{THT|After completing Getting Wood Pt. 1:|colspan=2}} | ||
| − | {{THT|'''Task''' | + | {{THT|'''Task:''' Upgrade the Spooky Campfire to Level 5<br>Quest reward: {{Cash|100}} and [[File:Tapped Out Smores.png|25px]]100/[[File:Tapped Out Gummies.png|25px]]100/[[File:Tapped Out Candy Apples.png|25px]]100|colspan=2}} |
}} | }} | ||
| − | ====Getting Wood Pt. 3==== | + | ==== Getting Wood Pt. 3 ==== |
{{Table| | {{Table| | ||
{{THT|After completing Getting Wood Pt. 2:|colspan=2}} | {{THT|After completing Getting Wood Pt. 2:|colspan=2}} | ||
| − | {{THT|'''Task''' | + | {{THT|'''Task:''' Upgrade the Spooky Campfire to Level 10<br>Quest reward: {{Cash|100}} and [[File:Tapped Out Smores.png|25px]]100/[[File:Tapped Out Gummies.png|25px]]100/[[File:Tapped Out Candy Apples.png|25px]]100|colspan=2}} |
}} | }} | ||
| − | ====Getting Wood Pt. 4==== | + | ==== Getting Wood Pt. 4 ==== |
{{Table| | {{Table| | ||
{{THT|After completing Getting Wood Pt. 3:|colspan=2}} | {{THT|After completing Getting Wood Pt. 3:|colspan=2}} | ||
| − | {{THT|'''Task''' | + | {{THT|'''Task:''' Upgrade the Spooky Campfire to Level 15<br>Quest reward: {{Cash|100}} and [[File:Tapped Out Smores.png|25px]]100/[[File:Tapped Out Gummies.png|25px]]100/[[File:Tapped Out Candy Apples.png|25px]]100|colspan=2}} |
}} | }} | ||
| − | ====Getting Wood Pt. 5==== | + | ==== Getting Wood Pt. 5 ==== |
{{Table| | {{Table| | ||
{{THT|After completing Getting Wood Pt. 4:|colspan=2}} | {{THT|After completing Getting Wood Pt. 4:|colspan=2}} | ||
| − | {{THT|'''Task''' | + | {{THT|'''Task:''' Upgrade the Spooky Campfire to Level 20<br>Quest reward: {{Cash|100}} and [[File:Tapped Out Smores.png|25px]]100/[[File:Tapped Out Gummies.png|25px]]100/[[File:Tapped Out Candy Apples.png|25px]]100|colspan=2}} |
}} | }} | ||
| − | ====Getting Wood Pt. 6==== | + | ==== Getting Wood Pt. 6 ==== |
{{Table| | {{Table| | ||
{{THT|After completing Getting Wood Pt. 5 (the quest loops):|colspan=2}} | {{THT|After completing Getting Wood Pt. 5 (the quest loops):|colspan=2}} | ||
| − | {{THT|'''Task''' | + | {{THT|'''Task:''' Upgrade the Spooky Campfire 5 Times<br>Quest reward: {{Cash|100}} and [[File:Tapped Out Smores.png|25px]]100/[[File:Tapped Out Gummies.png|25px]]100/[[File:Tapped Out Candy Apples.png|25px]]100|colspan=2}} |
}} | }} | ||
}} | }} | ||
| − | ==Shopkeeper's Challenges== | + | == Shopkeeper's Challenges == |
<gallery> | <gallery> | ||
File:HW2015 Daily Challenges Event Guide.png|Shopkeeper's Challenges Guide | File:HW2015 Daily Challenges Event Guide.png|Shopkeeper's Challenges Guide | ||
| Line 3,933: | Line 3,933: | ||
{{TB|{{Donut|20}}}} | {{TB|{{Donut|20}}}} | ||
}} | }} | ||
| − | ===Shopkeeper's Challenges=== | + | === Shopkeeper's Challenges === |
{{CollapsibleSection|To view the House of Evil's questline, click "show":| | {{CollapsibleSection|To view the House of Evil's questline, click "show":| | ||
| − | ====House of Evil owned==== | + | ==== House of Evil owned ==== |
{{Table| | {{Table| | ||
{{THT|After the user logs in on October 12 at 8am GMT and having completed The Call of the Campfire Pt. 5:|colspan=2}} | {{THT|After the user logs in on October 12 at 8am GMT and having completed The Call of the Campfire Pt. 5:|colspan=2}} | ||
| Line 3,943: | Line 3,943: | ||
}} | }} | ||
| − | ====House of Evil not owned==== | + | ==== House of Evil not owned ==== |
{{Table| | {{Table| | ||
{{THT|After the user logs in on October 12 at 8am GMT and having completed The Call of the Campfire Pt. 5:|colspan=2}} | {{THT|After the user logs in on October 12 at 8am GMT and having completed The Call of the Campfire Pt. 5:|colspan=2}} | ||
| Line 3,951: | Line 3,951: | ||
}} | }} | ||
| − | ====Unreleased==== | + | ==== Unreleased ==== |
{{Table| | {{Table| | ||
{{Tapped Out House Of Evil Shopkeeper Icon}} | {{Tapped Out House Of Evil Shopkeeper Icon}} | ||
| Line 3,966: | Line 3,966: | ||
}} | }} | ||
| − | ==Daily Play Combo== | + | == Daily Play Combo == |
<gallery> | <gallery> | ||
File:Daily Play Combo Smores.png|Act 1 | File:Daily Play Combo Smores.png|Act 1 | ||
| Line 3,973: | Line 3,973: | ||
</gallery> | </gallery> | ||
| − | ==Conform-o-meter impact== | + | == Conform-o-meter impact == |
{{Table| | {{Table| | ||
{{TH|Building or Item}} | {{TH|Building or Item}} | ||
| Line 4,122: | Line 4,122: | ||
=== October 7 Update ("4_17_THOH2015_Patch1_PostLaunch")=== | === October 7 Update ("4_17_THOH2015_Patch1_PostLaunch")=== | ||
*Fixed The Call of the Campfire Pt. 3 not completing. | *Fixed The Call of the Campfire Pt. 3 not completing. | ||
| − | === October 8 Update (12.30am GMT Server Update)=== | + | === October 8 Update (12.30am GMT Server Update) === |
{{Main|The Simpsons: Tapped Out IRS and Job Manager content update#October 8 Update .2812.30am GMT Server Update.29|l1=The Simpsons: Tapped Out IRS and Job Manager content update#October 8 Update (12.30am GMT Server Update)}} | {{Main|The Simpsons: Tapped Out IRS and Job Manager content update#October 8 Update .2812.30am GMT Server Update.29|l1=The Simpsons: Tapped Out IRS and Job Manager content update#October 8 Update (12.30am GMT Server Update)}} | ||
===October 15 Update ("4_17_HalloweenOfHorror")=== | ===October 15 Update ("4_17_HalloweenOfHorror")=== | ||
| Line 4,139: | Line 4,139: | ||
*The looping campfire upgrade quests no longer require each other to start and now set a value to check what upgrade quest was active last. | *The looping campfire upgrade quests no longer require each other to start and now set a value to check what upgrade quest was active last. | ||
*The crafting cost for Moe's Terror, Kill-E-Mart and Krusty Murder changed from 250 to 500. | *The crafting cost for Moe's Terror, Kill-E-Mart and Krusty Murder changed from 250 to 500. | ||
| − | ===October 21 Update (4.17.2)=== | + | === October 21 Update (4.17.2) === |
*''IRS and Job Manager related changes: ''[[The Simpsons: Tapped Out IRS and Job Manager content update#October 21 Update .284.17.2.29|The Simpsons: Tapped Out IRS and Job Manager content update#October 21 Update (4.17.2)]] | *''IRS and Job Manager related changes: ''[[The Simpsons: Tapped Out IRS and Job Manager content update#October 21 Update .284.17.2.29|The Simpsons: Tapped Out IRS and Job Manager content update#October 21 Update (4.17.2)]] | ||
===October 22 Update 1 ("v4_17_THOH2015_TieIn")=== | ===October 22 Update 1 ("v4_17_THOH2015_TieIn")=== | ||
| Line 4,150: | Line 4,150: | ||
*Squirrel Luann, Fairy Kodos, Acorn Kirk now shows that they require the respective character in the build menu. | *Squirrel Luann, Fairy Kodos, Acorn Kirk now shows that they require the respective character in the build menu. | ||
*Radioactive Milhouse, Saxophone Lisa and Wizard Martin now shows Improved Halloween jobs! in the build menu and now earn premium payout in Send Youngsters to Make S'mores, spawning 4 nightmares instead of 2 and yielding {{XP|60}}. | *Radioactive Milhouse, Saxophone Lisa and Wizard Martin now shows Improved Halloween jobs! in the build menu and now earn premium payout in Send Youngsters to Make S'mores, spawning 4 nightmares instead of 2 and yielding {{XP|60}}. | ||
| − | ===October 22 Update 2 (6.40pm GMT Server Update)=== | + | === October 22 Update 2 (6.40pm GMT Server Update) === |
*''New User Power Up related changes: ''[[The Simpsons: Tapped Out New User Power Ups content update#October 22 Update 2 .286.40pm GMT Server Update.29|The Simpsons: Tapped Out New User Power Ups content update#October 22 Update 2 (6.40pm GMT Server Update)]] | *''New User Power Up related changes: ''[[The Simpsons: Tapped Out New User Power Ups content update#October 22 Update 2 .286.40pm GMT Server Update.29|The Simpsons: Tapped Out New User Power Ups content update#October 22 Update 2 (6.40pm GMT Server Update)]] | ||
===October 23 Update ("4_17_THOH2015_TieIn_Patch1_PostLaunch")=== | ===October 23 Update ("4_17_THOH2015_TieIn_Patch1_PostLaunch")=== | ||
| Line 4,163: | Line 4,163: | ||
*Hunt Nightmares now requires The Blameless City to be started. | *Hunt Nightmares now requires The Blameless City to be started. | ||
*Fixed a glitch not granting Scream-son House. | *Fixed a glitch not granting Scream-son House. | ||
| − | ===November 5 Update (8pm GMT Server Update)=== | + | === November 5 Update (8pm GMT Server Update) === |
*Hunt Nightmares time was halved from 8 hours to 4 hours. | *Hunt Nightmares time was halved from 8 hours to 4 hours. | ||
===November 6 Update ("4_17_HalloweenPromo_Patch2_PostLaunch")=== | ===November 6 Update ("4_17_HalloweenPromo_Patch2_PostLaunch")=== | ||
Revision as of 16:46, April 29, 2024
- This article is about the Tapped Out's Treehouse of Horror content update from 2015. For other year's Tapped Out Treehouse of Horror content updates, see The Simpsons: Tapped Out Treehouse of Horror content updates.
|
|
|


- "Costumes? Check!
Party Snacks? Check!
Spooky Campfire built with Evil Driftwood? Check and Check!
An ancient evil stirs in Springfield and the adults have no idea (about this or anything else).
It's up to the kids to solve this problem (no matter that they may have caused it)!
Play today and fill up your special update treat bag with:
*Spooky Campfire Stories (that come to life)
*Brand new costumes for your favorite characters
*New Daily Challenges
*And much much more!" - ―Event description on the App Store
The Simpsons: Tapped Out Treehouse of Horror 2015 content update is a content update and event which was teased by EA on the game's Facebook page October 2, 2015. It was released October 6, 2015, and is the one hundred and fifth content update. It's the game's fourth Halloween event, after Treehouse of Horror XXIII, Treehouse of Horror XXIV and Treehouse of Horror XXV. It added 5 new characters, 9 new costumes, 5 new buildings, 4 new building skins and 18 new decorations. In the same update, a feature was added but released afterwards: New User Power Ups.
Contents
- 1 Characters
- 2 Buildings
- 3 Decorations
- 4 Consumables
- 5 Items Origins
- 6 Act 1 Gameplay
- 6.1 The Call of the Campfire
- 6.1.1 The Call of the Campfire Pt. 1
- 6.1.2 The Call of the Campfire Pt. 2
- 6.1.3 The Call of the Campfire Pt. 3
- 6.1.4 The Call of the Campfire Pt. 4
- 6.1.5 The Call of the Campfire Pt. 5
- 6.1.6 The Call of the Campfire Pt. 6
- 6.1.7 The Call of the Campfire Pt. 7
- 6.1.8 The Call of the Campfire Pt. 8
- 6.1.9 The Call of the Campfire Pt. 9
- 6.1.10 The Call of the Campfire Pt. 10
- 6.1.11 The Call of the Campfire Pt. 11
- 6.1.12 The Call of the Campfire Pt. 12
- 6.1.13 The Call of the Campfire Pt. 13
- 6.1.14 The Unspeakable
- 6.1 The Call of the Campfire
- 7 Act 2 Gameplay
- 8 Act 3 Gameplay
- 9 Ending Gameplay
- 10 Premium gameplay
- 11 Kang and Kodos Gameplay
- 12 Dates
- 13 Nightmare Spawn and Currency Earning Jobs
- 14 Prizes
- 15 Crafting
- 16 Spooky Campfire Level Up
- 17 Shopkeeper's Challenges
- 18 Daily Play Combo
- 19 Conform-o-meter impact
- 20 Other changes made
- 20.1 October 6 Update (4.17.0 / 4.17.1;"v4_17_THOH2015","4_17_NewUserPowerUpsTHOH2015")
- 20.2 October 7 Update ("4_17_THOH2015_Patch1_PostLaunch")
- 20.3 October 8 Update (12.30am GMT Server Update)
- 20.4 October 15 Update ("4_17_HalloweenOfHorror")
- 20.5 October 16 Update ("v4_17_THOH2015_Patch3_PostLaunch", Server Update)
- 20.6 October 21 Update (4.17.2)
- 20.7 October 22 Update 1 ("v4_17_THOH2015_TieIn")
- 20.8 October 22 Update 2 (6.40pm GMT Server Update)
- 20.9 October 23 Update ("4_17_THOH2015_TieIn_Patch1_PostLaunch")
- 20.10 October 26 Update ("4_17_THOH2015_TieIn_PostLaunch_Patch2")
- 20.11 October 28 Update ("4_17_HalloweenPromo")
- 20.12 October 29 Update ("4_17_HalloweenPromo_Patch1_PostLaunch")
- 20.13 November 5 Update (8pm GMT Server Update)
- 20.14 November 6 Update ("4_17_HalloweenPromo_Patch2_PostLaunch")
- 20.15 November 10 Update ("4_17_GinaMalloy")
- 20.16 November 11 Update ("4_17_GinaMalloy_PostLaunch_Patch1")
- 20.17 November 17 Update (4.17.6,"v4_17_THOH2015_Takedown")
- 21 Sources
Characters
|


Returning
|


Costumes
|


Returning
|


Buildings
|


Skins
|


Returning
|


Decorations
|

|


Returning
|


Consumables
|

 25
25 Items Origins
| ||||||||||||||||||||||||||||||||||||||||||||||||||||||||||||||||||||||||||||||||||||||||||||||||||||||||||||||||||||||||||||||||||||||||||||||||||||||||||||||||||||||||||||||||||||||||
Act 1 Gameplay
The Call of the CampfireThe Call of the Campfire Pt. 1
The Call of the Campfire Pt. 2
The Call of the Campfire Pt. 3
The Call of the Campfire Pt. 4
The Call of the Campfire Pt. 5
The Call of the Campfire Pt. 6
The Call of the Campfire Pt. 7
The Call of the Campfire Pt. 8
The Call of the Campfire Pt. 9
The Call of the Campfire Pt. 10
The Call of the Campfire Pt. 11
The Call of the Campfire Pt. 12
The Call of the Campfire Pt. 13
The Unspeakable
| |||||||||||||||||||||||||||||||||||||||||||||||||||||||||||||||||||||||||||||||||||||||||||||||||||||||||||||||||||||||||||||||||||||||||||||||||||||||||||||||||||||||||||||||||||||||||||||||||||||||||||||||||||||||||||||||||||||||||||||||||||||||||||||||||||||||||||||||||||||||||||||||||||||||||||||||||||||||||||||||||||||||||||||||||||||||||||||||||||||||||||||||||||||||||||||||||||||||||||||||||||||||||||||||||||||||||||||||||||||||||||||||||||||||||||||||||||||||||||||||||||||||||||||||||||||||||||||||||||||||||||||||||||||||||||||||||||||||||||||||
Act 2 Gameplay
The Very Young FolkThe Very Young Folk Pt. 1
The Very Young Folk Pt. 2
The Very Young Folk Pt. 3
The Very Young Folk Pt. 4
The Very Young Folk Pt. 5
The Springfield HorrorThe Springfield Horror Pt. 1
The Springfield Horror Pt. 2
The Springfield Horror Pt. 3
The Springfield Horror Pt. 4
| ||||||||||||||||||||||||||||||||||||||||||||||||||||||||||||||||||||||||||||||||||||||||||||||||||||||||||||||||||||||||||||||||||||||||||||||||||||||||||||||||||||||||||||||||||||||||||||||||||||||||||||||||||||||||||||||||||||||
Act 3 Gameplay
The Sandwich Horror
The Blameless City
The Blameless City Pt. 1
The Blameless City Pt. 2
The Blameless City Pt. 3
The Blameless City Pt. 4
The Blameless City Pt. 5
Something Strange in the Neighborhood
| ||||||||||||||||||||||||||||||||||||||||||||||||||||||||||||||||||||||||||||||||||||||||||||||||||||||||||||||||||||||||||||||||||||||||||||||||||||||||||||||||||||||||||||||||||||||||||


Ending Gameplay
Prize Track Completed
Event Ending Reminder
Event Takedown Reminder
| ||||||||||||||||||||||||||||||||||||||||||||||||||||||||||||||||||||||||||
Premium gameplay
The Boy who LARP'd
The Boy who LARP'd Pt. 1
The Boy who LARP'd Pt. 2
The Boy who LARP'd Pt. 3
The Boy who LARP'd Pt. 4
The Boy who LARP'd Pt. 5
| ||||||||||||||||||||||||||||||||||||||||||||||||||||||||||||||||||||||||||||||||||||||||||||||||||||||
The Saxamaphone
The Saxamaphone Pt.1
The Saxamaphone Pt.2
The Saxamaphone Pt.3
The Saxamaphone Pt.4
The Saxamaphone Pt. 5
| |||||||||||||||||||||||||||||||||||||||||||||||||||||||||||||||||||||||||||||||||||||||||||||||||||||||||||||||||||||||
Truth, Justice, and the Milhouse Way
Truth, Justice, and the Milhouse Way Pt. 1
Truth, Justice, and the Milhouse Way Pt. 2
Truth, Justice, and the Milhouse Way Pt. 3
Truth, Justice, and the Milhouse Way Pt. 4
Truth, Justice, and the Milhouse Way Pt. 5
| ||||||||||||||||||||||||||||||||||||||||||||||||||||||||||||||||||||||||||||||||||||||||||||||||||||||||||||||||||||||
Willie's Labyrinth
Willie's Labyrinth Pt. 1
Willie's Labyrinth Pt. 2
Willie's Labyrinth Pt. 3
| |||||||||||||||||||||||||||||||||||||||||||||||||||||||||||||||||||||||||||||||||||||
Under the Tentacles
Under the Tentacles Pt. 1
Under the Tentacles Pt. 2
Under the Tentacles Pt. 3
Under the Tentacles Pt. 4
| |||||||||||||||||||||||||||||||||||||||||||||||||||||||||||||||||||||||||||||||||||||||||||||||||||||||||||||||
Early Squirrel Gets the Nut
Early Squirrel Gets the Nut Pt. 1
Early Squirrel Gets the Nut Pt. 2
Early Squirrel Gets the Nut Pt. 3
Early Squirrel Gets the Nut Pt. 4
Early Squirrel Gets the Nut Pt. 5
| ||||||||||||||||||||||||||||||||||||||||||||||||||||||||||||||||||||||||||||||||||||||||||||||||||||||||||||||||||||||||||||||||||||||||||
Cover Squirrel
Cover Squirrel Pt. 1
Cover Squirrel Pt. 2
Cover Squirrel Pt. 3
Cover Squirrel Pt. 4
Cover Squirrel Pt. 5
| |||||||||||||||||||||||||||||||||||||||||||||||||||||||||||||||||||||||||||||||||||||||||||||||||||||||||
What Is Dead May Never Die
| ||
Spawn of the Elder God
| ||
Formless Tappers
| ||
No Bones About It
| ||
Kang and Kodos Gameplay
Midgalaxy Crisis
Midgalaxy Crisis Pt. 1
Midgalaxy Crisis Pt. 2
Midgalaxy Crisis Pt. 3
Midgalaxy Crisis Pt. 4
| |||||||||||||||||||||||||||||||||||||||||||||||||||||||||||||||||||||||||||||||||||||||||||||||||||||||
Where No Probe Has Gone Before
Where No Probe Has Gone Before Pt. 1
Where No Probe Has Gone Before Pt. 2
Where No Probe Has Gone Before Pt. 3
Where No Probe Has Gone Before Pt. 4
Where No Probe Has Gone Before Pt. 5
| ||||||||||||||||||||||||||||||||||||||||||||||||||||||||||||||||||||||||||||||||||||||||||||||||||||||||||||||
Dates
|
Nightmare Spawn and Currency Earning Jobs
All Acts
Items
|
Characters
|
Act 1 and 2
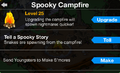
Spooky Campfire Act 1 and 2 Menu
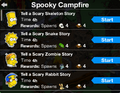
Tell a Scary Story Act 1 Menu
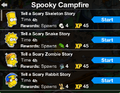
Tell a Scary Story Act 2 Menu
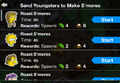
Send Youngsters to Make S'mores Act 1 Menu
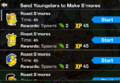
Send Youngsters to Make S'mores Act 2 Menu


Tell a Scary Story
|
Send Youngsters to Make S'mores
|
Act 2

Find Building Screen
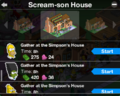
Gather at the Simpson's House Menu
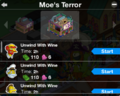
Unwind With Wine Menu
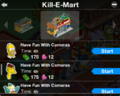
Have Fun With Cameras Menu
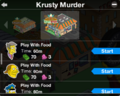
Play With Food Menu


Gather at the Simpson's House
|
Unwind With Wine
|
Have Fun With Cameras
|
Play With Food
|
Characters
|
Act 3
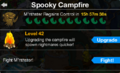
Spooky Campfire Act 3 Menu (Active)

Spooky Campfire Act 3 Menu (Inactive)
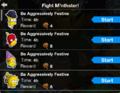
Fight M'nthster Menu
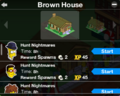
Hunt Nightmares Menu
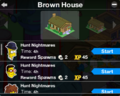
Hunt Nightmares Menu after November 5 Update


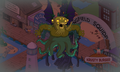
Flying M'nthster

M'nthster at the Spooky Campfire
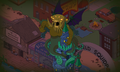
M'nthster at the Sunken Temple

Sunk Temple
Fight M'nthster
|
Hunt Nightmares
|
Defeating M'nthster
|
Characters
|
Prizes
|


| |||||||||||||||||||||||||||||||||||||||||||||||||||||||||

Captain Kang
Captain Kang Pt. 1
Captain Kang Pt. 2
Captain Kang Pt. 3
Captain Kang Pt. 4
| |||||||||||||||||||||||||||||||||||||||||||||||||||||||||||||||||||||||||||||||||||||||||||||||||||
The One that Got Away
| |||||||||||||||||||||||||||||||||||||||||||||||||||||||
Gate to Nowhere
| ||||
The Ultra-Prankster
The Ultra-Prankster Pt. 1
The Ultra-Prankster Pt. 2
The Ultra-Prankster Pt. 3
The Ultra-Prankster Pt. 4
The Ultra-Prankster Pt. 5
The Ultra-Prankster Pt. 6
| |||||||||||||||||||||||||||||||||||||||||||||||||||||||||||||||||||||||||||||||||||||||||||||||||||||||||||||||||||||||||||||||||||
Festiween
Festiween Pt. 1
Festiween Pt. 2
Festiween Pt. 3
Festiween Pt. 4
| |||||||||||||||||||||||||||||||||||||||||||||||||||||||||||||||||||||||||||||||||||||||||||
Lobotomy of Love
Lobotomy of Love Pt. 1
Lobotomy of Love Pt. 2
Lobotomy of Love Pt. 3
| ||||||||||||||||||||||||||||||||||||||||||||||||||||||||||||||||||||||||||||||||||
Crafting
|

| ||||||||||||||||||||||||||||||||||||||||||||||||||||||||||||||||||
A Proper Rigellian Thanksgiving
Act 1, 2 and 3A Proper Rigellian Thanksgiving Pt. 1
A Proper Rigellian Thanksgiving Pt. 2
A Proper Rigellian Thanksgiving Pt. 3
Act 2 and 3A Proper Rigellian Thanksgiving Pt. 4
A Proper Rigellian Thanksgiving Pt. 5
A Proper Rigellian Thanksgiving Pt. 6
A Proper Rigellian Thanksgiving Pt. 7
Act 3A Proper Rigellian Thanksgiving Pt. 8
A Proper Rigellian Thanksgiving Pt. 9
A Proper Rigellian Thanksgiving Pt. 10
| |||||||||||||||||||||||||||||||||||||||||||||||||||||||||||||||||||||||||
My Brother's Keeper
My Brother's Keeper Pt. 1
My Brother's Keeper Pt. 2
My Brother's Keeper Pt. 3
My Brother's Keeper Pt. 4
My Brother's Keeper Pt. 5
My Brother's Keeper Pt. 6
| |||||||||||||||||||||||||||||||||||||||||||||||||||||||||||||||||||||||||||||||||||||||||||||||||||||||||||||||||||||||||||||||||||||||||||||||||||||||||||||||||||
Spooky Campfire Level Up

|
Every level upgrade, you'll receive a 5% increase to the Nightmares (Act 1 and 2)/Star Spawns (Act 3) spawn rate and a new decoration. After level 41 the rate doesn't increase anymore.
Decorations
|
Getting Wood
Getting Wood Pt. 1
Getting Wood Pt. 2
Getting Wood Pt. 3
Getting Wood Pt. 4
Getting Wood Pt. 5
Getting Wood Pt. 6
| |||||||||||||||||||||||||||||||||||||||
Shopkeeper's Challenges

Shopkeeper's Challenges Guide
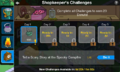
Week 1
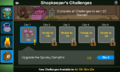
Week 2
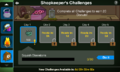
Week 3

Week 4
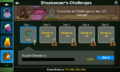
Week 5


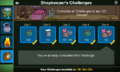
Week 1 Complete
Week 2 Complete
Week 3 Complete
Week 4 Complete
Week 5 Complete


| ||||||||||||||||||||||||||||||||||||||||||||||||||||||||||||||||||||||||||||||||||||||||||||||||||||||||||||||||||||||||||||||||||||||||||||||||||||||||||||||||||||||||||||||||||||
Shopkeeper's Challenges
House of Evil owned
House of Evil not owned
Unreleased
| ||||||||||||||||||||||||||||||||||
Daily Play Combo
- Daily Play Combo Smores.png
Act 1
- Daily Play Combo Gummies.png
Act 2
- Daily Play Combo Candy Apples.png
Act 3
Conform-o-meter impact
|
|
Other changes made
October 6 Update (4.17.0 / 4.17.1;"v4_17_THOH2015","4_17_NewUserPowerUpsTHOH2015")
- 4.17.1 (Android, Kindle) / 4.17.0 (iOs)
- "v4_17_THOH2015"
- "4_17_NewUserPowerUpsTHOH2015"
- The app icon, the splash screen and the ambience music were changed to new ones for the event.
- A black aura surrounds the screen.
- A new Leaderboard was added for the event.
- The town landing point was moved to the Spooky Campfire.
- Friend visit's icon was changed to Radioactive Milhouse and Clockwork Bart.
- Monorail Tracks' overlay was changed.
- Kwik-E-Mart, Krusty Burger, Moe's Tavern were added to the Businesses Visitable group.
- Witch Marge cost changed from
 90 to 75.
 - Devil Flanders cost changed from 75 to 120.
- Cauldron cost changed from 75 to 25 and is no longer associated with Witch Marge.
- Flanders The Devil no longer requires "The Black Hole Pt. 4" to be completed, instead requires Level 6 and not having done the quest.
- Bad Dream House questline is restarted for those that already completed it.
- Placing the Victorian UFO now yields
 200, cost changed from 35 to 60.
 - Freakmobile cost changed from 35 to 60.
- Just the Two of Us now requires Kang and Kodos to be active.
- The Day Springfield Stood Still now requires Kodos's Crashed UFO and for Act 1 of the Treehouse of Horror 2015 to be active.
- Portal to Rigel 7 cost changed from 100 to 75.
- Placing Rigellian Queen now yields 100 and costs 100.
- Placing Donut Torture Device now yields 80 and costs 80.
- Placing The Grand Pumpin now yields 60 and costs 60.
- If You Can't Beat 'Em, Hilarium now requires Kang and/or Kodos.
- Tree-hugging decorations, rivers and Springfield Falls changed to Halloween look.
- The unreleased Hide/Show All icon was added, enabling hiding the Hide items list on Edit mode.
- Ninja Homer's Smash Up Flanders House (4h) now yields
 4.
4. - Count Burns's Rest in Peace (24h) now yields
 24.
24. - Mayan Marge's Chant an Ancient Song (8h) now yields
 8.
8. - Shadow Knight Bart's Go on a Killing Spree (12h) now yields
 12.
12. - Pet Cemetery's job changed to Breeding Bunnies and now spawns 10 Bunnies every 10h.
- Mausoleum's job changed to Reviving Skeletons and now spawns 8 Skeletons every 8h.
- Freakmobile's job changed to Resurrecting Zombies and now spawns 12 Disco Zombies every 12h.
- Hollow Snake Trunk now spawns 12 Snakes every 12h.
- The Daily Play Combo was changed to yield event currency.
- New User Power Up related changes: The Simpsons: Tapped Out New User Power Ups content update#October 6 Update (4.17.0 / 4.17.1;"v4_17_THOH2015","4_17_NewUserPowerUpsTHOH2015")
- IRS and Job Manager related changes: The Simpsons: Tapped Out IRS and Job Manager content update#October 21 Update (4.17.2)
October 7 Update ("4_17_THOH2015_Patch1_PostLaunch")
- Fixed The Call of the Campfire Pt. 3 not completing.
October 8 Update (12.30am GMT Server Update)
October 15 Update ("4_17_HalloweenOfHorror")
- The unreleased Official Halloween HQ has been released.
- The Sunken Temple has been changed to a new building with 6 skins depending on the stage.
- The new appearance for the Simpson House that was added in the Level 55 update was released.
- Two new skins, Acorn Kirk and Squirrel Luann, were added to the store for Act 2.
- Holiday Homer was fully programmed.
- Holiday Homer, Acorn Kirk and Squirrel Luann were added to the new characters collection "Treehouse of Horror XXVI Adults".
- Rush Rates for Mechanical Ghost, Clockwork Bart, Apu's Apocalypse Jeep and Holiday Homer were reduced.
- Act 2 and 3 of the event were programmed.
- Week 3, 4 and 5 of the Shopkeeper's Challenges were added.
- The Drive-In Theater and the Space Mutant were added back to the store.
- Bramble Hedge was changed for north-east and southwest directions.
October 16 Update ("v4_17_THOH2015_Patch3_PostLaunch", Server Update)
- The looping campfire upgrade quests no longer require each other to start and now set a value to check what upgrade quest was active last.
- The crafting cost for Moe's Terror, Kill-E-Mart and Krusty Murder changed from 250 to 500.
October 21 Update (4.17.2)
- IRS and Job Manager related changes: The Simpsons: Tapped Out IRS and Job Manager content update#October 21 Update (4.17.2)
October 22 Update 1 ("v4_17_THOH2015_TieIn")
- If Sideshow Bob has not been unlocked, and Bob's Victorian House is bought, his spawn chance is raised by 10%.
- Ghost Pirate Airship was added back to the store.
- Formless Terrors touch priority was lowered from 100 to 8.
- Spawning Formless Terrors in other towns now doesn't pan the camera to the spawn point.
- Bart's Tell a Scary Story doesn't yield Gummies anymore.
- Ancient Ruins will return to the store from November 10 at 8am GMT to November 17th at 8am GMT.
- Squirrel Luann, Fairy Kodos, Acorn Kirk now shows that they require the respective character in the build menu.
- Radioactive Milhouse, Saxophone Lisa and Wizard Martin now shows Improved Halloween jobs! in the build menu and now earn premium payout in Send Youngsters to Make S'mores, spawning 4 nightmares instead of 2 and yielding 60.
October 22 Update 2 (6.40pm GMT Server Update)
- New User Power Up related changes: The Simpsons: Tapped Out New User Power Ups content update#October 22 Update 2 (6.40pm GMT Server Update)
October 23 Update ("4_17_THOH2015_TieIn_Patch1_PostLaunch")
- The event store panel was changed from the Three Panel to One Panel.
October 26 Update ("4_17_THOH2015_TieIn_PostLaunch_Patch2")
- Shopkeeper's Week 3 1st Challenge now correctly states "Squish Skeletons" instead of "Squish Bunnies".
- If the user haven't completed The Call of the Campfire Pt. 13 (if act 2 isn't started), Shopkeeper's Week 3 5th Challenge will correctly say "You're falling behind! Complete "The Call of the Campfire Pt. 13" in order to do this challenge!" instead of "You're falling behind! Complete "The Very Young Folk Pt. 5" in order to do this challenge!" (the message it'd say if act 3 isn't started).
October 28 Update ("4_17_HalloweenPromo")
October 29 Update ("4_17_HalloweenPromo_Patch1_PostLaunch")
- Spooky Campfire jobs "Tell a Scary Story" and "Roast S'mores" are now active in Act 3 too, till The Blameless City Pt. 1 is started.
- Hunt Nightmares now requires The Blameless City to be started.
- Fixed a glitch not granting Scream-son House.
November 5 Update (8pm GMT Server Update)
- Hunt Nightmares time was halved from 8 hours to 4 hours.
November 6 Update ("4_17_HalloweenPromo_Patch2_PostLaunch")
- After defeating M'nthster at the Spooky Campfire, the game detects that he's been defeated there, setting a variable, probably fixing a glitch preventing kids from hunting nightmares.
November 10 Update ("4_17_GinaMalloy")
November 11 Update ("4_17_GinaMalloy_PostLaunch_Patch1")
- The game now spawns the correct nightmares, fixing a glitch that spawned the incorrect ones once released.
November 17 Update (4.17.6,"v4_17_THOH2015_Takedown")
- The app icon, splash screen, friend visit's icon and ambience music were changed back to non-event ones.
- The black aura surrounding the screen was removed.
- Event's Leaderboard was removed.
- The town landing point was restored to town center.
- Fairy Kodos' Secrete Glitter Onto Magic Wand was changed to Secret Glitter Onto Magic Wand.
- Bad Dream House, It Blows and Elf Home were added to the buildings group Pays Taxes.
- The raised chance of Sideshow Bob spawning is now linked to having the Bob's Victorian House instead of having purchased it.
- Tell a Scary Story is now permanent at the Spooky Campfire and yields 175$ and 45 XP.
- Read from the Necronomicon at the Sepulcher of Evil doesn't spawn any more nightmares.
- Higher Class of Politics Pt. 3 now requires reward to be collected to continue the dialogue.
- Pet Disco Zombie, Formless Terror and Star Spawn were added to the shop till November 25 at 8am GMT and in a new character collection was added: "Treehouse of Horror XXVI Nightmares". Pet Skeleton is unreleased.
- Spooky Campfire can now be stored but can't be leveled up anymore, instead it shows the reached level.
- Sunken Temple can now be stored and now when tapped it makes M'nthster appear and disappear with a water pillar.
- My Brother's Keeper doesn't require A Proper Rigellian Thanksgiving Pt. 3 to be completed.
- Fixed a possible bug in Fission Impossible Pt. 3.
- Squirrel Luann's Show Off Her Squirrel Costume is now permanent and premium.
- Early Squirrel Gets The Nut Pt. 2 now doesn't require Luann anymore if the user haven't got her unlocked, instead having Kirk Painfully Get His Costume Glued to His Groin.
- The Impossible Tower can't be placed on Krustyland anymore.
- Midgalaxy Crisis doesn't require A Proper Rigellian Thanksgiving Pt. 1 to be completed anymore.
- Pet Cemetery, Mausoleum, Freakmobile and Hollow Snake Trunk's nightmare spawning jobs were removed.
- Adult jobs at Scream-son House, Kill-E-Mart, Krusty Murder and Moe's Tavern and kid jobs at Brown House were removed.
- Tell a Scary Story now rewards
 90 and 10.
 - Gate to Nowhere's job Breaching Reality now yields 300 and 30 every 24 hours.
- The glitch that allowed some items (like The Impossible Tower) to be placable on the Ocean and on Roads has been fixed.
- Apu's Set Up the Halloween Display is now active till the Treehouse of Horror 2015's quest kill date, November 27, along the other jobs from Halloween of Horror tie-in.
- Clockwork Bart, Wizard Martin, Saxophone Lisa, Fairy Kodos and Pirate Kang's jobs were changed and the temp ones are now permanent:
|
- Clockwork Bart, Wizard Martin, Saxophone Lisa, Fairy Kodos, Pirate Kang, Kang and Kodos have new jobs:
|
Sources
 Overview at Tapped Out - Update Information
 The Simpsons: Tapped Out Official Facebook Page on Facebook