|
|
| (15 intermediate revisions by 3 users not shown) |
| Line 2: |
Line 2: |
| | {{for|the Tapped Out's Treehouse of Horror content update from 2012|other year's Tapped Out Treehouse of Horror content updates|The Simpsons: Tapped Out Treehouse of Horror content update|TSTO Treehouse of Horror Content Updates}} | | {{for|the Tapped Out's Treehouse of Horror content update from 2012|other year's Tapped Out Treehouse of Horror content updates|The Simpsons: Tapped Out Treehouse of Horror content update|TSTO Treehouse of Horror Content Updates}} |
| | {{TOCUPrevNext|The Simpsons: Tapped Out "Moonshine River" episode tie-in content update|The Simpsons: Tapped Out Level 23 content update}} | | {{TOCUPrevNext|The Simpsons: Tapped Out "Moonshine River" episode tie-in content update|The Simpsons: Tapped Out Level 23 content update}} |
| − | {{cleanup|Way too much stuff up the top here}}
| |
| − | [[File:Tapped Out Wicked Treat Box.png|left|thumb|A Wicked Treat Box, which costs {{Donut|2}}.]]
| |
| − | [[File:Tapped Out Treehouse of Horror Guide.png|250px|right]]
| |
| − | The '''third content update''' for ''[[The Simpsons: Tapped Out]]'' was first available for download on October 3, 2012, and was released as version 3.0.0.
| |
| | | | |
| − | This was a huge update, introducing new Halloween characters and buildings. Players are now able to squish zombies after building the Springfield Cemetery, toilet-paper and egg friends' houses, and unlock new Halloween quests. Also, new objects have been released: a Pylon, a Gas Pump, a Patio Table, a See-Saw and a Stop Sign - all of which are unlocked on the new level introduced in the update - Level 22. Edna Krabappel's apartment block and Edna are available to unlock in the new level 22, after completing the quest "Staff Needs".
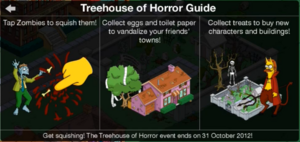
| + | [[File:Tapped Out Halloween Update promo.jpg|200px|right|thumb|A promotional image for the update.]][[File:Tapped Out Treehouse of Horror Guide.png|thumb|300px|Event guide.]] |
| | | | |
| − | [[File:Tapped Out Halloween Update promo.jpg|200px|right|thumb|A promotional image for the update.]] | + | '''''[[The Simpsons: Tapped Out]]'' Treehouse of Horror XXIII''' is the third content update for ''[[The Simpsons: Tapped Out]]''. It was released on October 3, [[2012]]. |
| − | The player needs to be on Level 5 to unlock the Halloween features. Once the Mayan calendar has been completed, the Mayan God asks the player a question - if the player answers correctly they get Mayan Homer and 10 donuts, but if they answer incorrectly they don't get 10 donuts. A clue to the answer is in the [[season 24]] episode "[[Treehouse of Horror XXIII]]".
| |
| | | | |
| − | If you complete the Treehouse of Horror XXIII character collection, which consists of the Mayan God, the Talking Krusty Doll, Kang, Burns Monster and the Raven, you get {{Cash|1000}} and {{XP|20}}.
| + | As well as the "Treehouse of Horror" content, the update included Level 22 of the game. |
| − | [[File:Mayan Marge.png|80px|left]]
| |
| − | The Halloween features were available until early November, between November 5, 2012 and November 8, 2012 - and until that date, Mystery Boxes were Wicked Treat Boxes.
| |
| | | | |
| − | Despite the Treehouse of Horror Update Guide in the game listing the date of October 31, 2012 for when the Treehouse of Horror event will last until, the update's content was still in the game between November 5, 2012 and November 8, 2012.
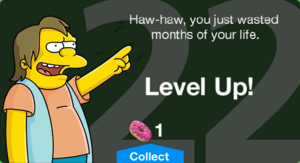
| + | == Level Up Message == |
| | + | Its level up is message is spoken by [[Nelson Muntz]]. |
| | | | |
| − | As of the fifth content update, characters are no longer able to go on Halloween quests with the exception of Halloween characters, such as [[Kang]], and costumes, such as Witch [[Marge]], though they now earn cash instead of treats.
| + | {{Table|align=center|width=300px| |
| − | | |
| − | On February 26/27, 2013, a user on the TSTO Players forum posted a list (with links to images) of characters and buildings sent to appear in then-future content updates. The user also found a black-and-white [http://s20.postimage.org/wwtlk1im5/unlock_marge_mayan.jpg 'unlock' image of Mayan Marge], a character that possibly would have introduced with this content update. On May 31, 2013, presumably, a [http://www.tstappedout.com/updates/Other/images/unlock_marge_mayan.png full colour image of Mayan Marge] was uploaded to a ''Tapped Out'' fansite.
| |
| − | | |
| − | ==Level 22 Level Up Message==
| |
| − | Its level up is message is spoken by [[Nelson Muntz]]
| |
| − | | |
| − | | |
| − | <ul><ul><ul>{{Table|align=center|width=500px|
| |
| | {{THT|Level Up Message}} | | {{THT|Level Up Message}} |
| − | {{TBT|[[File:Level22.png|500px]]}} | + | {{TBT|[[File:Level22.png|300px]]}} |
| − | }}</ul></ul></ul>
| |
| − | | |
| − | == Gameplay ==
| |
| − | Once the player has got the Treehouse of Horror XXIII update:
| |
| − | | |
| − | ===Dial 'Z' for Zombies Pt. 1===
| |
| − | {{Table|
| |
| − | {{Tapped Out Homer Icon}}
| |
| − | {{TB|Halloween is coming! Let's crank up the "spooky" factor around here by building the Springfield Cemetery!}}
| |
| − | {{Tapped Out Lisa Icon}}
| |
| − | {{TB|There's a lot more important things to build first.}}
| |
| − | {{Tapped Out Homer Icon}}
| |
| − | {{TB|I'll be frank. We're all living inside buildings I, Homer Simpson, built in less than a day. Pretty soon we're gonna need somewhere to put dead bodies.}}
| |
| − | {{Tapped Out Lisa Icon}}
| |
| − | {{TB|Excellent point.}}
| |
| − | {{THT|The player then receives the quest "Dial 'Z' for Zombies Pt. 1", which is to "Build Springfield Cemetery". The Springfield Cemetery is free, and takes only six seconds to build. The reward for the quest is {{Treat|1}}, {{XP|5}}.|colspan=2}}
| |
| − | {{TBT|'''Build'''}}
| |
| − | {{TB|[[File:Springfield Cemetery Tapped Out.png|200px]]}}
| |
| − | }}
| |
| − | ===Dial 'Z' for Zombies Pt. 2===
| |
| − | {{Table|
| |
| − | {{Tapped Out Lisa Icon}}
| |
| − | {{TB|Zombies are pouring out of the cemetery!}}
| |
| − | {{Tapped Out Homer Icon}}
| |
| − | {{TB|Think! What kills zombies -- silver bullets? Garlic? Me relaxing in my hammock?}}
| |
| − | {{Tapped Out Lisa Icon}}
| |
| − | {{TB|The best method is squishing them with an enormous sky-finger.}}
| |
| − | {{Tapped Out Homer Icon}}
| |
| − | {{TB|Where, oh where, will we ever find one of those????}}
| |
| − | {{THT|The player then receives the quest "'Dial 'Z' for Zombies Pt. 2", which is to "Squish Zombies" - ten. During zombie squishing, a Mysterious Artifact is found.|colspan=2}}
| |
| − | {{Tapped Out Lisa Icon}}
| |
| − | {{TB|That's weird. That zombie was holding some sort of ancient STONE ARTIFACT. I wonder why?}}
| |
| − | {{Tapped Out Homer Icon}}
| |
| − | {{TB|Why do zombies do anything? For money, that's why.}}
| |
| − | {{Tapped Out Lisa Icon}}
| |
| − | {{TB|Uh, I'm pretty sure all zombies care about is eating brains.}}
| |
| − | {{Tapped Out Homer Icon}}
| |
| − | {{TB|You need to hang out with a higher class of zombie.}}
| |
| − | {{Tapped Out Zombie Icon}}
| |
| − | {{TB|Watch October 7 Treehouse of Horror episode --}}
| |
| − | {{THT|The player then places the artifact. After doing so, a quest pops up, "The Secret of the Mayans Pt. 1", which is to "Find and Place Mysterious Artifacts" - because the player has already placed one, it is listed as "1/2".|colspan=2}}
| |
| − | }}
| |
| − | ===The Secret of the Mayans Pt. 1===
| |
| − | {{Table|
| |
| − | {{THT|Continuing to squish zombies, the player finds another Mysterious Artifact. Placing it, the player has completed the quest given, and receives {{Treat|1}} and {{XP|5}}.|colspan=2}}
| |
| − | {{Tapped Out Homer Icon}}
| |
| − | {{TB|Another ARTIFACT! And look -- it fits together with the first one!}}
| |
| − | {{Tapped Out Lisa Icon}}
| |
| − | {{TB|Dad, I think these are pieces of the Mayan Long Count Calendar! But why?}}
| |
| − | {{Tapped Out Homer Icon}}
| |
| − | {{TB|Stay tuned for the answers, everybody!}}
| |
| − | {{Tapped Out Zombie Icon}}
| |
| − | {{TB|Complete calendar. Watch October 7 Treehouse of Horror episode.}}
| |
| − | {{THT|The player then receives the second part of the quest, "The Secret of the Mayans Pt. 2", which is to "Find and Place Mysterious Artifacts". The quest requires the player to find and place 3 artifacts, and the player has already found and placed 2 of them at this point. The player squishes the rest of the zombies and gets the reward for "Dial 'Z' for Zombies Pt. 2", {{Treat|1}} and {{XP|5}}.|colspan=2}}
| |
| | }} | | }} |
| | | | |
| − | ===The Secret of the Mayans Pt. 2 & Dial 'Z' for Zombies Pt. 3=== | + | == Characters == |
| | + | === Level 22 === |
| | {{Table| | | {{Table| |
| − | {{Tapped Out Cletus Icon}} | + | {{TH|Image}} |
| − | {{TB|Oh, sad day. Cletus Junior, my favorite huntin' dog, has passed.}} | + | {{TH|Name}} |
| − | {{Tapped Out Lisa Icon}} | + | {{TH|Cost}} |
| − | {{TB|That's terrible! How did he die?}} | + | {{TH|Unlock image}} |
| − | {{Tapped Out Cletus Icon}} | + | {{TH|Notes}} |
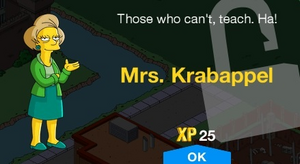
| − | {{TB|He was deer huntin'. Poor dog had one too many beers, tripped over his own paw, and his gun went off.}} | + | {{TBT|[[File:Tapped Out Unlock Edna.png|80px]]}} |
| − | {{THT|Then, the player receives the quest "Dial 'Z' for Zombies Pt. 3", which is to "Have Treats" (10) and to "Build Pet Cemetery". The pet cemetery costs {{Treat|10}} and takes 4 hours to build. Another horde of zombies comes out of the cemetery, and squishing them, the player gets at least one more artifact - | + | {{TB|[[Mrs. Krabappel]]}} |
| − | completing "The Secret of the Mayans Pt. 2" which gives the reward of {{Treat|1}} and {{XP|5}}.|colspan=2}}
| + | {{TB|{{Cash|70000}}}} |
| − | {{TBT|'''Build'''}} | + | {{TB|[[File:Tapped Out Edna Krabappel New Character.png|300px]]}} |
| − | {{TB|[[File:Pet Cemetery Tapped Out.png|200px]]}} | + | {{TB|Requires Level 22.<br>Unlocks in Staff Needs.<br>Unlocks with Krabappel Apartment.}} |
| | + | {{TBT|[[File:Tapped Out Unlock Otto.png|100px]]}} |
| | + | {{TB|[[Otto]]}} |
| | + | {{TB|{{Donut|120}}}} |
| | + | {{TB|[[File:Tapped Out Otto New Character.png|300px]]}} |
| | + | {{TB|Requires Level 22<br>Unlocks with School Bus.}} |
| | }} | | }} |
| | | | |
| − | ===The Secret of the Mayans Pt. 3=== | + | === Treehouse of Horror XXIII === |
| | {{Table| | | {{Table| |
| − | {{Tapped Out Lisa Icon}} | + | {{TH|Image}} |
| − | {{TB|The Mayan calendar is almost complete! Dad, I think the zombies are trying to tell us something...}} | + | {{TH|Name}} |
| − | {{Tapped Out Zombie Icon}} | + | {{TH|Cost}} |
| − | {{TB|Complete calendar. Watch October 7 Treehouse of Horror episode. Answer trivia question about it. Answer correctly and receive a--}} | + | {{TH|Unlock image}} |
| − | {{Tapped Out Homer Icon}} | + | {{TH|Notes}} |
| − | {{TB|Take that, zombie! (BLOWS ZOMBIE AWAY WITH SHOTGUN)}} | + | {{TBT|[[File:Tapped Out Unlock Kang.png|100px]]}} |
| − | {{Tapped Out Lisa Icon}}
| + | {{TB|[[Kang]]}} |
| − | {{TB|Dad! That zombie had something to say!}} | + | {{TB|{{Donut|100}}}} |
| − | {{Tapped Out Homer Icon}} | + | {{TB|[[File:Tapped Out Kang New Character.png|300px]]}} |
| − | {{TB|And I had a shotgun. Which means I win.}} | + | {{TB|Unlocks with Ray Gun.}} |
| − | {{THT|The player receives "The Secret of the Mayans Pt. 3", which is to "Find and Place Mysterious Artifacts" - five, even though that the player has already found 3 of the artifacts at this point. The reward for this quest is {{Treat|1}} and {{XP|5}}.|colspan=2}} | |
| | }} | | }} |
| | | | |
| − | ===Dial 'Z' for Zombies Pt. 4=== | + | == Character skins == |
| | {{Table| | | {{Table| |
| − | {{TH|Once building the Springfield Cemetery|colspan=2}} | + | {{TH|Image}} |
| − | {{Tapped Out Homer Icon}} | + | {{TH|Name}} |
| − | {{TB|I found a stray dog! Can we keep him?}}
| + | {{TH|Cost}} |
| − | {{Tapped Out Lisa Icon}} | + | {{TH|Unlock image}} |
| − | {{TB|I don't know, Dad. He's kinda... decomposing.}}
| + | {{TH|Notes}} |
| − | {{Tapped Out Homer Icon}} | + | {{TBT|[[File:Mayan Homer.png|80px]]}} |
| − | {{TB|Yeah, but he's smart. If you listen, you can hear him saying "brains.. want brains..."}}
| + | {{TB|[[Mayan Homer]]}} |
| − | {{Tapped Out Lisa Icon}}
| + | {{TB|}} |
| − | {{TB|Terrific. Now the pet cemetery is churning out zombie pets.}}
| + | {{TB|[[File:Tapped Out Mayan Homer New Character.png|300px]]}} |
| − | {{THT|The player receives "Dial 'Z' for Zombies Pt. 4", which is to "Squish Zombie Pets" - ten of them. Once squashing the ten zombie pets, the player receives {{Treat|1}} and {{XP|5}} as a reward.|colspan=2}}
| + | {{TB|Unlocks after completing The Secret of the Mayans Pt. 4 and answering the question correctly.}} |
| − | }} | + | {{TBT|[[File:Devil Flanders.png|120px]]}} |
| − | ===The Secret of the Mayans Pt. 4===
| + | {{TB|[[Devil Flanders]]}} |
| − | {{Table|
| + | {{TB|}} |
| − | {{TH|After completing "The Secret of the Mayans Pt. 3", the player receives "The Secret of the Mayans Pt. 4", in which the player must "Find and place the last Artifacts to complete the Mayan Calendar". Once the calendar is complete and the final piece of the calendar has been found and placed:|colspan=2}} | + | {{TB|[[File:Tapped Out Devil Flanders New Character.png|300px]]}} |
| − | {{Tapped Out Lisa Icon}}
| + | {{TB|Unlocks after completing The Black Hole Pt. 4.}} |
| − | {{TB|Okay, that's the last piece of the calendar!}}
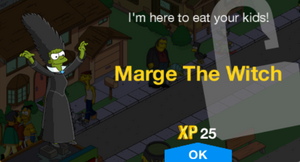
| + | {{TBT|[[File:Marge Witch.png|100px]]}} |
| − | {{THT|The Mayan God then fades into existence on the Mayan Calendar. The player receives {{XP|25}} for unlocking Mayan God, which completes "The Secret of the Mayans Pt. 4", for which the player receives {{Treat|1}} and {{XP|5}} as a reward.|colspan=2}}
| + | {{TB|[[Marge The Witch]]}} |
| − | {{TBT|'''New Character'''}} | + | {{TB|{{Donut|90}}}} |
| − | {{TB|[[File:Tapped Out Mayan God New Character.png|200px]]}}
| + | {{TB|[[File:Tapped Out Marge the Witch New Character.png|300px]]}} |
| − | {{Tapped Out Mayan God Icon}}
| + | {{TB|Unlocks with Cauldron.}} |
| − | {{TB|Hear my SACRED TRIVIA QUESTION!!!!}} | |
| − | {{TBT|Notice}}
| |
| − | {{TB|Get it right and win a Mayan Homer outfit... complete with all new quests!}}
| |
| − | {{Tapped Out Mayan God Icon}}
| |
| − | {{TB|Only those who have seen this year's Treehouse of Horror episode, 75 days before our highly scientific calendar prophecies of the END OF THE WORLD, will answer correctly!}} | |
| − | {{TBT|Notice}}
| |
| − | {{TB|For those of you using the normal calendar, that's October 7th}}
| |
| − | {{THT|The Mayan God will walk around your town with not an exclamation mark above his head, but a question mark. Once the player taps on the question mark, a square appears, which has the Mayan God's illustration on it - and the trivia question: "In this year's Treehouse of Horror episode, what do the aliens consider to be mankind's highest achievement?". The answer is one of these three:
| |
| − | | |
| − | *John Carter on Blu-ray
| |
| − | *The Zune
| |
| − | *DVRs That Let You Skip Commercials
| |
| − | | |
| − | Below, there is a notice: "Answer to unlock an exclusive Mayan Homer outfit. Get it on the first try and win 10 donuts as well!" If the player gets the correct answer, "The Zune", they will receive ten donuts (if they got the answer on the first try) and they will unlock a Mayan Homer outfit. A "Outfits" notice appears: "Congratulations! You have your first Outfit! Tap on the Character to change their Outfit. Each Outfit has its own set of jobs." |colspan=2}}
| |
| − | {{TBT|'''New Skin'''}}
| |
| − | {{TB|[[File:Tapped Out Mayan Homer New Character.png|200px]]}} | |
| − | }}
| |
| − | | |
| − | ===Blast from the Past Pt. 1===
| |
| − | {{Table|
| |
| − | {{TH|After tapping on Homer's exclamation mark|colspan=2}}
| |
| − | {{Tapped Out Mayan Homer Icon}}
| |
| − | {{TB|Where am I? And WHEN am I? Anyone know what baktun it is?}} | |
| − | {{Tapped Out Apu Icon}}
| |
| − | {{TB|Thirteenth.}}
| |
| − | {{Tapped Out Mayan Homer Icon}}
| |
| − | {{TB|Wow. Traveling through time really builds up an appetite.}}
| |
| − | {{THT|The player receives the quest "Blast from the Past Pt. 1", which is to "Make Mayan Homer Go on a Maize Binge". The task lasts 60 minutes and on its own the player would receive {{Treat|1}} and {{XP|17}}. The player receives {{Treat|1}} and {{XP|5}} as the reward for the quest.|colspan=2}}
| |
| − | }}
| |
| − | ===Blast from the Past Pt. 2===
| |
| − | {{Table|
| |
| − | {{Tapped Out Mayan God Icon}}
| |
| − | {{TB|Grrr... gggrrrr!!!}}
| |
| − | {{Tapped Out Mayan Homer Icon}}
| |
| − | {{TB|Hiya, mighty Gukumatz!}}
| |
| − | {{Tapped Out Mayan God Icon}}
| |
| − | {{TB|GRRRR GRGR!}}
| |
| − | {{Tapped Out Mayan Homer Icon}}
| |
| − | {{TB|Hey, if you want a human sacrifice, you got one. No problem!}}
| |
| − | {{THT|The player then receives "Blast from the Past Pt. 2", which is to "Make Mayan Homer Perform Human Sacrifice in the Brown House". The task takes 12 hours and on its own would give the player the reward of {{Treat|1}} and {{XP|100}}. The reward for the quest is {{Treat|1}} and {{XP|5}}.|colspan=2}}
| |
| − | }}
| |
| − | ===Blast from the Past Pt. 3===
| |
| − | {{Table|
| |
| − | {{Tapped Out Mayan God Icon}}
| |
| − | {{TB|Grrgr Grr!}}
| |
| − | {{Tapped Out Mayan Homer Icon}}
| |
| − | {{TB|I'm sorry! Disco Stu was the best sacrifice I could get on short notice.}}
| |
| − | {{Tapped Out Mayan God Icon}}
| |
| − | {{TB|GGGGRRRRR! RRR!}}
| |
| − | {{Tapped Out Mayan Homer Icon}}
| |
| − | {{TB|There's just no making you gods happy.}}
| |
| − | {{THT|The player then receives the final part of the "Blast from the Past" trilogy, "Blast from the Past Pt. 3", which is to "Make Mayan Homer Reenact the Mayan Collapse". The task takes 4 hours and on its own the reward would be {{Treat|1}} and {{XP|45}}.|colspan=2}}
| |
| − | {{Tapped Out Lisa Icon}}
| |
| − | {{TB|Are you done now? Can we get on with it?}}
| |
| − | {{Tapped Out Mayan Homer Icon}}
| |
| − | {{TB|Sure, what's next?}}
| |
| − | }}
| |
| − | | |
| − | ===The Black Hole Pt. 1===
| |
| − | {{Table|
| |
| − | {{TH|After "Dial 'Z' for Zombies Pt. 4", Professor Frink then appears in your town|colspan=2}}
| |
| − | {{Tapped Out Professor Frink Icon}}
| |
| − | {{TB|Good glavin! I have developed a theory to explain the existence of multiple Springfields!}}
| |
| − | {{Tapped Out Homer Icon}}
| |
| − | {{TB|I too have developed a theory: you yell boring things as if they're exciting.}}
| |
| − | {{Tapped Out Professor Frink Icon}}
| |
| − | {{TB|Quickly! I need access to a high-energy super collider.}}
| |
| − | {{Tapped Out Lisa Icon}}
| |
| − | {{TB|What about the LHC at CERN? It just found the Higgs Boson.}}
| |
| − | {{Tapped Out Professor Frink Icon}}
| |
| − | {{TB|Not powerful enough. The boson I'm looking for is much harder to find. You see, due to a printing error, the word "boson" appears upside down on its shell. Very rare. Highly collectible.}}
| |
| − | {{THT|Professor Frink disappears and the player is given the quest "The Black Hole Pt. 1", which is to "Build Super Collider". It costs {{Treat|100}} and takes 8 hours to build. The player receives {{XP|50}} once building the Super Collider, fully named the Springfield Subatomic Supercollider, and then receives {{Treat|1}} and {{XP|5}} for completing "The Black Hole Pt. 1".|colspan=2}}
| |
| − | {{TBT|'''Build'''}}
| |
| − | {{TB|[[File:Super Collider Tapped Out.png|200px]]}}
| |
| − | }}
| |
| − | | |
| − | ===The Black Hole Pt. 2===
| |
| − | {{Table|
| |
| − | {{TH|After tapping on Lisa's exclamation mark, Professor Frink appears again|colspan=2}}
| |
| − | {{Tapped Out Professor Frink Icon}}
| |
| − | {{TB|The collider is ready! With the plasmas, and the crisp new lab coats, and the slamming things together for learning...}}
| |
| − | {{Tapped Out Lisa Icon}}
| |
| − | {{TB|I read somewhere that supercolliders can spawn miniature black holes.}}
| |
| − | {{Tapped Out Professor Frink Icon}}
| |
| − | {{TB|Later, Lisa! It's time to sciencify!}}
| |
| − | {{THT|Frink disappears, and the player receives "The Black Hole Pt. 2" quest, which is to "Make Lisa Turn on the Super Collider" - a 45 second task, which in reward, the player is given {{Treat|1}} and {{XP|1}}. This task can only be done once in the game. The reward for the quest is {{Treat|1}} and {{XP|5}}.|colspan=2}}
| |
| − | }}
| |
| − | ===The Black Hole Pt. 3===
| |
| − | {{Table|
| |
| − | {{TH|Professor Frink appears again.|colspan=2}}
| |
| − | {{Tapped Out Lisa Icon}}
| |
| − | {{TB|A black hole! A tear in the very fabric of space-time that could swallow the earth!}}
| |
| − | {{Tapped Out Professor Frink Icon}}
| |
| − | {{TB|Get that thing out of here before it gobbles the building!}}
| |
| − | {{Tapped Out Lisa Icon}}
| |
| − | {{TB|Will do! Wait a second, where are you going?}}
| |
| − | {{Tapped Out Professor Frink Icon}}
| |
| − | {{TB|Any Springfield but this one! With the naked singularities, and the oh-so-short life expectancy...}}
| |
| − | {{THT|Frink disappears, and the player receives "The Black Hole Pt. 3" quest, which is to "Place Black Hole". The black hole is in the player's inventory, and once the player places it in their Springfield, the player receives the reward of {{Treat|1}} and {{XP|5}}.|colspan=2}}
| |
| − | }}
| |
| − | ===The Black Hole Pt. 4===
| |
| − | {{Table|
| |
| − | {{TH|After tapping on Homer's exclamation mark|colspan=2}}
| |
| − | {{Tapped Out Homer Icon}}
| |
| − | {{TB|What about the candy? Surely the candy will survive the black hole?}}
| |
| − | {{Tapped Out Lisa Icon}}
| |
| − | {{TB|I... I'm afraid not.}}
| |
| − | {{Tapped Out Homer Icon}}
| |
| − | {{TB|Then we don't have much time.}}
| |
| − | {{Tapped Out Milhouse Icon}}
| |
| − | {{TB|KID POWER!}}
| |
| − | {{Tapped Out Lisa Icon}}
| |
| − | {{TB|I know there's zombies out there but how often do kids get the opportunity to amass a horde of candy?}}
| |
| − | {{THT|The player receives the quest "The Black Hole Pt. 4", which is to "Send any Kids Trick-or-Treating". The reward for a character going trick-or-treating is {{Treat|1}} and {{XP|125}}, and the only characters available to go trick-or-treating are Bart, Lisa, Milhouse, Martin and Nelson. Once the player has tapped the "thumb logo" above one of the characters that the player had sent trick-or-treating's heads|colspan=2}}
| |
| − | {{Tapped Out Kang Icon}}
| |
| − | {{TB|Foolish Earthlings! They do not grasp the TRUE danger of the black hole! Science teaches us that black holes are a gateway, connecting this world to the Christian hell! Just as their Albert Einstein predicted, if you read him correctly. Behold! The legions of hell pour forth.}}
| |
| − | {{THT|The player then completes "The Black Hole Pt. 4", the reward for which is {{Treat|1}} and {{XP|5}}. Completing the quest unlocks Devil Flanders, for which the player is given {{XP|25}}.|colspan=2}}
| |
| − | {{Tapped Out Cletus Icon}}
| |
| − | {{TB|I reckon it's the hillbilly's job to point out the alien craft menacing our skies?}}
| |
| − | {{Tapped Out Professor Frink Icon}}
| |
| − | {{TB|I have positively identified this flying object as a UFO. We must construct the Frink Ray Gun immediately!}}
| |
| − | {{Tapped Out Kang Icon}}
| |
| − | {{TB|I KNEW we should have paid for the ray-gun-proof undercoating. Our only hope is that the humans will not have enough donuts to build this ultimate weapon.}}
| |
| − | {{TBT|'''New Skin'''}} | |
| − | {{TB|[[File:Tapped Out Devil Flanders New Character.png|200px]]}}
| |
| − | }}
| |
| − | (Please go to [[#Ray Gun|the Ray Gun section]] for the rest of the gameplay involving Kang.)
| |
| − | ===Flanders the Devil Pt. 1===
| |
| − | {{Table|
| |
| − | {{TH|After tapping on Devil Flanders's exclamation mark|colspan=2}}
| |
| − | {{Tapped Out Devil Flanders Icon}}
| |
| − | {{TB|Hey-diddly-ho there, Springfield!}} | |
| − | {{Tapped Out Homer Icon}}
| |
| − | {{TB|Stupid Devil Flanders! What do you want?}}
| |
| − | {{Tapped Out Devil Flanders Icon}}
| |
| − | {{TB|You might say I'm on Soul Patrol! Wheelin' and Dealin'! Doin' the Hell Sell!}}
| |
| − | {{Tapped Out Homer Icon}}
| |
| − | {{TB|Does EVERY version of you have to rhyme?}}
| |
| − | {{THT|The player then receives the "Flanders the Devil Pt. 1" quest, which is to "Make Devil Flanders Sign up New "Clients"". The task is 12 hours long and on its own, the reward would be {{Treat|1}} and {{XP|100}}. The reward for the quest is {{Treat|1}} and {{XP|5}}.|colspan=2}}
| |
| − | }}
| |
| − | ===Flanders the Devil Pt. 2===
| |
| − | {{Table|
| |
| − | {{Tapped Out Lisa Icon}}
| |
| − | {{TB|What are we gonna do with all these eggs and toilet paper?}}
| |
| − | {{Tapped Out Devil Flanders Icon}}
| |
| − | {{TB|You haven't been using 'em to mess up other Springfields?}}
| |
| − | {{THT|Then, the player receives "Flanders the Devil Pt. 2", which is to "Throw Eggs at houses in other Springfields" and "Throw Toilet Paper at trees in other Springfields" - ten times each. The reward for the quest is {{Treat|1}} and {{XP|5}}.|colspan=2}}
| |
| − | }}
| |
| − | ===Flanders the Devil Pt. 3===
| |
| − | {{Table|
| |
| − | {{Tapped Out Homer Icon}}
| |
| − | {{TB|Did you see the look on that other me's stupid face when I saw me hucking eggs at me? Priceless!}}
| |
| − | {{Tapped Out Devil Flanders Icon}}
| |
| − | {{TB|What truly awful people you are. And what a delightfully wretched town. [SNIFF!]}}
| |
| − | {{Tapped Out Homer Icon}}
| |
| − | {{TB|Are you crying, Stupid Flanders, Prince of Darkness?}} | |
| − | {{Tapped Out Devil Flanders Icon}}
| |
| − | {{TB|I think I'm gonna like it here. Time to set up shop!}}
| |
| − | {{THT|The player receives "Flanders the Devil Pt. 3", which is to "Have Treats" (100) and to "Build House of Evil". The House of Evil costs {{Treat|100}} and takes 12 hours to build.|colspan=2}}
| |
| − | {{TBT|'''Build'''}}
| |
| − | {{TB|[[File:House of Evil Tapped Out.png|200px]]}} | |
| − | }}
| |
| − | ===Flanders the Devil Pt. 4===
| |
| − | {{Table|
| |
| − | {{TH|Once built, the player receives the reward for the quest, {{Treat|1}} and {{XP|5}}|colspan=2}}
| |
| − | {{Tapped Out Homer Icon}}
| |
| − | {{TB|Hmm, "House of Evil". Nice to see there's still a place for brick-and-mortar evil shops in the Internet Age.}}
| |
| − | {{THT|The player receives "Flanders the Devil Pt. 4", which is to "Make Homer Shop at House of Evil". Homer is the only character who can shop there. The task takes 60 minutes and on its own would give the reward of {{Treat|1}} and {{XP|17}}. The reward for the quest is {{Treat|1}} and {{XP|5}}.|colspan=2}}
| |
| − | {{TBT|'''New Character'''}}
| |
| − | {{TB|[[File:Tapped Out Talking Krusty Doll New Character.png|200px]]}}
| |
| − | }}
| |
| − | | |
| − | ===Flanders the Devil Pt. 5===
| |
| − | {{Table|
| |
| − | {{Tapped Out Homer Icon}}
| |
| − | {{TB|Why's a Talking Krusty Doll for sale at an emporium of evil?}} | |
| − | {{Tapped Out Talking Krusty Doll Icon}}
| |
| − | {{TB|Kill Homer! Kill Homer Simpson!}}
| |
| − | {{Tapped Out Homer Icon}}
| |
| − | {{TB|And there's your answer.}}
| |
| − | {{THT|"Flanders the Devil Pt. 5", the final quest in the "Flanders the Devil" pentalogy, requires the player to "Make Homer Run from Talking Krusty Doll". The task takes 24 hours to complete, and on its own the player would receive {{Treat|1}} and {{XP|150}} as a reward. The task is just Homer running around your town with his hands in the air while the Talking Krusty Doll wanders around town, not chasing him at all. Once Homer is done (and out of breath) you receive {{Treat|1}} and {{XP|5}}.|colspan=2}}
| |
| − | }}
| |
| − | ===Bad Dream House Pt. 1===
| |
| − | {{Table|
| |
| − | {{Tapped Out Devil Flanders Icon}}
| |
| − | {{TB|I've got it! I know just the thing to make this town a real Hell-on-Earth!}}
| |
| − | {{Tapped Out Homer Icon}}
| |
| − | {{TB|An NFL stadium funded by taxpayer money, while the public school system crumbles?}}
| |
| − | {{Tapped Out Devil Flanders Icon}}
| |
| − | {{TB|No! And stop eavesdropping!}}
| |
| − | {{Tapped Out Homer Icon}}
| |
| − | {{TB|But eavesdropping is evil! I thought you'd approve.}}
| |
| − | {{Tapped Out Devil Flanders Icon}}
| |
| − | {{TB|It's not evil! It's just rude!}}
| |
| − | {{THT|The player then receives "Bad Dream House Pt. 1", which is to "Have Treats" (150) and to "Build Bad Dream House". The Bad Dream House costs {{Treat|150}} and takes 24 hours to build. The reward for the quest is {{Treat|1}} and {{XP|5}}. After this quest, two "Treat" icons appear in the taskbook sidebar; they are two quests: "Heck House" - "Buy Heck House" and "Burns Monster" - "Buy Burns Monster". The Heck House and the Burns Monster both cost {{Treat|300}}. After completing "Heck House" a "Façades" notice appears: "Congratulations! You have your first building façade. Tap on the building to change its façade." For unlocking the Burns Monster after completing "Burns Monster", the player gets {{XP|25}}. The rewards for these quests are both {{Treat|1}} and {{XP|5}}. |colspan=2}}
| |
| − | {{TBT|'''Build'''}} | |
| − | {{TB|[[File:Bad Dream House Tapped Out.png|200px]]}}
| |
| − | }}
| |
| − | ===Bad Dream House Pt. 2===
| |
| − | {{Table|
| |
| − | {{Tapped Out Devil Flanders Icon}}
| |
| − | {{TB|Spend a night in this house and it's yours! Test your courage! Maybe that angry Scotsman is up to the challenge!}} | |
| − | {{THT|The player then receives "Bad Dream House Pt. 2", which requires the player to "Reach Level 10" and "Build Willie's Shack". If these have been done, the quest is to "Make Willie Sleep in the Bad Dream House". All of the "Sleep in the Bad Dream House" task take 12 hours and if on their own, the player is rewarded with {{Treat|1}} and {{XP|100}} for each "Sleep in the Bad Dream House" task set. After sending Willie to Sleep in the Bad Dream House|colspan=2}}
| |
| − | {{Tapped Out Willie Icon}}
| |
| − | {{TB|A Scotsman always takes the bait! Historically, it's been a real problem for us.}}
| |
| − | {{Tapped Out Devil Flanders Icon}}
| |
| − | {{TB|Your first victim approaches, House-y. You know what to do.}}
| |
| − | {{Tapped Out Bad Dream House Icon}}
| |
| − | {{TB|Next time, can you find someone who doesn't reek of haggis and two-stroke engines?}}
| |
| − | {{THT|The player gets {{Treat|1}} and {{XP|5}} as the quest's reward.|colspan=2}}
| |
| − | }}
| |
| − | ===Bad Dream House Pt. 3===
| |
| − | {{Table|
| |
| − | {{Tapped Out Willie Icon}}
| |
| − | {{TB|Must... kill... Principal Skinner...}}
| |
| − | {{Tapped Out Devil Flanders Icon}}
| |
| − | {{TB|Nice brainwashing, House-y! You're the best in the business.}}
| |
| − | {{Tapped Out Bad Dream House Icon}}
| |
| − | {{TB|You're too kind, O King of Perdition.}}
| |
| − | {{Tapped Out Devil Flanders Icon}}
| |
| − | {{TB|Okay, who's next? How about the fat comic man?}}
| |
| − | {{THT|"Bad Dream House Pt. 3" requires the player to "Reach Level 13" and "Build Android's Dungeon". If these have been done, the quest is to "Make Comic Book Guy Sleep in the Bad Dream House".|colspan=2}}
| |
| − | {{Tapped Out Comic Book Guy Icon}}
| |
| − | {{TB|If the "spend a night-in-a-haunted-house" plotline was good enough for every "Scooby-Doo" ever, it's good enough for me!}}
| |
| − | {{THT|The quest's reward is {{Treat|1}} and {{XP|5}}.|colspan=2}}
| |
| − | }}
| |
| − | | |
| − | ===Bad Dream House Pt. 4===
| |
| − | {{Table|
| |
| − | {{Tapped Out Comic Book Guy Icon}}
| |
| − | {{TB|Must... kill... Apu.... Also Lovejoy and Krusty and Milhouse and Mr. Burns...}}
| |
| − | {{Tapped Out Devil Flanders Icon}}
| |
| − | {{TB|Woah! You gave that brain the scrub-a-dub of the century!}}
| |
| − | {{Tapped Out Bad Dream House Icon}}
| |
| − | {{TB|Yeah, I was on a roll. That guy has some INTENSE anger issues.}}
| |
| − | {{Tapped Out Devil Flanders Icon}}
| |
| − | {{TB|Who's next?}}
| |
| − | {{Tapped Out Homer Icon}}
| |
| − | {{TB|The Simpsons will give it a shot!}}
| |
| − | {{THT|The player receives "Bad Dream House Pt. 4", which is to "Make Homer Sleep in the Bad Dream House", "Make Lisa Sleep in the Bad Dream House" and "Make Bart Sleep in the Bad Dream House". At the same time, another "Bad Dream House" icon appears in the taskbook sidebar. The quest is "Marge's Bad Dream", which requires the player to "Reach Level 15" and "Build Moe's Tavern". If these have been done, the quest is to "Make Marge Sleep in the Bad Dream House". Both of these quests' rewards are {{Treat|1}} and {{XP|5}}.|colspan=2}}
| |
| − | }}
| |
| − | | |
| − | ===Bad Dream House Pt. 5===
| |
| − | {{Table|
| |
| − | {{Tapped Out Bart Icon}}
| |
| − | {{TB|Must... kill... Lisa...}}
| |
| − | {{Tapped Out Homer Icon}}
| |
| − | {{TB|Kill... Bart...}}
| |
| − | {{Tapped Out Lisa Icon}}
| |
| − | {{TB|Kill... Mom...}}
| |
| − | {{Tapped Out Marge Icon}}
| |
| − | {{TB|So this is what it comes to? This is how the Simpsons finally meet their end?}}
| |
| − | {{Tapped Out Bad Dream House Icon}}
| |
| − | {{TB|Stick to the script, lady.}}
| |
| − | {{Tapped Out Marge Icon}}
| |
| − | {{TB|Oh, right. Sorry. Must... kill... Homer...}}
| |
| − | {{Tapped Out Wiggum Icon}}
| |
| − | {{TB|Now, hold on a second. You there -- I suppose you have a PERMIT to operate a house of brainwashing?}}
| |
| − | {{Tapped Out Devil Flanders Icon}}
| |
| − | {{TB|Uh... no. Do I need one?}}
| |
| − | {{Tapped Out Wiggum Icon}}
| |
| − | {{TB|Read your Satanic Bible, pal.}}
| |
| − | {{THT|The player receives "Bad Dream House Pt. 5", which is to "Make Devil Flanders Do Emergency Satanic Bible Study". The task takes 8 hours and on its own, the reward would be {{Treat|1}} and {{XP|70}}.|colspan=2}}
| |
| − | {{Tapped Out Devil Flanders Icon}}
| |
| − | {{TB|Officer, I apologize about the permit, but my evil plans are THIS CLOSE to fruition...}}
| |
| − | {{Tapped Out Wiggum Icon}}
| |
| − | {{TB|Sorry. Rules are rules.}}
| |
| − | {{Tapped Out Devil Flanders Icon}}
| |
| − | {{TB|I am a small businessman, sir. Your town should be WELCOMING people like me!}} | |
| − | {{Tapped Out Wiggum Icon}} | |
| − | {{TB|Thank you for your cooperation.}}
| |
| − | {{Tapped Out Devil Flanders Icon}}
| |
| − | {{TB|Oh, forget this! I'm going back to hell! Where, if nothing else, I can count on a business-friendly environment!}}
| |
| − | {{THT|The player then receives {{Treat|1}} and {{XP|5}} as a reward, ending the "Bad Dream House" pentalogy and the Halloween quests.|colspan=2}}
| |
| − | }}
| |
| − | | |
| − | ==Level 22==
| |
| − | ===School Daze===
| |
| − | {{Table|
| |
| − | {{TH|After tapping on Bart's exclamation mark|colspan=2}}
| |
| − | {{Tapped Out Bart Icon}}
| |
| − | {{TB|Man, I can't believe they still make us go to school every day. There aren't even any teachers!}}
| |
| − | {{Tapped Out Lisa Icon}}
| |
| − | {{TB|Bart, school isn't just about learning. It's about our parents getting rid of us for 6 hours a day.}}
| |
| − | {{THT|The player receives "School Daze" which is to "Make Lisa Go To School" and "Make Bart Go To School". It takes 6 hours. The player receives total {{Cash|550}} and {{XP|120}} in reward.|colspan=2}}
| |
| − | }}
| |
| − | | |
| − | ===Staff Needs===
| |
| − | {{Table|
| |
| − | {{TH|After tapping on Skinner's exclamation mark|colspan=2}}
| |
| − | {{Tapped Out Skinner Icon}}
| |
| − | {{TB|The students are getting restless. What do I do? I'm not comfortable around children!}}
| |
| − | {{Tapped Out Willie Icon}}
| |
| − | {{TB|I could make a better man out of a rusty set of bagpipes! I knew you didn't have what it takes to handle the wee ones.}}
| |
| − | {{Tapped Out Skinner Icon}}
| |
| − | {{TB|By golly, you're right, Willie! There is only one woman with the emotional sand bags necessary to resist the children.}}
| |
| − | {{THT|The player receives "Staff Needs" which is to "Build the Krabappel Apartment". It takes 24 hours. The player receives total {{Cash|100}} and {{XP|10}} in reward.|colspan=2}}
| |
| − | {{TBT|'''Build'''}}
| |
| − | {{TB|[[File:Krabappel Apartment Tapped Out.png|200px]]}} | |
| − | {{TBT|'''New Characters'''}}
| |
| − | {{TB|[[File:Tapped Out Edna Krabappel New Character.png|200px]]}}
| |
| − | }}
| |
| − | | |
| − | ===A Day In The Life===
| |
| − | {{Table|
| |
| − | {{TH|After tapping on Edna's exclamation mark|colspan=2}}
| |
| − | {{Tapped Out Skinner Icon}}
| |
| − | {{TB|Edna! So good to have you back. I see my groveling was successful.}}
| |
| − | {{Tapped Out Edna Icon}}
| |
| − | {{TB|This better be good, Seymour.}}
| |
| − | {{Tapped Out Skinner Icon}}
| |
| − | {{TB|It is! I'm promoting you to teach every grade!}}
| |
| − | {{Tapped Out Skinner Icon}}
| |
| − | {{TB|Unfortunately, there's no money for any kind of salary bump... or salary. But being the only teacher does have its advantages.}}
| |
| − | {{Tapped Out Edna Icon}}
| |
| − | {{TB|Name one.}}
| |
| − | {{Tapped Out Skinner Icon}}
| |
| − | {{TB|You'll be able to sleep on the entire teacher's lounge sofa!}}
| |
| − | {{THT|The player receives "A Day In The Life" which is to "Make Mrs. Krabappel Teach Classes". It takes 8 hours. The player receives total {{Cash|375}} and {{XP|80}} in reward.|colspan=2}}
| |
| − | }}
| |
| − | | |
| − | ===Another Day In The Life===
| |
| − | {{Table|
| |
| − | {{TH|After tapping on Edna's exclamation mark|colspan=2}}
| |
| − | {{Tapped Out Edna Icon}}
| |
| − | {{TB|Hello, Seymour. I'm surprised the school didn't fall down around your ears, running everything by yourself.}}
| |
| − | {{Tapped Out Skinner Icon}}
| |
| − | {{TB|Let's just say I'm happy to have the teaching staff back in the classroom.}}
| |
| − | {{Tapped Out Edna Icon}}
| |
| − | {{TB|And I don't see "The Great Goddess Hag-nes" around anywhere.}}
| |
| − | {{Tapped Out Skinner Icon}}
| |
| − | {{TB|You're right, and without Mother around, I can stay out as late as I want.}}
| |
| − | {{Tapped Out Skinner Icon}}
| |
| − | {{TB|Nine-thirty!}}
| |
| − | {{THT|The player receives "Another Day In The Life" which is to "Make Mrs. Krabappel Teach Classes". It takes 8 hours. The player receives total {{Cash|375}} and {{XP|80}} in reward.|colspan=2}}
| |
| − | }}
| |
| − | | |
| − | ===Another Detention===
| |
| − | {{Table|
| |
| − | {{TH|After tapping on Edna's exclamation mark|colspan=2}}
| |
| − | {{Tapped Out Edna Icon}}
| |
| − | {{TB|You wanted to see me, Seymour?}}
| |
| − | {{Tapped Out Skinner Icon}}
| |
| − | {{TB|Why yes, Edna. I have plans this evening and need you to take care of detention for me.}}
| |
| − | {{Tapped Out Edna Icon}}
| |
| − | {{TB|But I have plans this evening too.}}
| |
| − | {{Tapped Out Skinner Icon}}
| |
| − | {{TB|Principal outranks teacher.}}
| |
| − | {{THT|The player receives "Another Detention" which is to "Make Skinner Go Bird Watching" and "Make Mrs. Krabappel Host Detention". It takes 12 and 24 hours. The player receives total {{Cash|1120}} and {{XP|260}} in reward.|colspan=2}}
| |
| − | {{Tapped Out Edna Icon}}
| |
| − | {{TB|(Sigh) Despite my "Thousand-Mile Stare", I assure you I am thrilled to be back to work.}}
| |
| − | }}
| |
| − | | |
| − | ===It's 2:30 In The Afternoon Somewhere===
| |
| − | {{Table|
| |
| − | {{TH|After tapping on Edna's exclamation mark|colspan=2}}
| |
| − | {{Tapped Out Edna Icon}}
| |
| − | {{TB|Since I'm the only one here, I may as well make a date with my friend James Beam and Jack Daniels.}}
| |
| − | {{THT|The player receives "It's 2:30 In The Afternoon Somewhere" which is to "Make Mrs. Krabappel Relax in Teacher's Lounge". It takes 60 minutes. The player receives total {{Cash|170}} and {{XP|27}} in reward.|colspan=2}}
| |
| − | }}
| |
| − | | |
| − | ===Principal Plus Interest===
| |
| − | {{Table|
| |
| − | {{TH|After tapping on Edna's exclamation mark|colspan=2}}
| |
| − | {{Tapped Out Skinner Icon}}
| |
| − | {{TB|Living without mother sure is liberating.}}
| |
| − | {{Tapped Out Skinner Icon}}
| |
| − | {{TB|Last night, I ate the dining room table, and not in the "bad boy corner."}}
| |
| − | {{Tapped Out Edna Icon}}
| |
| − | {{TB|I'm so happy I'm not dating you anymore.}}
| |
| − | {{THT|The player receives "Principal Plus Interest" which is to "Make Mrs. Krabappel Dine at the Truffle" and "Make Ned Dine at the Truffle". It takes 2 hours. The player receives total {{Cash|320}} and {{XP|64}} in reward.|colspan=2}}
| |
| − | }}
| |
| − | | |
| − | ===A Woman Scorned===
| |
| − | {{Table|
| |
| − | {{TH|After tapping on Edna's exclamation mark|colspan=2}}
| |
| − | {{Tapped Out Skinner Icon}}
| |
| − | {{TB|Edna, I heard you were out with Ned Flanders last night. Now that Mother's gone, I thought we would. You know...}}
| |
| − | {{Tapped Out Edna Icon}}
| |
| − | {{TB|Listen Seymour. I'm happy you're enjoying your newfound independence after four decades of being a momma's boy, but it's too late!}}
| |
| − | {{Tapped Out Skinner Icon}}
| |
| − | {{TB|Now let's not let this get to juvenile insults, Edna, it's not my fault Mother found you morally reprehensible.}}
| |
| − | {{Tapped Out Edna Icon}}
| |
| − | {{TB|I don't have time for this, Seymour! I have all of the classes to teach!}}
| |
| − | {{THT|The player receives "A Woman Scorned" which is to Make Mrs. Krabappel Go for a Smoke Break!". It takes 10 minutes. The player receives total {{Cash|170}} and {{XP|15}} in reward.|colspan=2}}
| |
| − | {{Tapped Out Lisa Icon}}
| |
| − | {{TB|Oh no. Mrs. Krabappel and Principal Skinner are fighting again.}}
| |
| − | {{Tapped Out Bart Icon}}
| |
| − | {{TB|Oh, really?}}
| |
| − | }}
| |
| − | | |
| − | ===Illegitimate Concern Pt. 1===
| |
| − | {{Table|
| |
| − | {{TH|After tapping on Bart's exclamation mark|colspan=2}}
| |
| − | {{Tapped Out Bart Icon}}
| |
| − | {{TB|Last night, when Mrs. Krabappel was at the Flanders', I overheard her tell Ned that you'd give her whatever she wanted.}}
| |
| − | {{Tapped Out Skinner Icon}}
| |
| − | {{TB|She said what? Wait, wait. Didn't you try this before?}}
| |
| − | {{Tapped Out Bart Icon}}
| |
| − | {{TB|What? No, well yes, but this time, I'm being completely honest! She said that if she threatened to quit, you'd fold faster than Superman on laundry day.}}
| |
| − | {{Tapped Out Skinner Icon}}
| |
| − | {{TB|That sound awfully familiar. But we'll see about that!}}
| |
| − | {{Tapped Out Bart Icon}}
| |
| − | {{TB|Then I'll just be on my way.}}
| |
| − | {{THT|The player receives "Illegitimate Concern Pt. 1" which is to "Make Bart Skip School". It takes 8 hours. The player receives total {{Cash|375}} and {{XP|80}} in reward.|colspan=2}}
| |
| − | }}
| |
| − | | |
| − | ===Illegitimate Concern Pt. 2===
| |
| − | {{Table|
| |
| − | {{TH|After tapping on Edna's exclamation mark|colspan=2}}
| |
| − | {{Tapped Out Edna Icon}}
| |
| − | {{TB|Bart, I trust you have a note for your absence yesterday.}}
| |
| − | {{Tapped Out Bart Icon}}
| |
| − | {{TB|I had one, but one of the symptoms of my disease is that I compulsively eat paper. So, there, you have it.}}
| |
| − | {{Tapped Out Edna Icon}}
| |
| − | {{TB|Ha! You know the rules, Bart -- that's detention.}}
| |
| − | {{THT|The player receives "Illegitimate Concern Pt. 2" which is to "Make Mrs. Krabappel Host Detention" and "Make Bart Serve Detention". It takes 6 and 12 hours. The player receives total {{Cash|745}} and {{XP|16}} in reward.|colspan=2}}
| |
| − | {{Tapped Out Bart Icon}}
| |
| − | {{TB|So Skinner has you doing detention again? Isn't that a Principal's job? Well, it's just like he said...}}
| |
| − | {{Tapped Out Edna Icon}}
| |
| − | {{TB|Put away your sample case, Baloney Salesman, I know what you're trying to do here...}}
| |
| − | {{Tapped Out Edna Icon}}
| |
| − | {{TB|OK, what did he say?}}
| |
| − | {{Tapped Out Bart Icon}}
| |
| − | {{TB|Skinner says you'll come crawling back; and that you, quote, "can't live without all his quality loving," unquote.}}
| |
| − | {{Tapped Out Edna Icon}}
| |
| − | {{TB|He said what? The nerve of him! And thank you for telling me, Bart.}}
| |
| − | }}
| |
| − | | |
| − | ===All Power To The People===
| |
| − | {{Table|
| |
| − | {{TH|After tapping on Skinner's exclamation mark|colspan=2}}
| |
| − | {{Tapped Out Skinner Icon}}
| |
| − | {{TB|Edna, I don't know what your problem is?}}
| |
| − | {{Tapped Out Edna Icon}}
| |
| − | {{TB|My problem is that I'm overworked, underpaid, and underappreciated!}}
| |
| − | {{Tapped Out Skinner Icon}}
| |
| − | {{TB|Oh come on, Edna! You and I both know what this is really about. I just wish that you would stop playing games. Show a little more maturity!}}
| |
| − | {{Tapped Out Edna Icon}}
| |
| − | {{TB|Mr. Momma Boy's asking me to show more maturity? That's it -- I'm on strike!}}
| |
| − | {{THT|The player receives "All Power To The People" which is to "Make Mrs. Krabappel Go on Strike". It takes 24 hours. The player receives total {{Cash|700}} and {{XP|160}} in reward.|colspan=2}}
| |
| − | }}
| |
| − | | |
| − | ===School's Out Forever!===
| |
| − | {{Table|
| |
| − | {{TH|After tapping on Bart's exclamation mark|colspan=2}}
| |
| − | {{Tapped Out Bart Icon}}
| |
| − | {{TB|Wow! I can't believe that worked again!}}
| |
| − | {{Tapped Out Lisa Icon}}
| |
| − | {{TB|Mom! Did you hear the terrible news? The School's on strike!}}
| |
| − | {{Tapped Out Marge Icon}}
| |
| − | {{TB|I'm sure Mr. Skinner and Mrs. Krabappel will work it out.}}
| |
| − | {{Tapped Out Marge Icon}}
| |
| − | {{TB|But the good news is that, now, you have time to catch up on all your chores.}}
| |
| − | {{Tapped Out Bart Icon}}
| |
| − | {{TB|Great joke, mom, but on a beautiful day like today?}}
| |
| − | {{Tapped Out Lisa Icon}}
| |
| − | {{TB|And without standardized testing, I need to study!}}
| |
| − | {{THT|The player receives "School's Out Forever!" which is to "Make Bart Skateboard" and "Make Lisa Do Next Week's Homework". It takes 4 and 24 hours. The player receives total {{Cash|875}} and {{XP|205}} in reward.|colspan=2}}
| |
| − | }}
| |
| − | | |
| − | ===Concerned Parents===
| |
| − | {{Table|
| |
| − | {{TH|After tapping on Marge's exclamation mark|colspan=2}}
| |
| − | {{Tapped Out Marge Icon}}
| |
| − | {{TB|Homie, I'm worried about the kids. I've been thinking about home schooling.}}
| |
| − | {{Tapped Out Homer Icon}}
| |
| − | {{TB|Marge, this is something I really think you should stop thinking about.}}
| |
| − | {{Tapped Out Ned Icon}}
| |
| − | {{TB|Well, hi-dily-ho, neighborino! Edna and I couldn't help overhearing your little problemo. I've got just the place for them.}}
| |
| − | {{THT|The player receives "Concerned Parents" which is to "Make Bart Go to Sunday School" and "Make Lisa Go To Sunday School". It takes 12 hours. The player receives total {{Cash|940}} and {{XP|210}} in reward.|colspan=2}}
| |
| − | }}
| |
| − | | |
| − | ===Let's Learn About Hell!===
| |
| − | {{Table|
| |
| − | {{TH|After tapping on Lisa's exclamation mark|colspan=2}}
| |
| − | {{Tapped Out Lisa Icon}}
| |
| − | {{TB|What's with all the Sunday School on days that aren't Sunday? We need science, maths, and art in our education!}}
| |
| − | {{Tapped Out Rev. Lovejoy Icon}}
| |
| − | {{TB|Now Lisa, the good book has more important lessons to teach then science, like Creationism!}}
| |
| − | {{Tapped Out Bart Icon}}
| |
| − | {{TB|I think a better question is why Sunday School is twice as long as regular school?}}
| |
| − | {{Tapped Out Rev. Lovejoy Icon}}
| |
| − | {{TB|Because it's twice as important!}}
| |
| − | {{THT|The player receives "Let's Learn About Hell!" which is to "Make Bart Go to Sunday School", "Make Lisa Go To Sunday School", and "Make Milhouse Go To Sunday School". It takes 12 hours. The player receives total {{Cash|1360}} and {{XP|310}} in reward.|colspan=2}}
| |
| − | }}
| |
| − | | |
| − | ===The Olive Branch Pt. 1===
| |
| − | {{Table|
| |
| − | {{TH|After tapping on Bart's exclamation mark|colspan=2}}
| |
| − | {{Tapped Out Bart Icon}}
| |
| − | {{TB|What have I done!? Milhouse, we need a plan to fix this.}}
| |
| − | {{Tapped Out Milhouse Icon}}
| |
| − | {{TB|It gives me a nosebleed when you talk about doing anything naughty. How do you think we're going to fix this?}} | |
| − | {{Tapped Out Bart Icon}}
| |
| − | {{TB|I don't know yet, but I think I know just the teacher's pet to help us.}}
| |
| − | {{THT|The player receives "The Olive Branch Pt. 1" which is to "Make Bart Have a Sleepover", "Make Milhouse have a Sleepover", and "Make Martin Have a Sleepover". It takes 24 hours. The player receives total {{Cash|1900}} and {{XP|460}} in reward.|colspan=2}}
| |
| − | }}
| |
| − | | |
| − | ===The Olive Branch Pt. 2===
| |
| − | {{Table|
| |
| − | {{TH|After tapping on Martin's exclamation mark|colspan=2}}
| |
| − | {{Tapped Out Martin Icon}}
| |
| − | {{TB|I do believe that Maestra Krabappel feels unappreciated.}}
| |
| − | {{Tapped Out Martin Icon}}
| |
| − | {{TB|While this particular disagreement doesn't appear to be financially driven, I believe if she were offered a raise, she might be willing to come back to work.}}
| |
| − | {{Tapped Out Bart Icon}}
| |
| − | {{TB|How are we going to come up with that kind of money?}}
| |
| − | {{Tapped Out Martin Icon}}
| |
| − | {{TB|Well, chums, I know a very exciting place to find that out. To the Non-mobile Book Mobile!}}
| |
| − | {{THT|The player receives "The Olive Branch Pt. 2" which is to "Make Bart Go to the Library", "Make Martin Go to the Library", and "Make Milhouse Go to the Library". It takes 24 hours. The player receives total {{Cash|1900}} and {{XP|460}} in reward.|colspan=2}}
| |
| − | }}
| |
| − | | |
| − | ===The Olive Branch Pt. 3===
| |
| − | {{Table|
| |
| − | {{TH|After tapping on Bart's exclamation mark|colspan=2}}
| |
| − | {{Tapped Out Bart Icon}}
| |
| − | {{TB|Thanks to Martin's book smarts, my ability to exploit people with book smarts, and Milhouse's ability to create a diversion, we have all we need!}}
| |
| − | {{Tapped Out Milhouse Icon}}
| |
| − | {{TB|I am not so sure about my part in this, Bart.}}
| |
| − | {{Tapped Out Bart Icon}}
| |
| − | {{TB|Please! We've been through this, Milhouse! Do you want to be a baby and let us all down?}}
| |
| − | {{Tapped Out Milhouse Icon}}
| |
| − | {{TB|I do want to be a baby, but I don't want to let you down.}}
| |
| − | {{THT|The player receives "The Olive Branch Pt. 3" which is to "Make Milhouse Pull the Fire Alarm" and "Make Bart Break into School Computer". It takes 10 minutes. The player receives total {{Cash|134}} and {{XP|20}} in reward.|colspan=2}}
| |
| − | }}
| |
| − | | |
| − | ===Caught Red Handed===
| |
| − | {{Table|
| |
| − | {{TH|After tapping on Wiggum's exclamation mark|colspan=2}}
| |
| − | {{Tapped Out Wiggum Icon}}
| |
| − | {{TB|We caught the kid red handed. Want me to put a good scare into him?}}
| |
| − | {{Tapped Out Wiggum Icon}}
| |
| − | {{TB|I've got a Dracula mask in the car.}}
| |
| − | {{Tapped Out Skinner Icon}}
| |
| − | {{TB|I think a mere 700 hours of the lowest form of human labor should do the trick. I am talking about janitorial work!}}
| |
| − | {{Tapped Out Willie Icon}}
| |
| − | {{TB|Willie's standing right 'ere!}}
| |
| − | {{THT|The player receives "Caught Red Handed" which is to "Make Milhouse Clean the School x2". Every time takes 12 hours. The player receives total {{Cash|940}} and {{XP|210}} in reward.|colspan=2}}
| |
| − | }}
| |
| − | | |
| − | ===The Olive Branch Pt. 4===
| |
| − | {{Table|
| |
| − | {{TH|After tapping on Edna's exclamation mark|colspan=2}}
| |
| − | {{Tapped Out Skinner Icon}}
| |
| − | {{TB|Well, Edna, when I was going through the school damage report, I noticed some unused funds in the budget.}}
| |
| − | {{Tapped Out Skinner Icon}}
| |
| − | {{TB|It would seems I could offer you a small raise if you come back. You can blame me for bad book keeping! I'm sorry.}}
| |
| − | {{Tapped Out Edna Icon}}
| |
| − | {{TB|What about an apology, Seymour?}}
| |
| − | {{Tapped Out Skinner Icon}}
| |
| − | {{TB|I'm very sorry I didn't keep better account of the school's finances.}}
| |
| − | {{Tapped Out Edna Icon}}
| |
| − | {{TB|Eh, close enough.}}
| |
| − | {{THT|The player receives "The Olive Branch Pt. 4" which is to "Make Mrs. Krabappel Teach Classes". It takes 8 hours. The player receives total {{Cash|375}} and {{XP|80}} in reward.|colspan=2}}
| |
| − | {{Tapped Out Willie Icon}}
| |
| − | {{TB|Hey! Wha's happened ta Willie's pay?}}
| |
| | }} | | }} |
| | | | |
| − | == Characters == | + | == Non-playable characters == |
| | {{Table| | | {{Table| |
| − | {{TH|Image|width=150px}} | + | {{TH|Image}} |
| | {{TH|Name}} | | {{TH|Name}} |
| − | {{TH|Unlocked when/costs}} | + | {{TH|Cost}} |
| − | {{TH|Level required}} | + | {{TH|Unlock image}} |
| − | {{TBT|[[File:Tapped Out Unlock Edna.png|150px]]}} | + | {{TH|Notes}} |
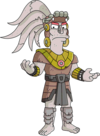
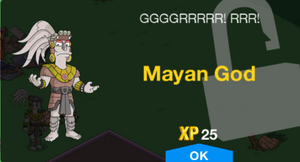
| − | {{TB|[[Edna Krabappel]]}} | + | {{TBT|[[File:Unlock Mayan God.png|100px]]}} |
| − | {{TB|[[82 Evergreen Terrace|Krabappel's Apartment]] block is built}} | + | {{TB|[[Mayan God]]}} |
| − | {{TB|22}} | + | {{TB|}} |
| − | {{TCsT|Halloween characters|4}}
| + | {{TB|[[File:Tapped Out Mayan God New Character.png|300px]]}} |
| − | {{TBT|[[File:Tapped Out Shuffling Zombie.png|150px]]}}
| + | {{TB|Unlocks after completing The Secret of the Mayans Pt. 4.}} |
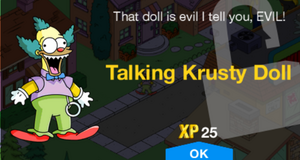
| − | {{TB|Zombies}} | + | {{TBT|[[File:Evil Krusty Doll.png|100px]]}} |
| − | {{TB|[[Springfield Cemetery]] is built}}
| + | {{TB|[[Talking Krusty Doll]]}} |
| − | {{TB|5}}
| + | {{TB|}} |
| − | {{TBT|[[File:Snarling Zombie Tapped Out.png|150px]]}} | + | {{TB|[[File:Tapped Out Talking Krusty Doll New Character.png|300px]]}} |
| − | {{TB|Pet zombies}}
| + | {{TB|Unlocks after completing Flanders the Devil Pt. 4.}} |
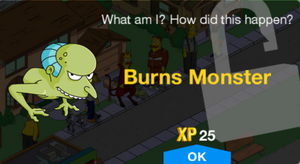
| − | {{TB|[[Springfield Pet Cemetery]] is built}} | + | {{TBT|[[File:Unlock Burns Monster.png|120px]]}} |
| − | {{TB|5}} | + | {{TB|[[Burns Monster]]}} |
| − | {{TBT|[[File:Unlock Mayan God.png|150px]]}} | + | {{TB|{{Treat|300}}}} |
| − | {{TB|Mayan God}} | + | {{TB|[[File:Tapped Out Burns Monster New Character.png|300px]]}} |
| − | {{TB|Mayan calendar is completed}}
| + | {{TB|Available after Bad Dream House Pt. 1.}} |
| − | {{TB|5}}
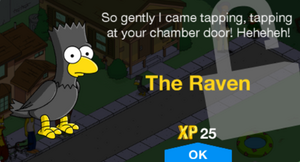
| + | {{TBT|[[File:The Raven.png|120px]]}} |
| − | {{TBT|[[File:Glutton.png|150px]]}} | + | {{TB|{{Ch|The Raven}}}} |
| − | {{TB|Mayan Homer}} | |
| − | {{TB|The player answers the trivia question the Mayan God gives}} | |
| − | {{TB|5}} | |
| − | {{TBT|[[File:Evil Krusty Doll.png|150px]]}} | |
| − | {{TB|Talking Krusty Doll}} | |
| − | {{TB|Once Flanders the Devil Pt. 4 is completed}}
| |
| − | {{TB|5}}
| |
| − | {{TBT|[[File:The Raven.png|150px]]}} | |
| − | {{TB|The Raven}} | |
| | {{TB|{{Donut|30}}}} | | {{TB|{{Donut|30}}}} |
| − | {{TB|5}} | + | {{TB|[[File:Tapped Out The Raven New Character.png|300px]]}} |
| − | {{TBT|[[File:Devil Flanders.png|150px]]}}
| + | {{TB|}} |
| − | {{TB|Devil Flanders}}
| |
| − | {{TB|"The Black Hole Pt. 4" is completed}}
| |
| − | {{TB|5}}
| |
| − | {{TBT|[[File:Tapped Out Unlock Kang.png|150px]]}}
| |
| − | {{TB|Kang}}
| |
| − | {{TB|Raygun is built}}
| |
| − | {{TB|5}}
| |
| − | {{TBT|[[File:Unlock Burns Monster.png]]}}
| |
| − | {{TB|Burns Monster}}
| |
| − | {{TB|{{Treat|300}}}}
| |
| − | {{TB|5}}
| |
| − | {{TBT|[[File:Tapped Out Black Hole.png|150px]]}}
| |
| − | {{TB|Black Hole}}
| |
| − | {{TB|"The Black Hole Pt. 2" is completed}}
| |
| − | {{TB|5}}
| |
| − | {{TBT|[[File:Marge Witch.png|150px]]}}
| |
| − | {{TB|Witch Marge}} | |
| − | {{TB|Cauldron is bought}}
| |
| − | {{TB|15 (Moe's Tavern)}}
| |
| | }} | | }} |
| | | | |
| | == Buildings == | | == Buildings == |
| − | The Springfield Cemetery and Springfield Pet Cemetery gave out 10 zombies every 10 hours. The Mausoleum, however, gaves out 15 zombies every 8 hours.
| + | === Level 22 === |
| − | | |
| − | As of the fourth content update, the Halloween buildings give out cash and XP. The amounts of the cash and XP can be seen in the [[#Halloween cash and XP amounts|Halloween cash and XP amounts]] section.
| |
| − | | |
| | {{Table| | | {{Table| |
| − | {{TH|Image|width=150px}} | + | {{TH|Image|width=250px}} |
| | {{TH|Name}} | | {{TH|Name}} |
| − | {{TH|Building time}} | + | {{TH|Cost}} |
| − | {{TH|Costs}} | + | {{TH|Build time}} |
| | {{TH|Task}} | | {{TH|Task}} |
| − | {{TH|Character unlocked when built}} | + | {{TH|Notes}} |
| − | {{TH|Level required}}
| + | {{TBT|[[File:Krabappel Apartment Tapped Out.png|100px]]}} |
| − | {{TBT|[[File:Krabappel Apartment Tapped Out.png|150px]]}} | + | {{TB|[[Krabappel Apartment]]}} |
| − | {{TB|[[82 Evergreen Terrace|Krabappel's Apartment]] block}} | |
| − | {{TB|24 hours}}
| |
| | {{TB|{{Cash|70000}}}} | | {{TB|{{Cash|70000}}}} |
| | + | {{TB|24h}} |
| | {{TB|Overdue Rent}} | | {{TB|Overdue Rent}} |
| − | {{TB|[[Edna Krabappel]]}} | + | {{TB|Requires Level 22.<br>Unlocks in Staff Needs.<br>Unlocks Mrs. Krabappel.}} |
| − | {{TB|22}} | + | {{TBT|[[File:School Bus Tapped Out.png|100px]]}} |
| − | {{TCsT|Halloween buildings|7}} | + | {{TB|[[School Bus]]}} |
| − | {{TBT|[[File:Springfield Cemetery Tapped Out.png|150px]]}} | + | {{TB|{{Donut|120}}}} |
| | + | {{TB|6s}} |
| | + | {{TB|Money Found in Sock}} |
| | + | {{TB|Requires Level 22.<br>Unlocks Otto.}} |
| | + | }} |
| | + | |
| | + | === Treehouse of Horror XXIII === |
| | + | {{Table| |
| | + | {{TH|Image|width=250px}} |
| | + | {{TH|Name}} |
| | + | {{TH|Cost}} |
| | + | {{TH|Build time}} |
| | + | {{TH|Task}} |
| | + | {{TH|Notes}} |
| | + | {{TBT|[[File:Springfield Cemetery Tapped Out.png|100px]]}} |
| | {{TB|[[Springfield Cemetery]]}} | | {{TB|[[Springfield Cemetery]]}} |
| − | {{TB|6 seconds}} | + | {{TB|}} |
| − | {{TB|Free}} | + | {{TB|6s}} |
| | {{TB|Incubating Zombies}} | | {{TB|Incubating Zombies}} |
| − | {{TB|Zombies}} | + | {{TB|Unlocks in Dial 'Z' for Zombies Pt. 1.}} |
| − | {{TB|5}}
| + | {{TBT|[[File:Pet Cemetery Tapped Out.png|100px]]}} |
| − | {{TBT|[[File:Pet Cemetery Tapped Out.png|150px]]}} | + | {{TB|[[Pet Cemetery]]}} |
| − | {{TB|[[Springfield Pet Cemetery]]}} | |
| − | {{TB|4 hours}}
| |
| | {{TB|{{Treat|10}}}} | | {{TB|{{Treat|10}}}} |
| | + | {{TB|4h}} |
| | {{TB|Incubating Pet Zombies}} | | {{TB|Incubating Pet Zombies}} |
| − | {{TB|Pet zombies}} | + | {{TB|Unlocks in Dial 'Z' for Zombies Pt. 3.}} |
| − | {{TB|5}}
| + | {{TBT|[[File:Super Collider Tapped Out.png|100px]]}} |
| − | {{TBT|[[File:Super Collider Tapped Out.png|150px]]}} | + | {{TB|[[Super Collider]]}} |
| − | {{TB|[[Springfield Subatomic Supercollider]]}} | |
| − | {{TB|8 hours}}
| |
| | {{TB|{{Treat|100}}}} | | {{TB|{{Treat|100}}}} |
| | + | {{TB|8h}} |
| | {{TB|Pointlessly Accelerating Particles}} | | {{TB|Pointlessly Accelerating Particles}} |
| − | {{TB|Black hole}} | + | {{TB|Unlocks in The Black Hole Pt. 1.}} |
| − | {{TB|5}}
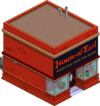
| + | {{TBT|[[File:House of Evil Tapped Out.png|100px]]}} |
| − | {{TBT|[[File:House of Evil Tapped Out.png|150px]]}} | |
| | {{TB|[[House of Evil]]}} | | {{TB|[[House of Evil]]}} |
| − | {{TB|12 hours}}
| |
| | {{TB|{{Treat|100}}}} | | {{TB|{{Treat|100}}}} |
| | + | {{TB|12h}} |
| | {{TB|Selling Evil and Cursed Frogurt}} | | {{TB|Selling Evil and Cursed Frogurt}} |
| − | {{TB|Talking Krusty Doll}} | + | {{TB|Unlocks in Flanders the Devil Pt. 3.}} |
| − | {{TB|5}}
| + | {{TBT|[[File:Bad Dream House Tapped Out.png|100px]]}} |
| − | {{TBT|[[File:Bad Dream House Tapped Out.png|150px]]}} | |
| | {{TB|[[Evil House|Bad Dream House]]}} | | {{TB|[[Evil House|Bad Dream House]]}} |
| − | {{TB|24 hours}}
| |
| | {{TB|{{Treat|150}}}} | | {{TB|{{Treat|150}}}} |
| | + | {{TB|24h}} |
| | {{TB|Scaring Unsuspecting Guests}} | | {{TB|Scaring Unsuspecting Guests}} |
| − | {{TB|}} | + | {{TB|Unlocks in Bad Dream House Pt. 1.}} |
| − | {{TB|5}}
| + | {{TBT|[[File:Tapped Out Mausoleum.png|100px]]}} |
| − | {{TBT|[[File:Tapped Out Mausoleum.png|150px]]}} | + | {{TB|[[Mausoleum]]}} |
| − | {{TB|Mausoleum}} | |
| − | {{TB|Instant Build}}
| |
| | {{TB|{{Donut|60}}}} | | {{TB|{{Donut|60}}}} |
| | + | {{TB|6s}} |
| | {{TB|Incubating Premium Zombies}} | | {{TB|Incubating Premium Zombies}} |
| − | {{TB|Zombies}} | + | {{TB|}} |
| − | {{TB|5}}
| |
| | }} | | }} |
| | | | |
| − | === Façades === | + | == Building skins == |
| | {{Table| | | {{Table| |
| − | {{TH|Image|width=150px}} | + | {{TH|Image|width=250px}} |
| | {{TH|Name}} | | {{TH|Name}} |
| − | {{TH|Façade for}} | + | {{TH|Cost}} |
| − | {{TH|Costs}} | + | {{TH|Notes}} |
| − | {{TH|Task}}
| |
| − | {{TH|Level required}}
| |
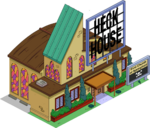
| | {{TBT|[[File:Heck House Tapped Out.png|150px]]}} | | {{TBT|[[File:Heck House Tapped Out.png|150px]]}} |
| − | {{TB|[[First Church of Springfield|Heck House]]}} | + | {{TB|[[Heck House]]}} |
| − | {{TB|[[First Church of Springfield]]}}
| |
| | {{TB|{{Treat|300}}}} | | {{TB|{{Treat|300}}}} |
| − | {{TB|Summoning Demons}} | + | {{TB|Available after Bad Dream House Pt. 1.}} |
| − | {{TB|12}}
| |
| | }} | | }} |
| | | | |
| − | == Objects/Decorations == | + | == Decorations == |
| − | | + | === Level 22 === |
| − | All are unlocked at Level 22, except for the Barbed Wire Fence and the Iron Railing (both Level 1).
| |
| | {{Table| | | {{Table| |
| − | {{TH|Decoration}} | + | {{TH|Image|width=300px}} |
| − | {{TH|Picture}} | + | {{TH|Name}} |
| − | {{TH|Requires}} | + | {{TH|Cost}} |
| − | {{TH|Reward}} | + | {{TH|Notes}} |
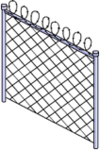
| − | {{TBT|Barbed Wire Fence}} | + | {{TBT|[[File:Tapped Out Barbed Write Fence.png|100px]]}} |
| − | {{TB|[[File:Tapped Out Barbed Write Fence.png]]}} | + | {{TB|[[Barbed Wire Fence]]}} |
| | {{TB|{{Cash|175}}}} | | {{TB|{{Cash|175}}}} |
| − | {{TB|Improves your Vanity rating.}} | + | {{TB|}} |
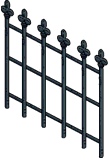
| − | {{TBT|Iron Railing}} | + | {{TBT|[[File:Tapped Out Iron Ralling.png]]}} |
| − | {{TB|[[File:Tapped Out Iron Ralling.png]]}} | + | {{TB|[[Iron Railing]]}} |
| | {{TB|{{Cash|220}}}} | | {{TB|{{Cash|220}}}} |
| − | {{TB|Improves your Vanity rating.}} | + | {{TB|}} |
| − | {{TBT|Pylon}} | + | {{TBT|[[File:Pylon.png]]}} |
| − | {{TB|[[File:Pylon.png]]}} | + | {{TB|[[Pylon]]}} |
| | {{TB|{{Cash|135}}}} | | {{TB|{{Cash|135}}}} |
| − | {{TB|Improves your Vanity rating by 50.}} | + | {{TRs|Unlocks at Level 22.|5}} |
| − | {{TBT|Gas Pump}} | + | {{TBT|[[File:Tapped Out Stop Sign.png]]}} |
| − | {{TB|[[File:Tapped Out Gas Pump.png]]}} | + | {{TB|[[Stop Sign]]}} |
| | + | {{TB|{{Cash|385}}}} |
| | + | {{TBT|[[File:Tapped Out See-Saw.png|100px]]}} |
| | + | {{TB|[[See-Saw]]}} |
| | + | {{TB|{{Cash|760}}}} |
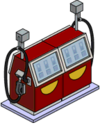
| | + | {{TBT|[[File:Tapped Out Gas Pump.png|100px]]}} |
| | + | {{TB|[[Gas Pump]]}} |
| | {{TB|{{Cash|1300}}}} | | {{TB|{{Cash|1300}}}} |
| − | {{TB|Improves your Vanity rating by 200.}}
| + | {{TBT|[[File:Tapped Out Patio Table.png|100px]]}} |
| − | {{TBT|Patio Table}} | + | {{TB|[[Patio Table]]}} |
| − | {{TB|[[File:Tapped Out Patio Table.png]]}} | |
| | {{TB|{{Cash|1400}}}} | | {{TB|{{Cash|1400}}}} |
| − | {{TB|Improves your Vanity rating by 210.}}
| |
| − | {{TBT|See-Saw}}
| |
| − | {{TB|[[File:Tapped Out See-Saw.png]]}}
| |
| − | {{TB|{{Cash|760}}}}
| |
| − | {{TB|Improves your Vanity rating by 150.}}
| |
| − | {{TBT|Stop Sign}}
| |
| − | {{TB|[[File:Tapped Out Stop Sign.png]]}}
| |
| − | {{TB|{{Cash|385}}}}
| |
| − | {{TB|Improves your Obedience rating by 1.}}
| |
| | }} | | }} |
| | | | |
| − | | + | === Treehouse of Horror XXIII === |
| − | === Halloween === | |
| − | All except the Barbed Wire fence and Iron Railing were limited time objects and cannot be sold.
| |
| | {{Table| | | {{Table| |
| − | {{TH|Decoration}} | + | {{TH|Image|width=300px}} |
| − | {{TH|Picture}} | + | {{TH|Name}} |
| − | {{TH|Requires}} | + | {{TH|Cost}} |
| − | {{TH|Reward}} | + | {{TH|Notes}} |
| − | {{TBT|Mayan Calender}} | + | {{TBT|[[File:Tapped Mayan Calendar.png|100px]]}} |
| − | {{TB|[[File:Tapped Mayan Calendar.png|100px]]}}
| + | {{TB|[[Mayan Calendar]]}} |
| − | {{TB|The Secret of the Mayans Pt. 4}} | + | {{TB|}} |
| − | {{TB|Mayan God, improves vanity rating by 100}} | + | {{TB|Unlocks after completing The Secret of the Mayans Pt. 4.}} |
| − | {{TBT|Jack-o-Lantern}} | + | {{TBT|[[File:Tapped Out Black Hole.png|100px]]}} |
| − | {{TB|[[File:Tapped Out Jack-o-Lantern.png|100px]]}} | + | {{TB|[[Black Hole]]}} |
| − | {{TB|{{Cash|135}}, Dial 'Z' for Zombies Pt. 1, Level 5}} | + | {{TB|}} |
| − | {{TB|Improves vanity rating by 50.}} | + | {{TB|Unlocks in The Black Hole Pt. 3.}} |
| − | {{TBT|Dead Tree}} | + | {{TBT|[[File:Tapped Out Jack-o-Lantern.png]]}} |
| − | {{TB|[[File:Tapped Out Dead Tree.png|100px]]}} | + | {{TB|[[Jack-o-Lantern]]}} |
| − | {{TB|{{Cash|270}}, Dial 'Z' for Zombies Pt. 1, Level 5}}
| + | {{TB|{{Cash|135}}}} |
| − | {{TB|Look out for Vandals, improves tree-hugging rating by 80}}
| + | {{TB|}} |
| − | {{TBT|Spooky Tree}}
| + | {{TBT|[[File:Tapped Out Dead Tree.png|100px]]}} |
| − | {{TB|[[File:Tapped Out Spooky Tree.png|100px]]}} | + | {{TB|[[Dead Tree]]}} |
| − | {{TB|{{Cash|325}}, Dial 'Z' for Zombies Pt. 1, Level 5}} | + | {{TB|{{Cash|270}}}} |
| − | {{TB|Look out for Vandals, improves tree-hugging rating by 90}} | + | {{TB|}} |
| − | {{TBT|Pumpkin Patch}} | + | {{TBT|[[File:Tapped Out Spooky Tree.png|100px]]}} |
| − | {{TB|[[File:Tapped Out Pumpkin Patch.png|100px]]}}
| + | {{TB|[[Spooky Tree]]}} |
| − | {{TB|{{Cash|420}}, Dial 'Z' for Zombies Pt. 1, Level 5}}
| + | {{TB|{{Cash|325}}}} |
| − | {{TB|Improves vanity rating by 110.}}
| + | {{TB|}} |
| − | {{TBT|Cauldron}}
| + | {{TBT|[[File:Tapped Out Pumpkin Patch.png|100px]]}} |
| − | {{TB|[[File:Tapped Out Cauldron.png|100px]]}} | + | {{TB|[[Pumpkin Patch]]}} |
| − | {{TB|{{Donut|90}}, There an Al Coholic Here Pt. 1, Level 5}} | + | {{TB|{{Cash|420}}}} |
| − | {{TB|2.25% bonus money and XP to all jobs, improves vanity rating by 200}} | + | {{TB|}} |
| − | {{TBT|Ray Gun}} | + | {{TBT|[[File:Tapped Out Cauldron.png|100px]]}} |
| − | {{TB|[[File:Tapped Out Ray Gun.png|100px]]}}
| + | {{TB|[[Cauldron]]}} |
| − | {{TB|{{Donut|100}}, The Black Hole Pt. 4, Level 5}} | + | {{TB|{{Donut|90}}}} |
| − | {{TB|3.75% bonus money and XP to all jobs, improves vanity rating by 200}}
| + | {{TB|Requires {{TOQP|Is There an Al Coholic Here|1}}.}} |
| − | }}
| + | {{TBT|[[File:Tapped Out Ray Gun.png|100px]]}} |
| − | | + | {{TB|[[Ray Gun]]}} |
| − | == Ray Gun ==
| + | {{TB|{{Donut|100}}}} |
| − | [[File:Tapped Out Ray Gun.png|200px]] | + | {{TB|Requires The Black Hole Pt. 4<br>Unlocks Kang.}} |
| − | {{Table|
| |
| − | {{TH|The '''Ray Gun''' is a raygun that was able to be purchased for {{Donut|100}}; the original price was {{Donut|150}}. When Kang flies over your Springfield in his spaceship (after completing "The Black Hole Pt. 4") and Cletus points out the 'alien craft menacing our skies', Professor Frink mentions that they must construct the Frink Ray Gun immediately. Once the player has purchased and placed the Ray Gun|colspan=2}}
| |
| − | {{Tapped Out Kang Icon}}
| |
| − | {{TB|Those meddling humans have built the Ray Gun. We must try to destroy it before they use it!}} | |
| − | {{THT|Kang tries to destroy the Ray Gun by firing at it using his spaceship. The player presses the Ray Gun so it shoots into the air. After one shot|colspan=2}} | |
| − | {{Tapped Out Kang Icon}}
| |
| − | {{TB|Stop it! Our craft can only take two more hits like that!}} | |
| − | {{THT|Kang continues to fire at the Ray Gun, while the player continues to fire at his spaceship. Soon, the spaceship starts to wobble before a final hit makes the spaceship crash into the ray gun, destroying it and the ship.|colspan=2}}
| |
| − | {{Tapped Out Kang Icon}}
| |
| − | {{TB|Ouch. Ouch. OUCH! I think I twisted a tentacle.}}
| |
| − | {{Tapped Out Professor Frink Icon}}
| |
| − | {{TB|Bullseye! I've put a new Ray Gun in storage.}}
| |
| − | {{TBT|'''New Character'''}} | |
| − | {{TB|[[File:Tapped Out Kang New Character.png|200px]]}}
| |
| − | }}
| |
| − | | |
| − | ===We come in Pieces! Pt. 1===
| |
| − | {{Table|
| |
| − | {{TH|After tapping on Kang's exclamation mark|colspan=2}}
| |
| − | {{Tapped Out Kang Icon}}
| |
| − | {{TB|Peaceful greetings, puny human!}} | |
| − | {{Tapped Out Lisa Icon}}
| |
| − | {{TB|A real life alien! Welcome to Earth, friend!}} | |
| − | {{Tapped Out Kang Icon}} | |
| − | {{TB|Let us live in friendship, and let us not deploy the beacon that summons the Rigellian invasion fleet!}}
| |
| − | {{Tapped Out Lisa Icon}}
| |
| − | {{TB|Uh... okay.}} | |
| − | {{Tapped Out Kang Icon}} | |
| − | {{TB|That's one thing I wish you not to worry about. No one is deploying any beacons!}}
| |
| − | {{THT|The player receives "We come in Pieces! Pt. 1", which is to "Make Kang Deploy the Beacon". The task takes 12 hours and on its own would give the reward of {{Treat|1}} and {{XP|150}}. The reward for the quest is {{Treat|1}} and {{XP|5}}.|colspan=2}}
| |
| − | }}
| |
| − | | |
| − | ===We come in Pieces! Pt. 2===
| |
| − | {{Table|
| |
| − | {{TH|After tapping on Lisa's exclamation mark|colspan=2}}
| |
| − | {{Tapped Out Lisa Icon}}
| |
| − | {{TB|Mr. Alien--}}
| |
| − | {{Tapped Out Kang Icon}}
| |
| − | {{TB|Please, call me Kang the Enslaver of Worlds! How can I help, friend human?}}
| |
| − | {{Tapped Out Lisa Icon}}
| |
| − | {{TB|There's a zombie outbreak in Springfield. Do you have any advanced technology that could help.}} | |
| − | {{Tapped Out Kang Icon}}
| |
| − | {{TB|Of course! Let me just get it over here.}} | |
| − | {{THT|The player receives "We come in Pieces! Pt. 2", which is to "Make Kang Activate the Beacon". The task takes 10 minutes and on its own would give the reward of {{Treat|1}} and {{XP|7}}. The reward for the quest is {{Treat|1}} and {{XP|5}}.|colspan=2}} | |
| − | }}
| |
| − | | |
| − | ===We come in Pieces! Pt. 3===
| |
| − | {{Table|
| |
| − | {{TH|After tapping on Lisa's exclamation mark|colspan=2}}
| |
| − | {{Tapped Out Lisa Icon}}
| |
| − | {{TB|Uh, stil waiting for help with the zombies.}}
| |
| − | {{Tapped Out Kang Icon}}
| |
| − | {{TB|Sprinkle these crystals on your fellow humans. It will, uh, make them zombie-proof!}}
| |
| − | {{Tapped Out Lisa Icon}}
| |
| − | {{TB|This appears to be common table salt.}}
| |
| − | {{Tapped Out Kang Icon}}
| |
| − | {{TB|Don't be idiotic! What would be the point of salting humans?}}
| |
| − | {{THT|The player receives "We come in Pieces! Pt. 3", which is to "Make Kang Properly Season Humans". The task takes 6 hours and on its own would give the reward of {{Treat|1}} and {{XP|90}}. The reward for the quest is {{Treat|1}} and {{XP|5}}.|colspan=2}}
| |
| − | }}
| |
| − | | |
| − | ===We come in Pieces! Pt. 4===
| |
| − | {{Table|
| |
| − | {{TH|After tapping on Kang's exclamation mark|colspan=2}}
| |
| − | {{Tapped Out Kang Icon}}
| |
| − | {{TB|Bwa-ha-ha! Ha-ha-ha-haaaaa!}} | |
| − | {{Tapped Out Lisa Icon}}
| |
| − | {{TB|What's so funny?}} | |
| − | {{Tapped Out Kang Icon}}
| |
| − | {{TB|The Rigellian fleet will be here in moments! You are about to become dinner!}}
| |
| − | {{Tapped Out Lisa Icon}}
| |
| − | {{TB|Seriously? You'd fly all the way across the galaxy just to eat us?}}
| |
| − | {{Tapped Out Kang Icon}}
| |
| − | {{TB|Of course! In all universe, there is no food as well-marbled as the American human!}}
| |
| − | {{THT|The player receives "We come in Pieces! Pt. 4, which is to "Make Kang 8-hour Evil Laugh". The task takes 8 hours and on its own would give the reward of {{Treat|1}} and {{XP|105}}. The reward for the quest is {{Treat|1}} and {{XP|5}}.|colspan=2}}
| |
| − | }}
| |
| − | | |
| − | ===We come in Pieces! Pt. 5===
| |
| − | {{Table|
| |
| − | {{TH|After tapping on Lisa's exclamation mark|colspan=2}}
| |
| − | {{Tapped Out Lisa Icon}}
| |
| − | {{TB|Excuse me? Your beacon is bleeping.}}
| |
| − | {{Tapped Out Kang Icon}}
| |
| − | {{TB|Huh. It appears my Message of Summoning didn't go through to the invasion fleet.}}
| |
| − | {{Tapped Out Homer Icon}}
| |
| − | {{TB|Yeah, reception kinda stinks here in New Springfield. I'm working on it.}}
| |
| − | {{Tapped Out Kang Icon}}
| |
| − | {{TB|Please, sit patiently while I resend the message that signals you doom...}}
| |
| − | {{Tapped Out Homer Icon}}
| |
| − | {{TB|No way! Come on, fellow puny humans -- get him!}}
| |
| − | {{THT|The player receives "We come in Pieces! Pt. 4, which is to "Make Kang Run from Puny Humans". The task takes 24 hours and on its own would give the reward of {{Treat|1}} and {{XP|225}}. The reward for the quest is {{Treat|1}} and {{XP|5}}, ending the "We come in Pieces!" pentalogy.|colspan=2}}
| |
| − | }}
| |
| − | | |
| − | == Cauldron ==
| |
| − | [[File:Tapped Out Cauldron.png|150px|right]]
| |
| − | The '''Cauldron''' is a cauldron that was able to be purchased for {{Donut|90}}. It can be unlocked after the player has completed "Is There An Al Coholic Pt. 1". Once the player has placed the Cauldron, the player unlocks Marge The Witch - a new outfit for Marge.
| |
| − | | |
| − | ====Easy-bake Coven Pt. 1====
| |
| − | {{Table|
| |
| − | {{TBT|'''After Placed'''}} | |
| − | {{TB|[[File:Tapped Out Cauldron.png|200px]]}}
| |
| − | {{TBT|'''New Skin'''}}
| |
| − | {{TB|[[File:Tapped Out Marge the Witch New Character.png|200px]]}} | |
| − | {{THT|After tapping on Marge the Witch's exclamation mark|colspan=2}}
| |
| − | {{Tapped Out Marge the Witch Icon}}
| |
| − | {{TB|I love my new outfit! It's just too bad I can't be a REAL witch.}} | |
| − | {{Tapped Out Devil Flanders Icon}} | |
| − | {{TB|You'd use your powers to beat Helen Lovejoy at the annual Church Bake-Off, am I right?}}
| |
| − | {{Tapped Out Marge the Witch Icon}}
| |
| − | {{TB|You should know that the mind-reading thing is very creepy.}}
| |
| − | {{Tapped Out Devil Flanders Icon}}
| |
| − | {{TB|I get that a lot. Anyhoo, I'll make you a dealio -- victory in the bake-off, in exchange for... your soul.}}
| |
| − | {{Tapped Out Marge the Witch Icon}}
| |
| − | {{TB|Hmm.. it WOULD be neat to defeat that horrible woman and her famous lemon bars.}}
| |
| − | {{Tapped Out Homer Icon}}
| |
| − | {{TB|Mmmm... lemons in bar form...}}
| |
| − | {{Tapped Out Marge the Witch Icon}}
| |
| − | {{TB|Homer, stop drooling. Okay, Evil Ned, let's do it! Sign me up!}}
| |
| − | {{THT|The player then receives "Easy-bake Coven Pt. 1", which is to "Make Devil Flanders Sign up New 'Clients'" and to "Make Marge the Witch Sign away her Soul". Both tasks are 12 hours long. Respectively, the rewards for these tasks if they were set on their own would be {{Treat|1}} and {{XP|100}} and {{Treat|1}} and {{XP|150}}. After completing both tasks, the player receives {{Treat|1}} and {{XP|5}}.|colspan=2}}
| |
| − | }}
| |
| − | | |
| − | ====Easy-bake Coven Pt. 2====
| |
| − | {{Table|
| |
| − | {{TH|After tapping on Marge the Witch's exclamation mark|colspan=2}}
| |
| − | {{Tapped Out Marge the Witch Icon}}
| |
| − | {{TB|Let's see, the first ingredient in the recipe is... candy, three bags. I'm gonna need some help.}} | |
| − | {{THT|The player then receives "Easy-bake Coven Pt. 2", which is to "Send Marge the Witch Trick-or-Treating", "Send Lisa Trick-or-Treating" and to "Send Bart Trick-or-Treating". All three tasks take 16 hours and each task rewards the player with {{Treat|1}} and {{XP|125}}, {{XP|200}} in Marge The Witch's case, when completed on their own. Upon completing the quest, the player receives {{Treat|1}} and {{XP|5}}.|colspan=2}}
| |
| | }} | | }} |
| | | | |
| − | ====Easy-bake Coven Pt. 3==== | + | == Quests == |
| − | {{Table| | + | Quests in this content update include: |
| − | {{TH|After tapping on Marge the Witch's exclamation mark|colspan=2}} | + | === Level 22 === |
| − | {{Tapped Out Marge the Witch Icon}}
| + | {{columns-list|4| |
| − | {{TB|The next ingredient on the list is Springfield Silvertongue.}}
| + | *{{ap|School Daze|Tapped Out quest}} |
| − | {{Tapped Out Cletus Icon}}
| + | *[[Staff Needs]] |
| − | {{TB|You in luck, green lady. My last crop just withered due to mysterious and convenient circumstances.}}
| + | *[[A Day In The Life]] |
| − | {{Tapped Out Marge the Witch Icon}}
| + | *[[Another Day In The Life]] |
| − | {{TB|If you plant some Silvertongue, I can make it grow faster for you.}}
| + | *[[Another Detention]] |
| − | {{Tapped Out Cletus Icon}}
| + | *[[It's 2:30 In The Afternoon Somewhere]] |
| − | {{TB|Can you do that with any crop at all?}}
| + | *[[Principal Plus Interest]] |
| − | {{Tapped Out Marge the Witch Icon}}
| + | *[[A Woman Scorned]] |
| − | {{TB|That's right! Why do you ask?}}
| + | *[[Illegitimate Concern]] |
| − | {{Tapped Out Cletus Icon}}
| + | *[[All Power To The People]] |
| − | {{TB|Just want to make sure Mobile-Device-Owning Gigantic Finger Person is paying attention. Here endeth the lesson.}}
| + | *[[School's Out Forever!]] |
| − | {{THT|The player receives "Easy-bake Coven Pt. 3", which is to "Plant Silvertongue" and to "Make Marge the Witch Speed up a Crop". Silvertongue costs {{Cash|55}}, takes 8 hours to grow on Cletus's Farm, and rewards the player with {{Cash|275}} and {{XP|75}} when harvested. Marge The Witch's task takes 4 hours and the task rewards the player with {{Treat|1}} and {{XP|70}} when completed on its own. Upon completing the quest, the player receives {{Treat|1}} and {{XP|5}}.|colspan=2}}
| + | *[[Concerned Parents]] |
| | + | *[[Let's Learn About Hell!]] |
| | + | *[[The Olive Branch]] |
| | + | *[[Caught Red Handed]] |
| | + | *[[A Hard Knock Morning]] |
| | + | *[[Hail To The Bus Driver]] |
| | + | *[[Crash]] |
| | + | *[[The Axe]] |
| | + | *[[The Broken Axe]] |
| | + | *[[The Rockstar]] |
| | }} | | }} |
| | | | |
| − | ====Easy-bake Coven Pt. 4==== | + | === Treehouse of Horror XXIII === |
| − | {{Table| | + | {{columns-list|4| |
| − | {{TH|After tapping on Marge the Witch's exclamation mark|colspan=2}}
| + | *[[Dial 'Z' for Zombies]] |
| − | {{Tapped Out Marge the Witch Icon}}
| + | *[[The Secret of the Mayans]] |
| − | {{TB|Let's see... I've got the Candy, the Silvertongue, and the Eye of Newt. Now all I need is Dew-Kissed Web of Day-Old Spider.}}
| + | *[[Blast from the Past]] |
| − | {{Tapped Out Homer Icon}}
| + | *{{ap|The Black Hole|Tapped Out quest}} |
| − | {{TB|I got one! I KNEW I was carrying around this D.K.W.D.O.S. for a reason.}}
| + | *{{ap|Flanders the Devil|Tapped Out quest}} |
| − | {{Tapped Out Marge the Witch Icon}}
| + | *{{ap|Bad Dream House|Tapped Out quest}} |
| − | {{TB|Uh, terrific. Thanks.}}
| + | *[[Marge's Bad Dream]] |
| − | {{THT|Then the player receives "Easy-bake Coven Pt. 4", which is to "Make Marge the Witch Stir the Pot". The task takes 12 hours and the task rewards the player with {{Treat|1}} and {{XP|150}} when completed on its own. Upon completing the quest, the player receives {{Treat|1}} and {{XP|5}}.|colspan=2}} | + | *[[We Come in Pieces!]] |
| − | }}
| + | *[[Easy-bake Coven]] |
| − | | |
| − | ====Easy-bake Coven Pt. 5====
| |
| − | {{Table| | |
| − | {{TH|After tapping on Marge the Witch's exclamation mark|colspan=2}}
| |
| − | {{Tapped Out Marge the Witch Icon}}
| |
| − | {{TB|Victory! The Bake Sale championship is mine!}} | |
| − | {{Tapped Out Devil Flanders Icon}}
| |
| − | {{TB|And your immortal soul is mine!}}
| |
| − | {{Tapped Out Marge the Witch Icon}}
| |
| − | {{TB|Is there a nice moment you don't love to spoil?}}
| |
| − | {{Tapped Out Devil Flanders Icon}}
| |
| − | {{TB|Nope. It's truly my worst quality.}}
| |
| − | {{THT|Then the player receives "Easy-bake Coven Pt. 5", which is to "Make Marge the Witch do a Victory Lap". The task takes 8 hours and the task rewards the player with {{Treat|1}} and {{XP|105}} when completed on its own. Upon completing the quest, the player receives {{Treat|1}} and {{XP|5}}, completing the "Easy-bake Coven" quest-line.|colspan=2}}
| |
| | }} | | }} |
| | | | |
| Line 1,091: |
Line 306: |
| | File:Tapped Out Milhouse Trick-or-Treating Costume.png|[[Milhouse Van Houten]] - Astronaut | | File:Tapped Out Milhouse Trick-or-Treating Costume.png|[[Milhouse Van Houten]] - Astronaut |
| | File:Tapped Out Bart Trick-or-Treating Costume.png|[[Bart Simpson]] - Frankenstein's Monster | | File:Tapped Out Bart Trick-or-Treating Costume.png|[[Bart Simpson]] - Frankenstein's Monster |
| − | File:Tapped Out Martin Trick-or-Treating Costume.png|[[Martin Prince, Jr.]] - Fairy | + | File:Tapped Out Martin Trick-or-Treating Costume.png|[[Martin Prince]] - Fairy |
| | File:Tapped Out Nelson Trick-or-Treating Costume.png|[[Nelson Muntz]] - Hobo | | File:Tapped Out Nelson Trick-or-Treating Costume.png|[[Nelson Muntz]] - Hobo |
| | File:Tapped Out Witch Marge Trick-or-Treating Costume.png|[[Marge|Marge the Witch]] - Witch | | File:Tapped Out Witch Marge Trick-or-Treating Costume.png|[[Marge|Marge the Witch]] - Witch |
| − | </gallery>
| |
| − |
| |
| − | === Outfits ===
| |
| − | <gallery>
| |
| − | File:Tapped Out Mayan Homer.png|Mayan Homer
| |
| − | File:Tapped Out Devil Flanders.png|Devil Flanders
| |
| − | File:Tapped Out Witch Marge.png|Witch Marge
| |
| | </gallery> | | </gallery> |
| | | | |
| Line 1,143: |
Line 351: |
| | </gallery> | | </gallery> |
| | | | |
| − | == Gallery== | + | == Conform-o-meter impact == |
| − | <gallery>
| + | {{Table| |
| − | File:Tapped Out Burns Monster New Character.png
| + | {{TH|Name}} |
| − | File:Tapped Out Mayan God New Character.png
| + | {{TH|Rating}} |
| − | File:Tapped Out Kang New Character.png
| + | {{TH|Points}} |
| − | File:Tapped Out Mayan Homer New Character.png
| + | {{TBT|House of Evil}} |
| − | File:Tapped Out Marge the Witch New Character.png
| + | {{TB|Consumerism}} |
| − | File:Tapped Out The Raven New Character.png
| + | {{TB|10}} |
| − | File:Tapped Out Devil Flanders New Character.png
| + | {{TBT|Krabappel Apartment, School Bus, Bad Dream House}} |
| − | File:Tapped Out Talking Krusty Doll New Character.png
| + | {{TB|Indolence}} |
| − | | + | {{TB|10}} |
| − | File:Unlock Burns Monster.png
| + | {{TBT|Stop Sign}} |
| − | File:Unlock Mayan God.png
| + | {{TB|Obedience}} |
| − | File:Tapped Out Unlock Kang.png
| + | {{TB|1}} |
| − | File:Glutton.png
| + | {{TBT|Dead Tree}} |
| − | File:Marge Witch.png
| + | {{TRs|Tree-hugging|3}} |
| − | File:The Raven.png
| + | {{TB|80}} |
| − | File:Devil Flanders.png
| + | {{TBT|Spooky Tree}} |
| − | File:Evil Krusty Doll.png
| + | {{TB|90}} |
| − | </gallery> | + | {{TBT|Pumpkin Patch}} |
| | + | {{TB|110}} |
| | + | {{TBT|Pylon}} |
| | + | {{TRs|Vanity|8}} |
| | + | {{TB|50}} |
| | + | {{TBT|Barbed Wire Fence}} |
| | + | {{TB|60}} |
| | + | {{TBT|Iron Railing}} |
| | + | {{TB|70}} |
| | + | {{TBT|Jack-o-Lantern}} |
| | + | {{TB|90}} |
| | + | {{TBT|Springfield Cemetery, Pet Cemetery, Mayan Calendar}} |
| | + | {{TB|100}} |
| | + | {{TBT|See-Saw}} |
| | + | {{TB|150}} |
| | + | {{TBT|Gas Pump}} |
| | + | {{TB|200}} |
| | + | {{TBT|Patio Table}} |
| | + | {{TB|210}} |
| | + | {{TBT|Cauldron}} |
| | + | {{TRs|Vanity<br>Bonus $ and XP|2}} |
| | + | {{TB|200<br>2.25%}} |
| | + | {{TBT|Ray Gun}} |
| | + | {{TB|200<br>3.75%}} |
| | + | }} |
| | | | |
| − | ==Trailer== | + | == Trailer == |
| | <youtube>https://www.youtube.com/watch?v=X9JkEAknxLs</youtube> | | <youtube>https://www.youtube.com/watch?v=X9JkEAknxLs</youtube> |
| − | == See also ==
| |
| − | *''[[The Simpsons: Tapped Out]]''
| |
| − | *[[The Simpsons: Tapped Out content updates|''The Simpsons: Tapped Out'' content updates]]
| |
| | | | |
| − | {{Tapped Out}}
| |
| | {{Tapped Out updates|2012=yes}} | | {{Tapped Out updates|2012=yes}} |
| − | {{DEFAULTSORT:Simpsons: Tapped Out Treehouse of Horror XXIII content update, The}} | + | {{DEFAULTSORT:Treehouse of Horror 23}} |
As well as the "Treehouse of Horror" content, the update included Level 22 of the game.
In the game, once zombies have come out of the cemeteries, they walk around your Springfield. When they meet a character, they turn that character into a zombie. Once tapping on the zombie character, they return back to normal...until another zombie comes along and turns the character into a zombie again. However, Halloween characters, such as Kang, do not get turned into zombies.

