

Difference between revisions of "The Simpsons: Tapped Out Black Friday 2015 content update"
(→Characters Unlock Messages) |
(→Deals) |
||
| Line 42: | Line 42: | ||
{{THT|November 27th|colspan=5}} | {{THT|November 27th|colspan=5}} | ||
{{TBT|8am}} | {{TBT|8am}} | ||
| − | {{TB|Santa's Little Helper}} | + | {{TB|[[Santa's Little Helper]]}} |
{{TB|{{Donut|150}}}} | {{TB|{{Donut|150}}}} | ||
{{TB|{{Donut|75}}}} | {{TB|{{Donut|75}}}} | ||
{{TB|{{Donut|75}}}} | {{TB|{{Donut|75}}}} | ||
{{TBT|9am}} | {{TBT|9am}} | ||
| − | {{TB|French Waiter}} | + | {{TB|[[French Waiter]]}} |
{{TB|{{Donut|50}}}} | {{TB|{{Donut|50}}}} | ||
{{TB|{{Donut|10}}}} | {{TB|{{Donut|10}}}} | ||
{{TB|{{Donut|40}}}} | {{TB|{{Donut|40}}}} | ||
{{TBT|10am}} | {{TBT|10am}} | ||
| − | {{TB|Duff Party Liner}} | + | {{TB|[[Duff Beer|Duff Party Liner]]}} |
{{TB|{{Donut|100}}}} | {{TB|{{Donut|100}}}} | ||
{{TB|{{Donut|30}}}} | {{TB|{{Donut|30}}}} | ||
{{TB|{{Donut|70}}}} | {{TB|{{Donut|70}}}} | ||
{{TBT|11am}} | {{TBT|11am}} | ||
| − | {{TB|Lugash's Gym w/Lugash}} | + | {{TB|[[Lugash's Gym]] w/[[Lugash]]}} |
{{TB|{{Donut|175}}}} | {{TB|{{Donut|175}}}} | ||
{{TB|{{Donut|40}}}} | {{TB|{{Donut|40}}}} | ||
{{TB|{{Donut|135}}}} | {{TB|{{Donut|135}}}} | ||
{{TBT|12pm}} | {{TBT|12pm}} | ||
| − | {{TB|Stiletto Sculpture}} | + | {{TB|{{w|Stiletto heel|Stiletto Sculpture}}}} |
{{TB|{{Donut|40}}}} | {{TB|{{Donut|40}}}} | ||
{{TB|{{Donut|8}}}} | {{TB|{{Donut|8}}}} | ||
{{TB|{{Donut|32}}}} | {{TB|{{Donut|32}}}} | ||
{{TBT|1pm}} | {{TBT|1pm}} | ||
| − | {{TB|The Mayflower}} | + | {{TB|[[Mayflower|The Mayflower]]}} |
{{TB|{{Donut|100}}}} | {{TB|{{Donut|100}}}} | ||
{{TB|{{Donut|30}}}} | {{TB|{{Donut|30}}}} | ||
{{TB|{{Donut|70}}}} | {{TB|{{Donut|70}}}} | ||
{{TBT|2pm}} | {{TBT|2pm}} | ||
| − | {{TB|Tetherball}} | + | {{TB|[[Springfield Elementary School|Tetherball]]}} |
{{TB|{{Donut|20}}}} | {{TB|{{Donut|20}}}} | ||
{{TB|{{Donut|3}}}} | {{TB|{{Donut|3}}}} | ||
{{TB|{{Donut|17}}}} | {{TB|{{Donut|17}}}} | ||
{{TBT|3pm}} | {{TBT|3pm}} | ||
| − | {{TB|Krustylu Studios w/Sideshow Mel}} | + | {{TB|[[Krustylu Studios]] w/[[Sideshow Mel]]}} |
{{TB|{{Donut|140}}}} | {{TB|{{Donut|140}}}} | ||
{{TB|{{Donut|35}}}} | {{TB|{{Donut|35}}}} | ||
{{TB|{{Donut|105}}}} | {{TB|{{Donut|105}}}} | ||
{{TBT|4pm}} | {{TBT|4pm}} | ||
| − | {{TB|Funzo Bundle w/Blue Funzo, Pink Funzo and Purple Funzo<br/>Can't be obtained if one of them has already been bought.}} | + | {{TB|[[Funzo]] Bundle w/[[Funzo|Blue Funzo]], [[Funzo|Pink Funzo]] and [[Funzo|Purple Funzo]]<br/>Can't be obtained if one of them has already been bought.}} |
{{TB|{{Donut|180}}}} | {{TB|{{Donut|180}}}} | ||
{{TB|{{Donut|75}}}} | {{TB|{{Donut|75}}}} | ||
{{TB|{{Donut|105}}}} | {{TB|{{Donut|105}}}} | ||
{{TBT|5pm}} | {{TBT|5pm}} | ||
| − | {{TB|Lard Lad Donuts}} | + | {{TB|[[Lard Lad Donuts]]}} |
{{TB|{{Donut|110}}}} | {{TB|{{Donut|110}}}} | ||
{{TB|{{Donut|30}}}} | {{TB|{{Donut|30}}}} | ||
{{TB|{{Donut|80}}}} | {{TB|{{Donut|80}}}} | ||
{{TBT|6pm}} | {{TBT|6pm}} | ||
| − | {{TB|Shiva Statue}} | + | {{TB|[[Shiva|Shiva Statue]]}} |
{{TB|{{Donut|40}}}} | {{TB|{{Donut|40}}}} | ||
{{TB|{{Donut|8}}}} | {{TB|{{Donut|8}}}} | ||
{{TB|{{Donut|32}}}} | {{TB|{{Donut|32}}}} | ||
{{TBT|7pm}} | {{TBT|7pm}} | ||
| − | {{TB|Springfield YMCA w/Coach Krupt}} | + | {{TB|[[Springfield YMCA]] w/[[Coach Krupt]]}} |
{{TB|{{Donut|120}}}} | {{TB|{{Donut|120}}}} | ||
{{TB|{{Donut|35}}}} | {{TB|{{Donut|35}}}} | ||
{{TB|{{Donut|85}}}} | {{TB|{{Donut|85}}}} | ||
{{TBT|8pm}} | {{TBT|8pm}} | ||
| − | {{TB|Santa's Little Helper}} | + | {{TB|[[Santa's Little Helper]]}} |
{{TB|{{Donut|150}}}} | {{TB|{{Donut|150}}}} | ||
{{TB|{{Donut|75}}}} | {{TB|{{Donut|75}}}} | ||
{{TB|{{Donut|75}}}} | {{TB|{{Donut|75}}}} | ||
{{TBT|9pm}} | {{TBT|9pm}} | ||
| − | {{TB|French Waiter}} | + | {{TB|[[French Waiter]]}} |
{{TB|{{Donut|50}}}} | {{TB|{{Donut|50}}}} | ||
{{TB|{{Donut|10}}}} | {{TB|{{Donut|10}}}} | ||
{{TB|{{Donut|40}}}} | {{TB|{{Donut|40}}}} | ||
{{TBT|10pm}} | {{TBT|10pm}} | ||
| − | {{TB|Duff Party Liner}} | + | {{TB|[[Duff Beer|Duff Party Liner]]}} |
{{TB|{{Donut|100}}}} | {{TB|{{Donut|100}}}} | ||
{{TB|{{Donut|30}}}} | {{TB|{{Donut|30}}}} | ||
{{TB|{{Donut|70}}}} | {{TB|{{Donut|70}}}} | ||
{{TBT|11pm}} | {{TBT|11pm}} | ||
| − | {{TB|Lugash's Gym w/Lugash}} | + | {{TB|[[Lugash's Gym]] w/[[Lugash]]}} |
{{TB|{{Donut|175}}}} | {{TB|{{Donut|175}}}} | ||
{{TB|{{Donut|40}}}} | {{TB|{{Donut|40}}}} | ||
| Line 123: | Line 123: | ||
{{THT|November 28th|colspan=5}} | {{THT|November 28th|colspan=5}} | ||
{{TBT|12am}} | {{TBT|12am}} | ||
| − | {{TB|Stiletto Sculpture}} | + | {{TB|{{w|Stiletto heel|Stiletto Sculpture}}}} |
{{TB|{{Donut|40}}}} | {{TB|{{Donut|40}}}} | ||
{{TB|{{Donut|8}}}} | {{TB|{{Donut|8}}}} | ||
{{TB|{{Donut|32}}}} | {{TB|{{Donut|32}}}} | ||
{{TBT|1am}} | {{TBT|1am}} | ||
| − | {{TB|The Mayflower}} | + | {{TB|[[Mayflower|The Mayflower]]}} |
{{TB|{{Donut|100}}}} | {{TB|{{Donut|100}}}} | ||
{{TB|{{Donut|30}}}} | {{TB|{{Donut|30}}}} | ||
{{TB|{{Donut|70}}}} | {{TB|{{Donut|70}}}} | ||
{{TBT|2am}} | {{TBT|2am}} | ||
| − | {{TB|Tetherball}} | + | {{TB|[[Springfield Elementary School|Tetherball]]}} |
{{TB|{{Donut|20}}}} | {{TB|{{Donut|20}}}} | ||
{{TB|{{Donut|3}}}} | {{TB|{{Donut|3}}}} | ||
{{TB|{{Donut|17}}}} | {{TB|{{Donut|17}}}} | ||
{{TBT|3am}} | {{TBT|3am}} | ||
| − | {{TB|Krustylu Studios w/Sideshow Mel}} | + | {{TB|[[Krustylu Studios]] w/[[Sideshow Mel]]}} |
{{TB|{{Donut|140}}}} | {{TB|{{Donut|140}}}} | ||
{{TB|{{Donut|35}}}} | {{TB|{{Donut|35}}}} | ||
{{TB|{{Donut|105}}}} | {{TB|{{Donut|105}}}} | ||
{{TBT|4am}} | {{TBT|4am}} | ||
| − | {{TB|Funzo Bundle w/Blue Funzo, Pink Funzo and Purple Funzo<br/>Can't be obtained if one of them has already been bought.}} | + | {{TB|[[Funzo]] Bundle w/[[Funzo|Blue Funzo]], [[Funzo|Pink Funzo]] and [[Funzo|Purple Funzo]]<br/>Can't be obtained if one of them has already been bought.}} |
{{TB|{{Donut|180}}}} | {{TB|{{Donut|180}}}} | ||
{{TB|{{Donut|75}}}} | {{TB|{{Donut|75}}}} | ||
{{TB|{{Donut|105}}}} | {{TB|{{Donut|105}}}} | ||
{{TBT|5am}} | {{TBT|5am}} | ||
| − | {{TB|Lard Lad Donuts}} | + | {{TB|[[Lard Lad Donuts]]}} |
{{TB|{{Donut|110}}}} | {{TB|{{Donut|110}}}} | ||
{{TB|{{Donut|30}}}} | {{TB|{{Donut|30}}}} | ||
{{TB|{{Donut|80}}}} | {{TB|{{Donut|80}}}} | ||
{{TBT|6am}} | {{TBT|6am}} | ||
| − | {{TB|Shiva Statue}} | + | {{TB|[[Shiva|Shiva Statue]]}} |
{{TB|{{Donut|40}}}} | {{TB|{{Donut|40}}}} | ||
{{TB|{{Donut|8}}}} | {{TB|{{Donut|8}}}} | ||
{{TB|{{Donut|32}}}} | {{TB|{{Donut|32}}}} | ||
{{TBT|7am}} | {{TBT|7am}} | ||
| − | {{TB|Springfield YMCA w/Coach Krupt}} | + | {{TB|[[Springfield YMCA]] w/[[Coach Krupt]]}} |
{{TB|{{Donut|120}}}} | {{TB|{{Donut|120}}}} | ||
{{TB|{{Donut|35}}}} | {{TB|{{Donut|35}}}} | ||
{{TB|{{Donut|85}}}} | {{TB|{{Donut|85}}}} | ||
{{TBT|8am}} | {{TBT|8am}} | ||
| − | {{TB|Unfinished Shed w/Chester Dupree}} | + | {{TB|[[Chester Dupree|Unfinished Shed]] w/[[Chester Dupree]]}} |
{{TB|{{Donut|150}}}} | {{TB|{{Donut|150}}}} | ||
{{TB|{{Donut|75}}}} | {{TB|{{Donut|75}}}} | ||
| Line 173: | Line 173: | ||
{{TB|{{Donut|10}}}} | {{TB|{{Donut|10}}}} | ||
{{TBT|10am}} | {{TBT|10am}} | ||
| − | {{TB|Juggler}} | + | {{TB|[[Juggler]]}} |
{{TB|{{Donut|60}}}} | {{TB|{{Donut|60}}}} | ||
{{TB|{{Donut|30}}}} | {{TB|{{Donut|30}}}} | ||
{{TB|{{Donut|30}}}} | {{TB|{{Donut|30}}}} | ||
{{TBT|11am}} | {{TBT|11am}} | ||
| − | {{TB|Whale}} | + | {{TB|[[The Squirt and the Whale|Whale]]}} |
{{TB|{{Donut|300}}}} | {{TB|{{Donut|300}}}} | ||
{{TB|{{Donut|90}}}} | {{TB|{{Donut|90}}}} | ||
| Line 188: | Line 188: | ||
{{TB|{{Donut|85}}}} | {{TB|{{Donut|85}}}} | ||
{{TBT|1pm}} | {{TBT|1pm}} | ||
| − | {{TB|Cracker Factory w/Luann}} | + | {{TB|[[Southern Cracker|Cracker Factory]] w/[[Luann]]}} |
{{TB|{{Donut|150}}}} | {{TB|{{Donut|150}}}} | ||
{{TB|{{Donut|40}}}} | {{TB|{{Donut|40}}}} | ||
{{TB|{{Donut|110}}}} | {{TB|{{Donut|110}}}} | ||
{{TBT|2pm}} | {{TBT|2pm}} | ||
| − | {{TB|Springfield Sign}} | + | {{TB|[[Springfield sign|Springfield Sign]]}} |
{{TB|{{Donut|170}}}} | {{TB|{{Donut|170}}}} | ||
{{TB|{{Donut|40}}}} | {{TB|{{Donut|40}}}} | ||
{{TB|{{Donut|130}}}} | {{TB|{{Donut|130}}}} | ||
{{TBT|3pm}} | {{TBT|3pm}} | ||
| − | {{TB|Boardwalk Fountain}} | + | {{TB|[[Squidport|Boardwalk Fountain]]}} |
{{TB|{{Donut|75}}}} | {{TB|{{Donut|75}}}} | ||
{{TB|{{Donut|15}}}} | {{TB|{{Donut|15}}}} | ||
{{TB|{{Donut|60}}}} | {{TB|{{Donut|60}}}} | ||
{{TBT|4pm}} | {{TBT|4pm}} | ||
| − | {{TB|BBQ Pig}} | + | {{TB|[[Lisa the Vegetarian|BBQ Pig]]}} |
{{TB|{{Donut|60}}}} | {{TB|{{Donut|60}}}} | ||
{{TB|{{Donut|12}}}} | {{TB|{{Donut|12}}}} | ||
{{TB|{{Donut|48}}}} | {{TB|{{Donut|48}}}} | ||
{{TBT|5pm}} | {{TBT|5pm}} | ||
| − | {{TB|Powell Mansion}} | + | {{TB|[[Herbert Powell|Powell Mansion]]}} |
{{TB|{{Donut|120}}}} | {{TB|{{Donut|120}}}} | ||
{{TB|{{Donut|35}}}} | {{TB|{{Donut|35}}}} | ||
{{TB|{{Donut|85}}}} | {{TB|{{Donut|85}}}} | ||
{{TBT|6pm}} | {{TBT|6pm}} | ||
| − | {{TB|Lisa Lionheart Display}} | + | {{TB|[[Lisa Lionheart|Lisa Lionheart Display]]}} |
{{TB|{{Donut|50}}}} | {{TB|{{Donut|50}}}} | ||
{{TB|{{Donut|10}}}} | {{TB|{{Donut|10}}}} | ||
{{TB|{{Donut|40}}}} | {{TB|{{Donut|40}}}} | ||
{{TBT|7pm}} | {{TBT|7pm}} | ||
| − | {{TB|Rocket Car w/Lumpwick}} | + | {{TB|[[Rocket Car]] w/[[Chester Lampwick|Lumpwick]]}} |
{{TB|{{Donut|120}}}} | {{TB|{{Donut|120}}}} | ||
{{TB|{{Donut|35}}}} | {{TB|{{Donut|35}}}} | ||
{{TB|{{Donut|85}}}} | {{TB|{{Donut|85}}}} | ||
{{TBT|8pm}} | {{TBT|8pm}} | ||
| − | {{TB|Unfinished Shed w/Chester Dupree}} | + | {{TB|[[Chester Dupree|Unfinished Shed]] w/[[Chester Dupree]]}} |
{{TB|{{Donut|150}}}} | {{TB|{{Donut|150}}}} | ||
{{TB|{{Donut|75}}}} | {{TB|{{Donut|75}}}} | ||
| Line 233: | Line 233: | ||
{{TB|{{Donut|10}}}} | {{TB|{{Donut|10}}}} | ||
{{TBT|10pm}} | {{TBT|10pm}} | ||
| − | {{TB|Juggler}} | + | {{TB|[[Juggler]]}} |
{{TB|{{Donut|60}}}} | {{TB|{{Donut|60}}}} | ||
{{TB|{{Donut|30}}}} | {{TB|{{Donut|30}}}} | ||
{{TB|{{Donut|30}}}} | {{TB|{{Donut|30}}}} | ||
{{TBT|11pm}} | {{TBT|11pm}} | ||
| − | {{TB|Whale}} | + | {{TB|[[The Squirt and the Whale|Whale]]}} |
{{TB|{{Donut|300}}}} | {{TB|{{Donut|300}}}} | ||
{{TB|{{Donut|90}}}} | {{TB|{{Donut|90}}}} | ||
| Line 249: | Line 249: | ||
{{TB|{{Donut|85}}}} | {{TB|{{Donut|85}}}} | ||
{{TBT|1am}} | {{TBT|1am}} | ||
| − | {{TB|Cracker Factory w/Luann}} | + | {{TB|[[Southern Cracker|Cracker Factory]] w/[[Luann]]}} |
{{TB|{{Donut|150}}}} | {{TB|{{Donut|150}}}} | ||
{{TB|{{Donut|40}}}} | {{TB|{{Donut|40}}}} | ||
{{TB|{{Donut|110}}}} | {{TB|{{Donut|110}}}} | ||
{{TBT|2am}} | {{TBT|2am}} | ||
| − | {{TB|Springfield Sign}} | + | {{TB|[[Springfield sign|Springfield Sign]]}} |
{{TB|{{Donut|170}}}} | {{TB|{{Donut|170}}}} | ||
{{TB|{{Donut|40}}}} | {{TB|{{Donut|40}}}} | ||
{{TB|{{Donut|130}}}} | {{TB|{{Donut|130}}}} | ||
{{TBT|3am}} | {{TBT|3am}} | ||
| − | {{TB|Boardwalk Fountain}} | + | {{TB|[[Squidport|Boardwalk Fountain]]}} |
{{TB|{{Donut|75}}}} | {{TB|{{Donut|75}}}} | ||
{{TB|{{Donut|15}}}} | {{TB|{{Donut|15}}}} | ||
{{TB|{{Donut|60}}}} | {{TB|{{Donut|60}}}} | ||
{{TBT|4am}} | {{TBT|4am}} | ||
| − | {{TB|BBQ Pig}} | + | {{TB|[[Lisa the Vegetarian|BBQ Pig]]}} |
{{TB|{{Donut|60}}}} | {{TB|{{Donut|60}}}} | ||
{{TB|{{Donut|12}}}} | {{TB|{{Donut|12}}}} | ||
{{TB|{{Donut|48}}}} | {{TB|{{Donut|48}}}} | ||
{{TBT|5am}} | {{TBT|5am}} | ||
| − | {{TB|Powell Mansion}} | + | {{TB|[[Herbert Powell|Powell Mansion]]}} |
{{TB|{{Donut|120}}}} | {{TB|{{Donut|120}}}} | ||
{{TB|{{Donut|35}}}} | {{TB|{{Donut|35}}}} | ||
{{TB|{{Donut|85}}}} | {{TB|{{Donut|85}}}} | ||
{{TBT|6am}} | {{TBT|6am}} | ||
| − | {{TB|Lisa Lionheart Display}} | + | {{TB|[[Lisa Lionheart|Lisa Lionheart Display]]}} |
{{TB|{{Donut|50}}}} | {{TB|{{Donut|50}}}} | ||
{{TB|{{Donut|10}}}} | {{TB|{{Donut|10}}}} | ||
{{TB|{{Donut|40}}}} | {{TB|{{Donut|40}}}} | ||
{{TBT|7am}} | {{TBT|7am}} | ||
| − | {{TB|Rocket Car w/Lumpwick}} | + | {{TB|[[Rocket Car]] w/[[Chester Lampwick|Lumpwick]]}} |
{{TB|{{Donut|120}}}} | {{TB|{{Donut|120}}}} | ||
{{TB|{{Donut|35}}}} | {{TB|{{Donut|35}}}} | ||
{{TB|{{Donut|85}}}} | {{TB|{{Donut|85}}}} | ||
{{TBT|8am}} | {{TBT|8am}} | ||
| − | {{TB|Stu's Disco w/Disco Stu}} | + | {{TB|[[Stu's Disco]] w/[[Disco Stu]]}} |
{{TB|{{Donut|180}}}} | {{TB|{{Donut|180}}}} | ||
{{TB|{{Donut|75}}}} | {{TB|{{Donut|75}}}} | ||
{{TB|{{Donut|105}}}} | {{TB|{{Donut|105}}}} | ||
{{TBT|9am}} | {{TBT|9am}} | ||
| − | {{TB|Itchy and Scratchy Billboard}} | + | {{TB|[[Itchy and Scratchy|Itchy and Scracthy Billboard]]}} |
{{TB|{{Donut|40}}}} | {{TB|{{Donut|40}}}} | ||
{{TB|{{Donut|8}}}} | {{TB|{{Donut|8}}}} | ||
{{TB|{{Donut|32}}}} | {{TB|{{Donut|32}}}} | ||
{{TBT|10am}} | {{TBT|10am}} | ||
| − | {{TB|DMV Limo}} | + | {{TB|[[Springfield Department of Motor Vehicles|DMV Limo]]}} |
{{TB|{{Donut|50}}}} | {{TB|{{Donut|50}}}} | ||
{{TB|{{Donut|12}}}} | {{TB|{{Donut|12}}}} | ||
{{TB|{{Donut|38}}}} | {{TB|{{Donut|38}}}} | ||
{{TBT|11am}} | {{TBT|11am}} | ||
| − | {{TB|Dr. Nick}} | + | {{TB|[[Dr. Nick]]}} |
{{TB|{{Donut|90}}}} | {{TB|{{Donut|90}}}} | ||
{{TB|{{Donut|25}}}} | {{TB|{{Donut|25}}}} | ||
{{TB|{{Donut|65}}}} | {{TB|{{Donut|65}}}} | ||
{{TBT|12pm}} | {{TBT|12pm}} | ||
| − | {{TB|Mount Carlmore}} | + | {{TB|[[Mount Carlmore]]}} |
{{TB|{{Donut|120}}}} | {{TB|{{Donut|120}}}} | ||
{{TB|{{Donut|35}}}} | {{TB|{{Donut|35}}}} | ||
{{TB|{{Donut|85}}}} | {{TB|{{Donut|85}}}} | ||
{{TBT|1pm}} | {{TBT|1pm}} | ||
| − | {{TB|Rancho Relaxo w/Don Vittorio}} | + | {{TB|[[Rancho Relaxo]] w/[[Don Vittorio]]}} |
{{TB|{{Donut|130}}}} | {{TB|{{Donut|130}}}} | ||
{{TB|{{Donut|35}}}} | {{TB|{{Donut|35}}}} | ||
{{TB|{{Donut|95}}}} | {{TB|{{Donut|95}}}} | ||
{{TBT|2pm}} | {{TBT|2pm}} | ||
| − | {{TB|Film Set w/McBain}} | + | {{TB|[[McBain|Film Set w/McBain]]}} |
{{TB|{{Donut|120}}}} | {{TB|{{Donut|120}}}} | ||
{{TB|{{Donut|35}}}} | {{TB|{{Donut|35}}}} | ||
{{TB|{{Donut|85}}}} | {{TB|{{Donut|85}}}} | ||
{{TBT|3pm}} | {{TBT|3pm}} | ||
| − | {{TB|Sherri and Terri}} | + | {{TB|[[Sherri]] and [[Terri]]}} |
{{TB|{{Donut|150}}}} | {{TB|{{Donut|150}}}} | ||
{{TB|{{Donut|40}}}} | {{TB|{{Donut|40}}}} | ||
{{TB|{{Donut|110}}}} | {{TB|{{Donut|110}}}} | ||
{{TBT|4pm}} | {{TBT|4pm}} | ||
| − | {{TB|Hot Tub}} | + | {{TB|[[Fat Tony|Hot Tub]]}} |
{{TB|{{Donut|60}}}} | {{TB|{{Donut|60}}}} | ||
{{TB|{{Donut|12}}}} | {{TB|{{Donut|12}}}} | ||
{{TB|{{Donut|48}}}} | {{TB|{{Donut|48}}}} | ||
{{TBT|5pm}} | {{TBT|5pm}} | ||
| − | {{TB|Springfield Clamphitheater}} | + | {{TB|[[Springfield Clamphitheater]]}} |
{{TB|{{Donut|145}}}} | {{TB|{{Donut|145}}}} | ||
{{TB|{{Donut|40}}}} | {{TB|{{Donut|40}}}} | ||
{{TB|{{Donut|105}}}} | {{TB|{{Donut|105}}}} | ||
{{TBT|6pm}} | {{TBT|6pm}} | ||
| − | {{TB|Murderpuss}} | + | {{TB|[[Murderpuss]]}} |
{{TB|{{Donut|30}}}} | {{TB|{{Donut|30}}}} | ||
{{TB|{{Donut|8}}}} | {{TB|{{Donut|8}}}} | ||
{{TB|{{Donut|22}}}} | {{TB|{{Donut|22}}}} | ||
{{TBT|7pm}} | {{TBT|7pm}} | ||
| − | {{TB|The Happy Sumo w/Akira}} | + | {{TB|[[The Happy Sumo]] w/[[Akira]]}} |
{{TB|{{Donut|100}}}} | {{TB|{{Donut|100}}}} | ||
{{TB|{{Donut|30}}}} | {{TB|{{Donut|30}}}} | ||
{{TB|{{Donut|70}}}} | {{TB|{{Donut|70}}}} | ||
{{TBT|8pm}} | {{TBT|8pm}} | ||
| − | {{TB|Stu's Disco w/Disco Stu}} | + | {{TB|[[Stu's Disco]] w/[[Disco Stu]]}} |
{{TB|{{Donut|180}}}} | {{TB|{{Donut|180}}}} | ||
{{TB|{{Donut|75}}}} | {{TB|{{Donut|75}}}} | ||
{{TB|{{Donut|105}}}} | {{TB|{{Donut|105}}}} | ||
{{TBT|9pm}} | {{TBT|9pm}} | ||
| − | {{TB|Itchy and Scratchy Billboard}} | + | {{TB|[[Itchy and Scratchy|Itchy and Scratchy Billboard]]}} |
{{TB|{{Donut|40}}}} | {{TB|{{Donut|40}}}} | ||
{{TB|{{Donut|8}}}} | {{TB|{{Donut|8}}}} | ||
{{TB|{{Donut|32}}}} | {{TB|{{Donut|32}}}} | ||
{{TBT|10pm}} | {{TBT|10pm}} | ||
| − | {{TB|DMV Limo}} | + | {{TB|[[Springfield Department of Motor Vehicles|DMV Limo]]}} |
{{TB|{{Donut|50}}}} | {{TB|{{Donut|50}}}} | ||
{{TB|{{Donut|12}}}} | {{TB|{{Donut|12}}}} | ||
{{TB|{{Donut|38}}}} | {{TB|{{Donut|38}}}} | ||
{{TBT|11pm}} | {{TBT|11pm}} | ||
| − | {{TB|Dr. Nick}} | + | {{TB|[[Dr. Nick]]}} |
{{TB|{{Donut|90}}}} | {{TB|{{Donut|90}}}} | ||
{{TB|{{Donut|25}}}} | {{TB|{{Donut|25}}}} | ||
| Line 365: | Line 365: | ||
{{THT|November 30th|colspan=5}} | {{THT|November 30th|colspan=5}} | ||
{{TBT|12am}} | {{TBT|12am}} | ||
| − | {{TB|Mount Carlmore}} | + | {{TB|[[Mount Carlmore]]}} |
{{TB|{{Donut|120}}}} | {{TB|{{Donut|120}}}} | ||
{{TB|{{Donut|35}}}} | {{TB|{{Donut|35}}}} | ||
{{TB|{{Donut|85}}}} | {{TB|{{Donut|85}}}} | ||
{{TBT|1am}} | {{TBT|1am}} | ||
| − | {{TB|Rancho Relaxo w/Don Vittorio}} | + | {{TB|[[Rancho Relaxo]] w/[[Don Vittorio]]}} |
{{TB|{{Donut|130}}}} | {{TB|{{Donut|130}}}} | ||
{{TB|{{Donut|35}}}} | {{TB|{{Donut|35}}}} | ||
{{TB|{{Donut|95}}}} | {{TB|{{Donut|95}}}} | ||
{{TBT|2am}} | {{TBT|2am}} | ||
| − | {{TB|Film Set w/McBain}} | + | {{TB|[[McBain|Film Set w/McBain]]}} |
{{TB|{{Donut|120}}}} | {{TB|{{Donut|120}}}} | ||
{{TB|{{Donut|35}}}} | {{TB|{{Donut|35}}}} | ||
{{TB|{{Donut|85}}}} | {{TB|{{Donut|85}}}} | ||
{{TBT|3am}} | {{TBT|3am}} | ||
| − | {{TB|Sherri and Terri}} | + | {{TB|[[Sherri]] and [[Terri]]}} |
{{TB|{{Donut|150}}}} | {{TB|{{Donut|150}}}} | ||
{{TB|{{Donut|40}}}} | {{TB|{{Donut|40}}}} | ||
{{TB|{{Donut|110}}}} | {{TB|{{Donut|110}}}} | ||
{{TBT|4am}} | {{TBT|4am}} | ||
| − | {{TB|Hot Tub}} | + | {{TB|[[Fat Tony|Hot Tub]]}} |
{{TB|{{Donut|60}}}} | {{TB|{{Donut|60}}}} | ||
{{TB|{{Donut|12}}}} | {{TB|{{Donut|12}}}} | ||
{{TB|{{Donut|48}}}} | {{TB|{{Donut|48}}}} | ||
{{TBT|5am}} | {{TBT|5am}} | ||
| − | {{TB|Springfield Clamphitheater}} | + | {{TB|[[Springfield Clamphitheater]]}} |
{{TB|{{Donut|145}}}} | {{TB|{{Donut|145}}}} | ||
{{TB|{{Donut|40}}}} | {{TB|{{Donut|40}}}} | ||
{{TB|{{Donut|105}}}} | {{TB|{{Donut|105}}}} | ||
{{TBT|6am}} | {{TBT|6am}} | ||
| − | {{TB|Murderpuss}} | + | {{TB|[[Murderpuss]]}} |
{{TB|{{Donut|30}}}} | {{TB|{{Donut|30}}}} | ||
{{TB|{{Donut|8}}}} | {{TB|{{Donut|8}}}} | ||
{{TB|{{Donut|22}}}} | {{TB|{{Donut|22}}}} | ||
{{TBT|7am}} | {{TBT|7am}} | ||
| − | {{TB|The Happy Sumo w/Akira}} | + | {{TB|[[The Happy Sumo]] w/[[Akira]]}} |
{{TB|{{Donut|100}}}} | {{TB|{{Donut|100}}}} | ||
{{TB|{{Donut|30}}}} | {{TB|{{Donut|30}}}} | ||
{{TB|{{Donut|70}}}} | {{TB|{{Donut|70}}}} | ||
{{TBT|8am (till December 1st 8am)}} | {{TBT|8am (till December 1st 8am)}} | ||
| − | {{TB|Kwik-E-Mart Central Office}} | + | {{TB|[[Homer and Apu|Kwik-E-Mart Central Office]]}} |
{{TB|{{Donut|145}}}} | {{TB|{{Donut|145}}}} | ||
{{TB|{{Donut|0}}}} | {{TB|{{Donut|0}}}} | ||
{{TB|{{Donut|145}}}} | {{TB|{{Donut|145}}}} | ||
{{TBT|8am}} | {{TBT|8am}} | ||
| − | {{TB|Teleporters w/Teleporter Alpha and Teleporter Omega}} | + | {{TB|[[Treehouse of Horror VIII|Teleporters w/Teleporter Alpha and Teleporter Omega]]}} |
{{TB|{{Donut|50}}}} | {{TB|{{Donut|50}}}} | ||
{{TB|{{Donut|20}}}} | {{TB|{{Donut|20}}}} | ||
{{TB|{{Donut|30}}}} | {{TB|{{Donut|30}}}} | ||
{{TBT|11am}} | {{TBT|11am}} | ||
| − | {{TB|Cremo Bot}} | + | {{TB|[[Days of Future Future|Cremo Bot]]}} |
{{TB|{{Donut|30}}}} | {{TB|{{Donut|30}}}} | ||
{{TB|{{Donut|8}}}} | {{TB|{{Donut|8}}}} | ||
{{TB|{{Donut|22}}}} | {{TB|{{Donut|22}}}} | ||
{{TBT|2pm}} | {{TBT|2pm}} | ||
| − | {{TB|Super Collider}} | + | {{TB|[[Springfield Subatomic Supercollider|Super Collider]]}} |
{{TB|{{Donut|70}}}} | {{TB|{{Donut|70}}}} | ||
{{TB|{{Donut|15}}}} | {{TB|{{Donut|15}}}} | ||
{{TB|{{Donut|55}}}} | {{TB|{{Donut|55}}}} | ||
{{TBT|5pm}} | {{TBT|5pm}} | ||
| − | {{TB|Frinkosonic MHV}} | + | {{TB|[[Frinkosonic MHV]]}} |
{{TB|{{Donut|35}}}} | {{TB|{{Donut|35}}}} | ||
{{TB|{{Donut|6}}}} | {{TB|{{Donut|6}}}} | ||
{{TB|{{Donut|29}}}} | {{TB|{{Donut|29}}}} | ||
{{TBT|8pm}} | {{TBT|8pm}} | ||
| − | {{TB|Jet Engine Bike}} | + | {{TB|[[At Long Last Leave|Jet Engine Bike]]}} |
{{TB|{{Donut|30}}}} | {{TB|{{Donut|30}}}} | ||
{{TB|{{Donut|8}}}} | {{TB|{{Donut|8}}}} | ||
{{TB|{{Donut|22}}}} | {{TB|{{Donut|22}}}} | ||
{{TBT|11pm}} | {{TBT|11pm}} | ||
| − | {{TB|Frink's Robot Dog}} | + | {{TB|[[Frink's Robot Dog]]}} |
{{TB|{{Donut|60}}}} | {{TB|{{Donut|60}}}} | ||
{{TB|{{Donut|15}}}} | {{TB|{{Donut|15}}}} | ||
| Line 441: | Line 441: | ||
{{THT|December 1st|colspan=5}} | {{THT|December 1st|colspan=5}} | ||
{{TBT|2am}} | {{TBT|2am}} | ||
| − | {{TB|Springfield Observatory}} | + | {{TB|[[Springfield Observatory]]}} |
{{TB|{{Donut|75}}}} | {{TB|{{Donut|75}}}} | ||
{{TB|{{Donut|15}}}} | {{TB|{{Donut|15}}}} | ||
{{TB|{{Donut|60}}}} | {{TB|{{Donut|60}}}} | ||
{{TBT|5am}} | {{TBT|5am}} | ||
| − | {{TB|Robby The Automaton}} | + | {{TB|[[Robby the Automaton|Robby The Automaton]]}} |
{{TB|{{Donut|40}}}} | {{TB|{{Donut|40}}}} | ||
{{TB|{{Donut|8}}}} | {{TB|{{Donut|8}}}} | ||
Revision as of 15:04, November 27, 2015
|
|
|
|
This article contains upcoming and unreleased content(s). The article's content may change as update(s) gets released and more information becomes available. Please be cautious when adding information to this article, as rumors and speculation often get confused with fact. All the contents is subject to change anytime without notice by EA before and on the release date. Any not yet released content or information listed in this page is not to be shared on the official EA forum due to the Forum rules. |

- "Get all the fun of Black Friday without any of the misery of getting off the couch! Check out our hourly, weekend-long, promotions starting Friday!
Splurge on man’s best friend! Get a deal on Santa’s Little Helper tomorrow at 12 AM PST or 12 PM PST! He knows all the tricks – sit, stay, and tap!" - ―Update description on Facebook
The Simpsons: Tapped Out Black Friday 2015 content update was released November 26, 2015 and is the one hundred and twelfth content update. It was teased by EA on their Facebook Page November 25 and 26, 2015. Its the game's second Black Friday update, after Black Friday 2014.
Contents
Buildings
|

Deals
The Black Friday deals launches on November 27, 2015 at 8am GMT. There will be an offer to buy the Kwik-E-Mart Central Office on Cyber Monday, November 30, 2015.
Gil, upon entering your town and if there is a new rebate offer, spawned and said: "Check out our newest rebate offer!", at which point he appeared with the ![]() over his head, which upon tapping lead to the Black Friday menu, and he disappeared (In Krustyland, this lead to the "Characters" menu). On Cyber Monday, Gil appeared with
over his head, which upon tapping lead to the Black Friday menu, and he disappeared (In Krustyland, this lead to the "Characters" menu). On Cyber Monday, Gil appeared with ![]() over his head.
over his head.
If you buy a character that requires a higher level then yours, a system message will appear saying "'character' comes with a premium quest line which will unlock at level 'level'!". The character is playable but you won't unlock his questline till you reach the level.
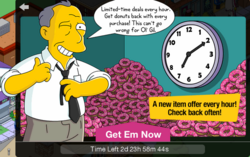
Black Friday Deal
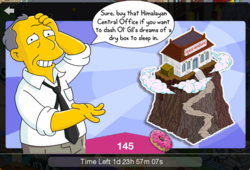
Cyber Monday Deal


- Note: You require the original amount of
 Donuts to purchase the item, but you'll recieve back the rebate donuts.
| |||||||||||||||||||||||||||||||||||||||||||||||||||||||||||||||||||||||||||||||||||||||||||||||||||||||||||||||||||||||||||||||||||||||||||||||||||||||||||||||||||||||||||||||||||||||||||||||||||||||||||||||||||||||||||||||||||||||||||||||||||||||||||||||||||||||||||||||||||||||||||||||||||||||||||||||||||||||||||||||||||||||||||||||||||||||||||||||||||||||||||||||||||||||||||||||||||||||||||||||||||||||||||||||||||||||||||||||||||
Gameplay
November 27th
| ||||||||||||||||||
November 28th
| ||||||||
November 29th
| ||||||||||
Item bought
| ||||||
Cyber Monday
| ||||||||||||||||||
Offer declined
|
Offer accepted
|
Premium Gameplay
Characters Unlock Messages
|
Rocky Mountain Why
Rocky Mountain Why Pt. 1
| ||||||||||||||||
Rocky Mountain Why Pt. 2
| ||||||||||||||||||
Rocky Mountain Why Pt. 3
| ||||||||||||||||
Conform-o-meter impact
|
Other changes made
November 26 Update ("4_17_BlackFriday2015")
- The BBQ Pig, Krustylu Studios, Robby The Automaton, Hot Tub, Unfinished Shed, Duff Party Liner, The Mayflower and Jet Engine Bike now requires Level 1 to be stored into inventory and can be placed from inventory.
- The Springfield Observatory, Lugash's Gym, Police Car, Kodos Topiary, Crashed Police Car, Stu's Disco, Rocket Car, Boardwalk Fountain and Film Set now requires Level 1 to be stored into inventory.
- Sherry and Terri now requires Level 1 to be stored into inventory and can be unlocked from inventory.
- Dr. Nick, Santa's Little Helper, Blue Funzo, Pink Funzo, Purple Funzo and French Waiter now requires Level 1 to be stored into inventory.
- Sherri, Terri and Bart's Torment Bart now yields
 1,114 and
  280 instead of 1,680 and 420.
 - The Trouble With Twins Pt. 2 now requires Level 5 instead of 8.
- The Trouble With Twins Pt. 3 now requires to Build Van Houten House if Sherri and Terri are unlocked below Level 9.
- Rancho Relaxo, Powell Mansion, Springfield YMCA and Springfield Clamphitheater can now be built from inventory.
- The Happy Sumo and Cracker Factory now requires Level 1 to be stored into inventory and can be built from inventory.
- Springfield Sign, Apple Tree, Orange Tree, Tetherball, Cremo Bot, Murderpuss, Lisa Lionheart Display, Stiletto Sculpture, Rocket Car, Shiva Statue and Frinksonic MHV can now be placed from inventory.
- French Waiter's Clean His Tuxedo can now be done at Brown House too.
- Apu's Set Up The Halloween Display is now temporary.
- Mr. Burns' Read From the Necronomicon now requires A Little Light Reading to be complete.
- Coach Krupt's Coach at the YMCA doesn't require Kruption Pt. 5 to be started anymore.
- Ferris Wheel can now be placed on Grass and Pavement too.
Sources
 Overview at Tapped Out - Update Information
- Template:TSTOTopix
- Template:TSTOTopix
- Template:TSTOTopix
- Template:TSTOTopix